
How to Connect Microsoft Apps to n8n
Step-by-step guide to creating Microsoft OAuth2 credentials in Azure — including API permissions, admin consent, and connecting to your Awesomate-hosted n8n instance.
Applies to:
In This Guide
- Overview & Prerequisites
- Video Walkthroughs
- Create a Microsoft Azure Account
- Start Creating the Credential in n8n
- Register an App in Azure
- Configure API Permissions (Microsoft Graph)
- Grant Admin Consent
- Create a Client Secret
- Connect Your Account in n8n
- Troubleshooting: "Need Admin Approval"
- Reference Links
1. Overview & Prerequisites
To use any Microsoft service (Outlook, Teams, Excel, OneDrive, SharePoint, etc.) inside your n8n workflows, you need to create an OAuth2 credential. This involves three key phases:
- Register an application in Microsoft Azure and get a Redirect URI from n8n.
- Configure API permissions so n8n can access the specific Microsoft services you need (mail, calendar, files, etc.).
- Grant admin consent, create a Client Secret, and connect everything in n8n.
Before you begin, make sure you have:
- A Microsoft account — either a personal account (e.g. Outlook.com, Hotmail) or an organisational/work account (Microsoft 365).
- Access to the Microsoft Azure Portal — you can create a free account if you don't have one.
- Access to your Awesomate-hosted n8n instance.
- If using a corporate Microsoft 365 account, your IT administrator may need to grant admin consent (see Section 7 and Section 10).
2. Video Walkthroughs
If you prefer to follow along visually, these two video guides cover the core process. Note that the written guide below includes additional detail around API permissions that the videos may skim over.
How to Get Microsoft OAuth Credentials for n8n
Full walkthrough of Azure app registration, client secret creation, and connecting to n8n.
Connect n8n with Microsoft 365 — Step by Step
Covers Azure signup, app registration, and connecting credentials including secret expiry settings.
3. Create a Microsoft Azure Account
If you already have an Azure account, skip ahead to Section 4.
Navigate to portal.azure.com and sign in with your Microsoft account.
If you don't have an Azure account, you'll be prompted to create one. Click Try Azure for free. Azure offers a free tier — your credit card won't be charged unless you manually upgrade to pay-as-you-go pricing.
Complete the sign-up form with your details. Select "For personal use" (or your organisation if applicable), verify your identity, and click Sign up.
4. Start Creating the Credential in n8n
Before completing the Azure registration, you need to grab the OAuth Redirect URI from your n8n instance and identify the credential type you need.
Open your Awesomate-hosted n8n instance. Click the Create workflow button, then click the dropdown arrow and select Create credential. Search for "Microsoft" and select the specific service you want to connect (e.g. Microsoft Outlook).
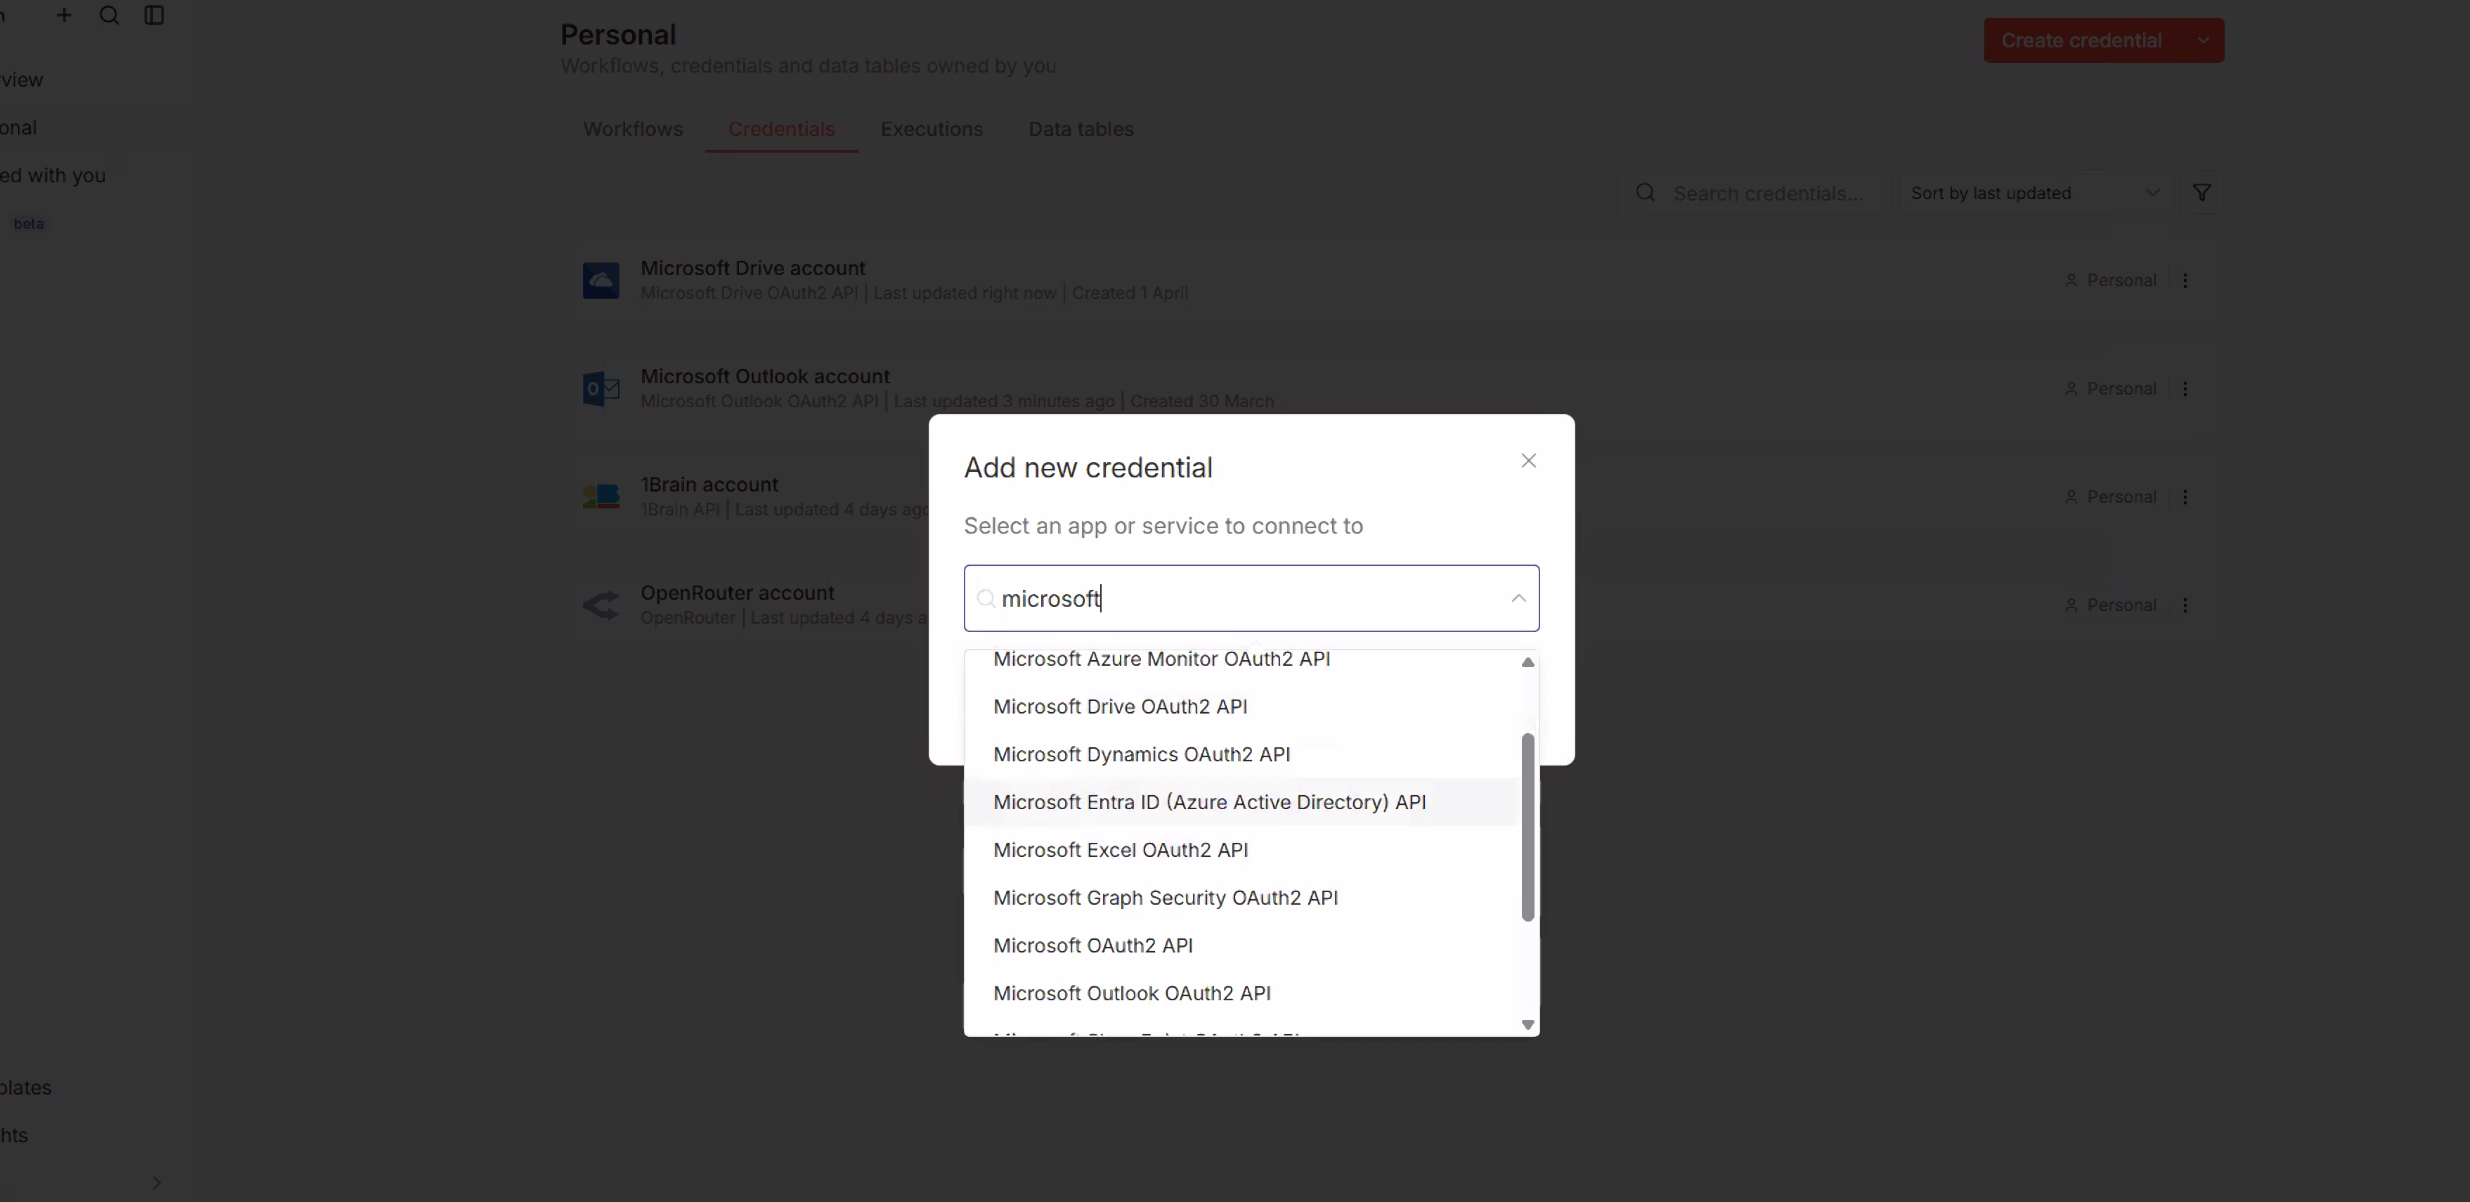
Click Continue. You'll see the credential setup form with fields for Client ID and Client Secret. At the top, you'll find the OAuth Redirect URL — click the copy icon to copy this URL. You'll need it in the next step.
5. Register an App in Azure
Now we register an application with the Microsoft Identity Platform. This is what gives n8n permission to interact with Microsoft services on your behalf.
In the Azure Portal, navigate to App registrations (or search for "App registrations" in the portal search bar). Click + New registration.
Fill in the registration form:
- Name: Enter something descriptive like
n8n – Awesomate. - Supported account types: Select "Accounts in any organizational directory and personal Microsoft accounts" (multi-tenant + personal). This is the recommended option for most users.
- Redirect URI: Paste the OAuth Redirect URL you copied from n8n. Set the platform to Web.
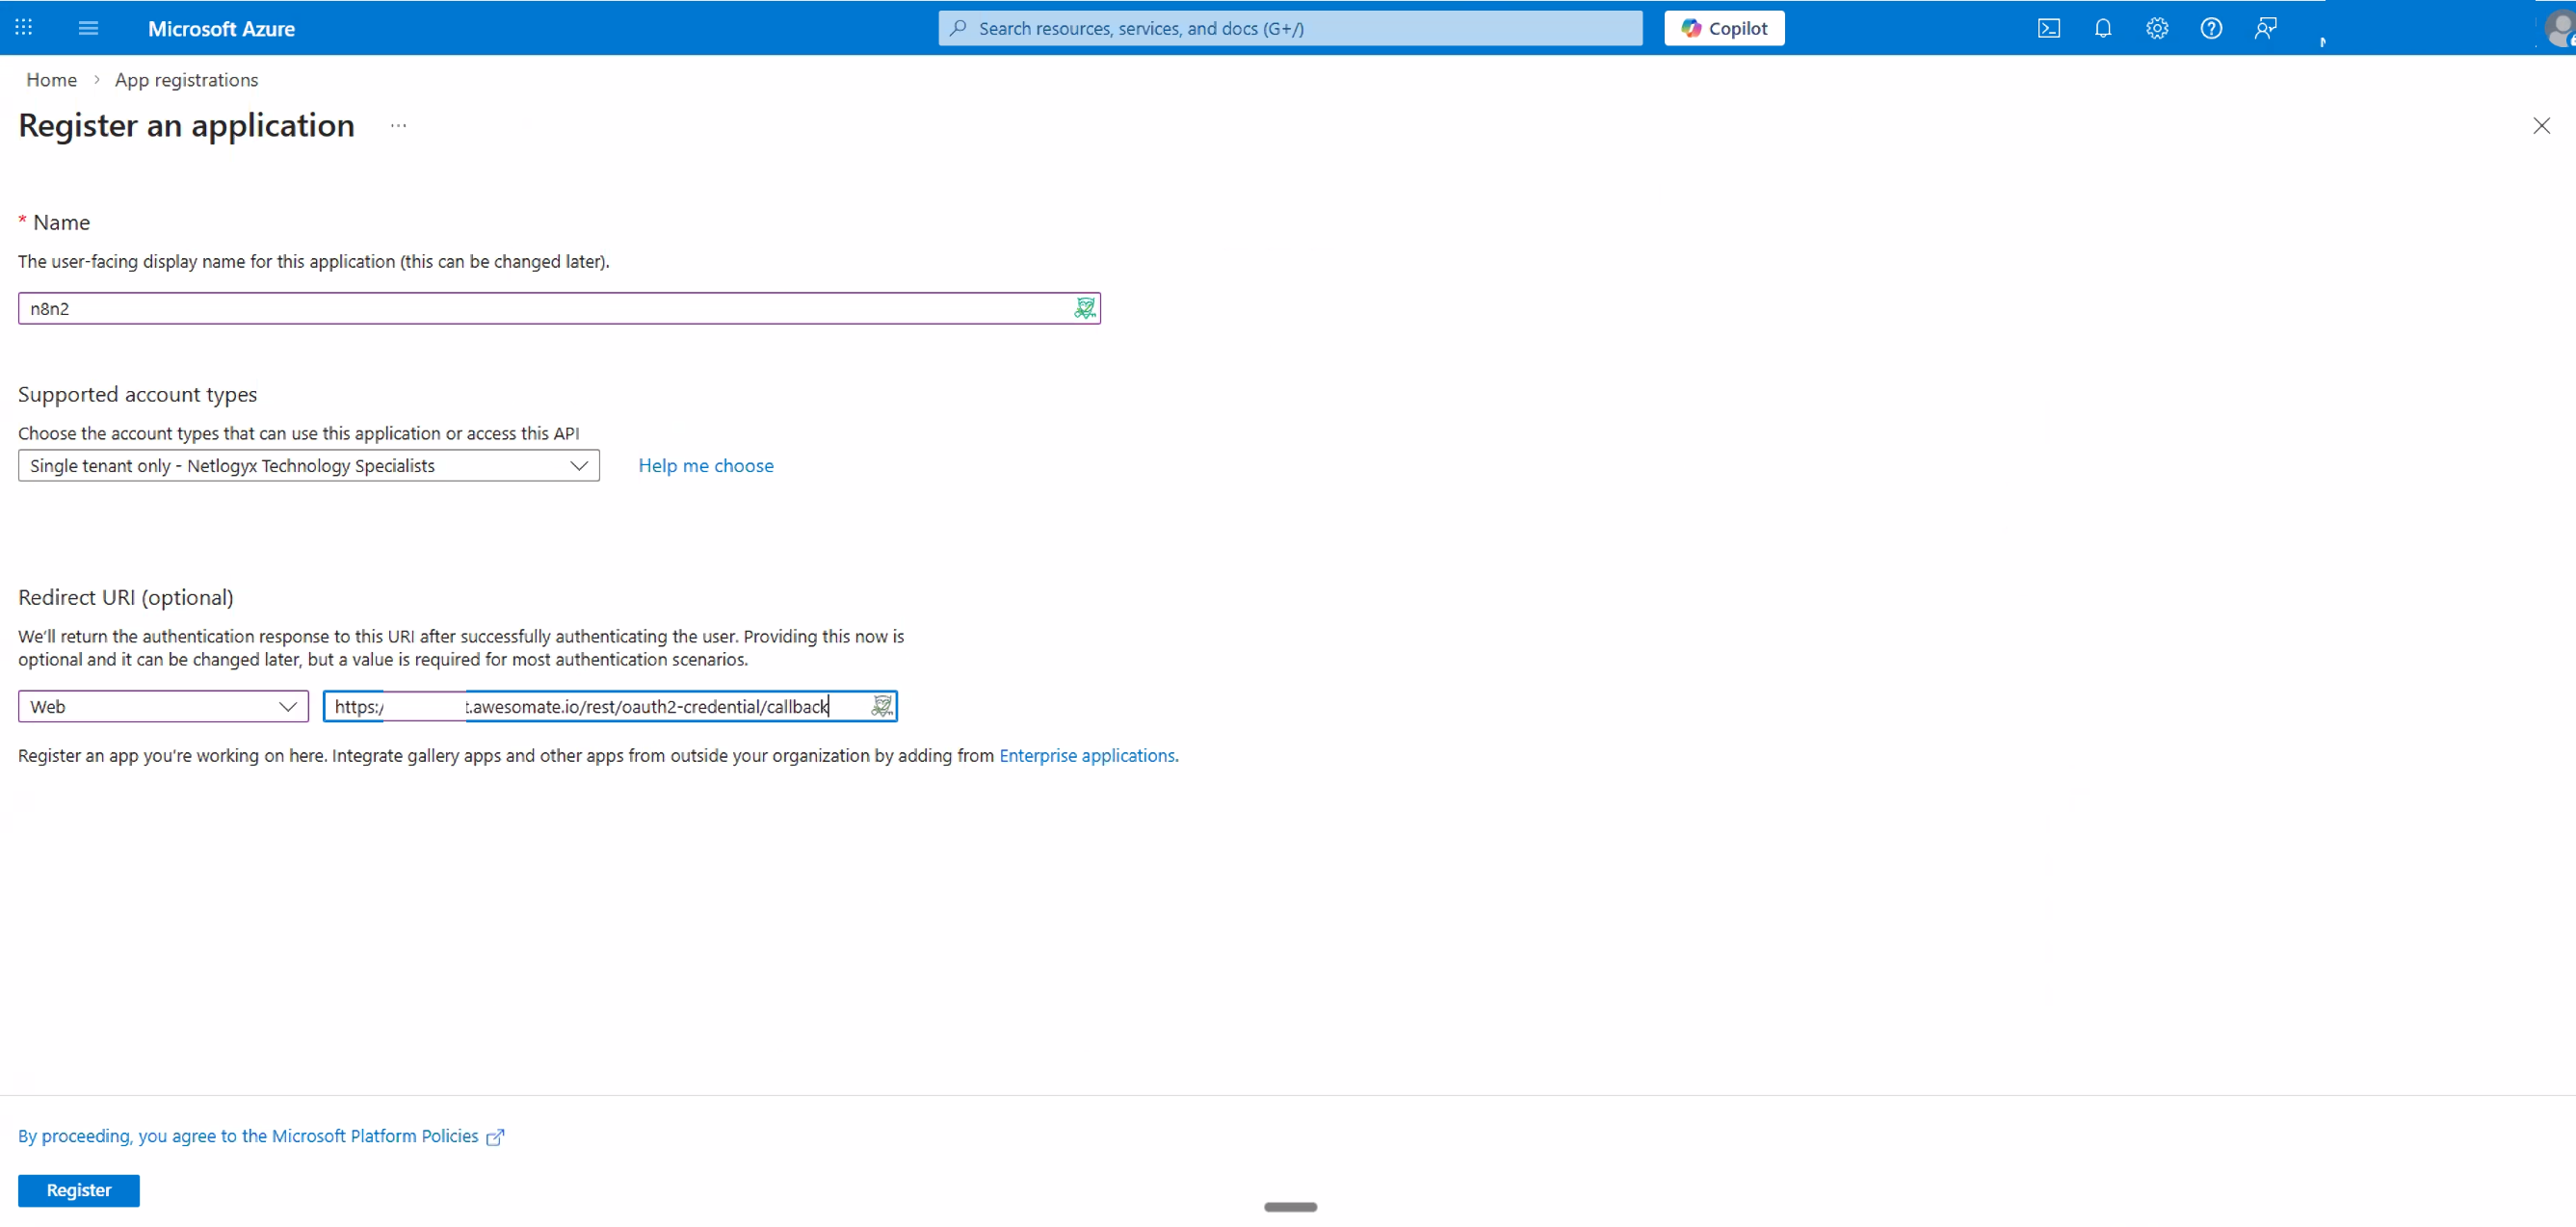
Click Register. Azure will create your application and redirect you to the app's Overview page.
On the Overview page, locate the Application (client) ID. Copy this value — you'll paste it into n8n later.

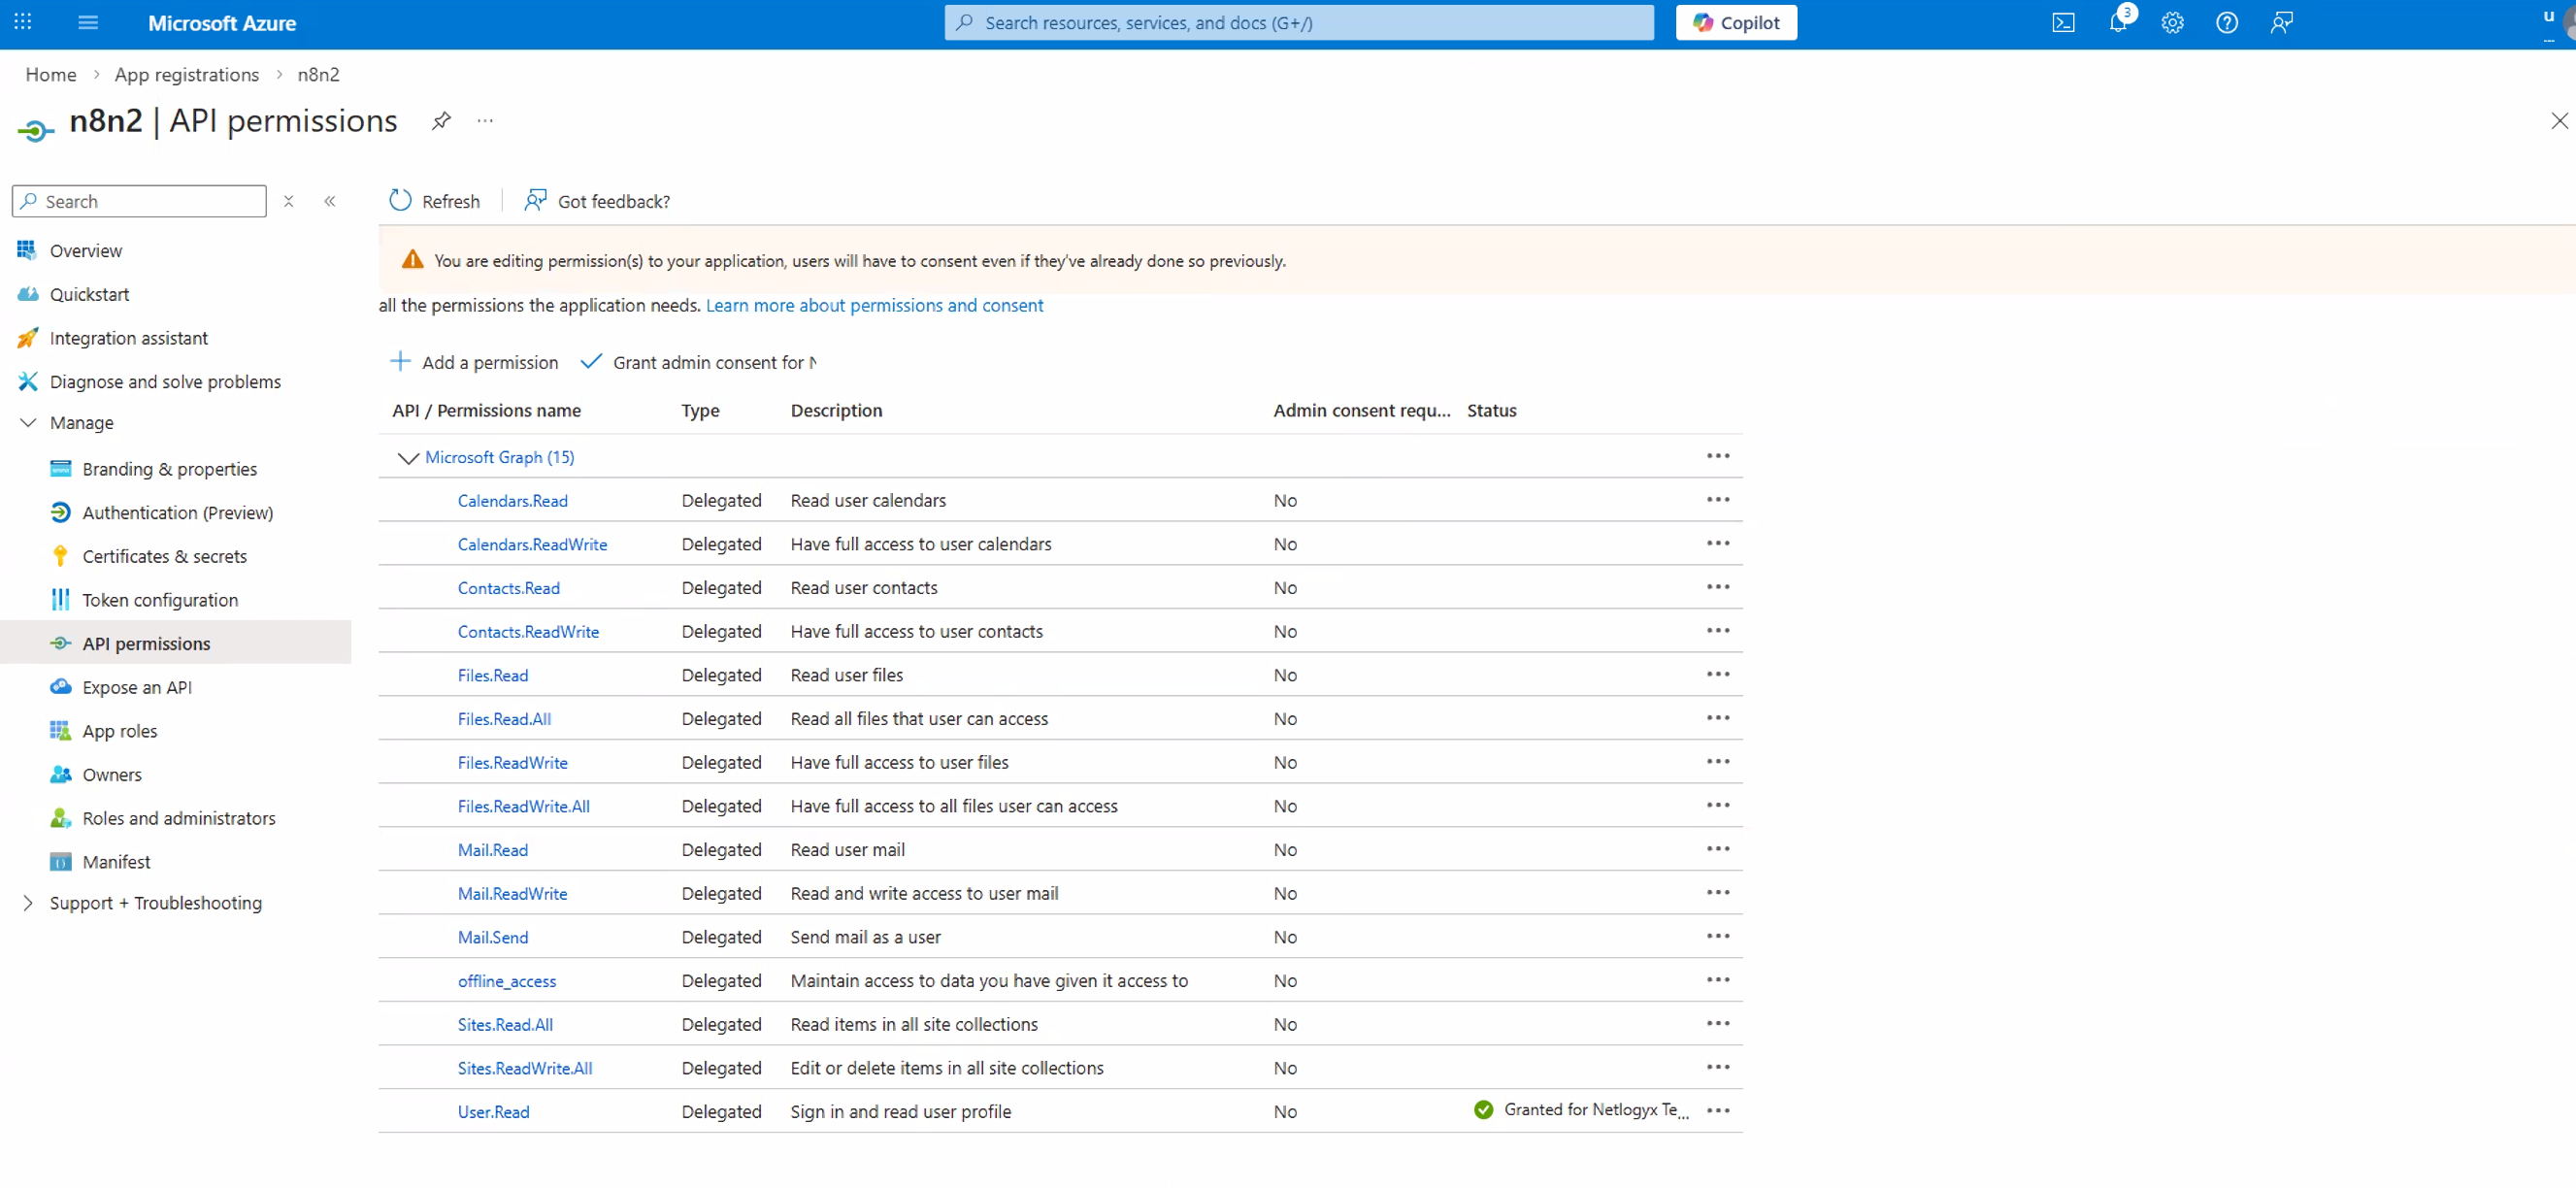
6. Configure API Permissions (Microsoft Graph)
By default, your new app only has the basic User.Read permission. You need to add the specific permissions that n8n requires to access mail, calendar, contacts, files, and sites on your behalf.
In your app registration, click API permissions in the left-hand navigation. You'll see the default User.Read permission listed.
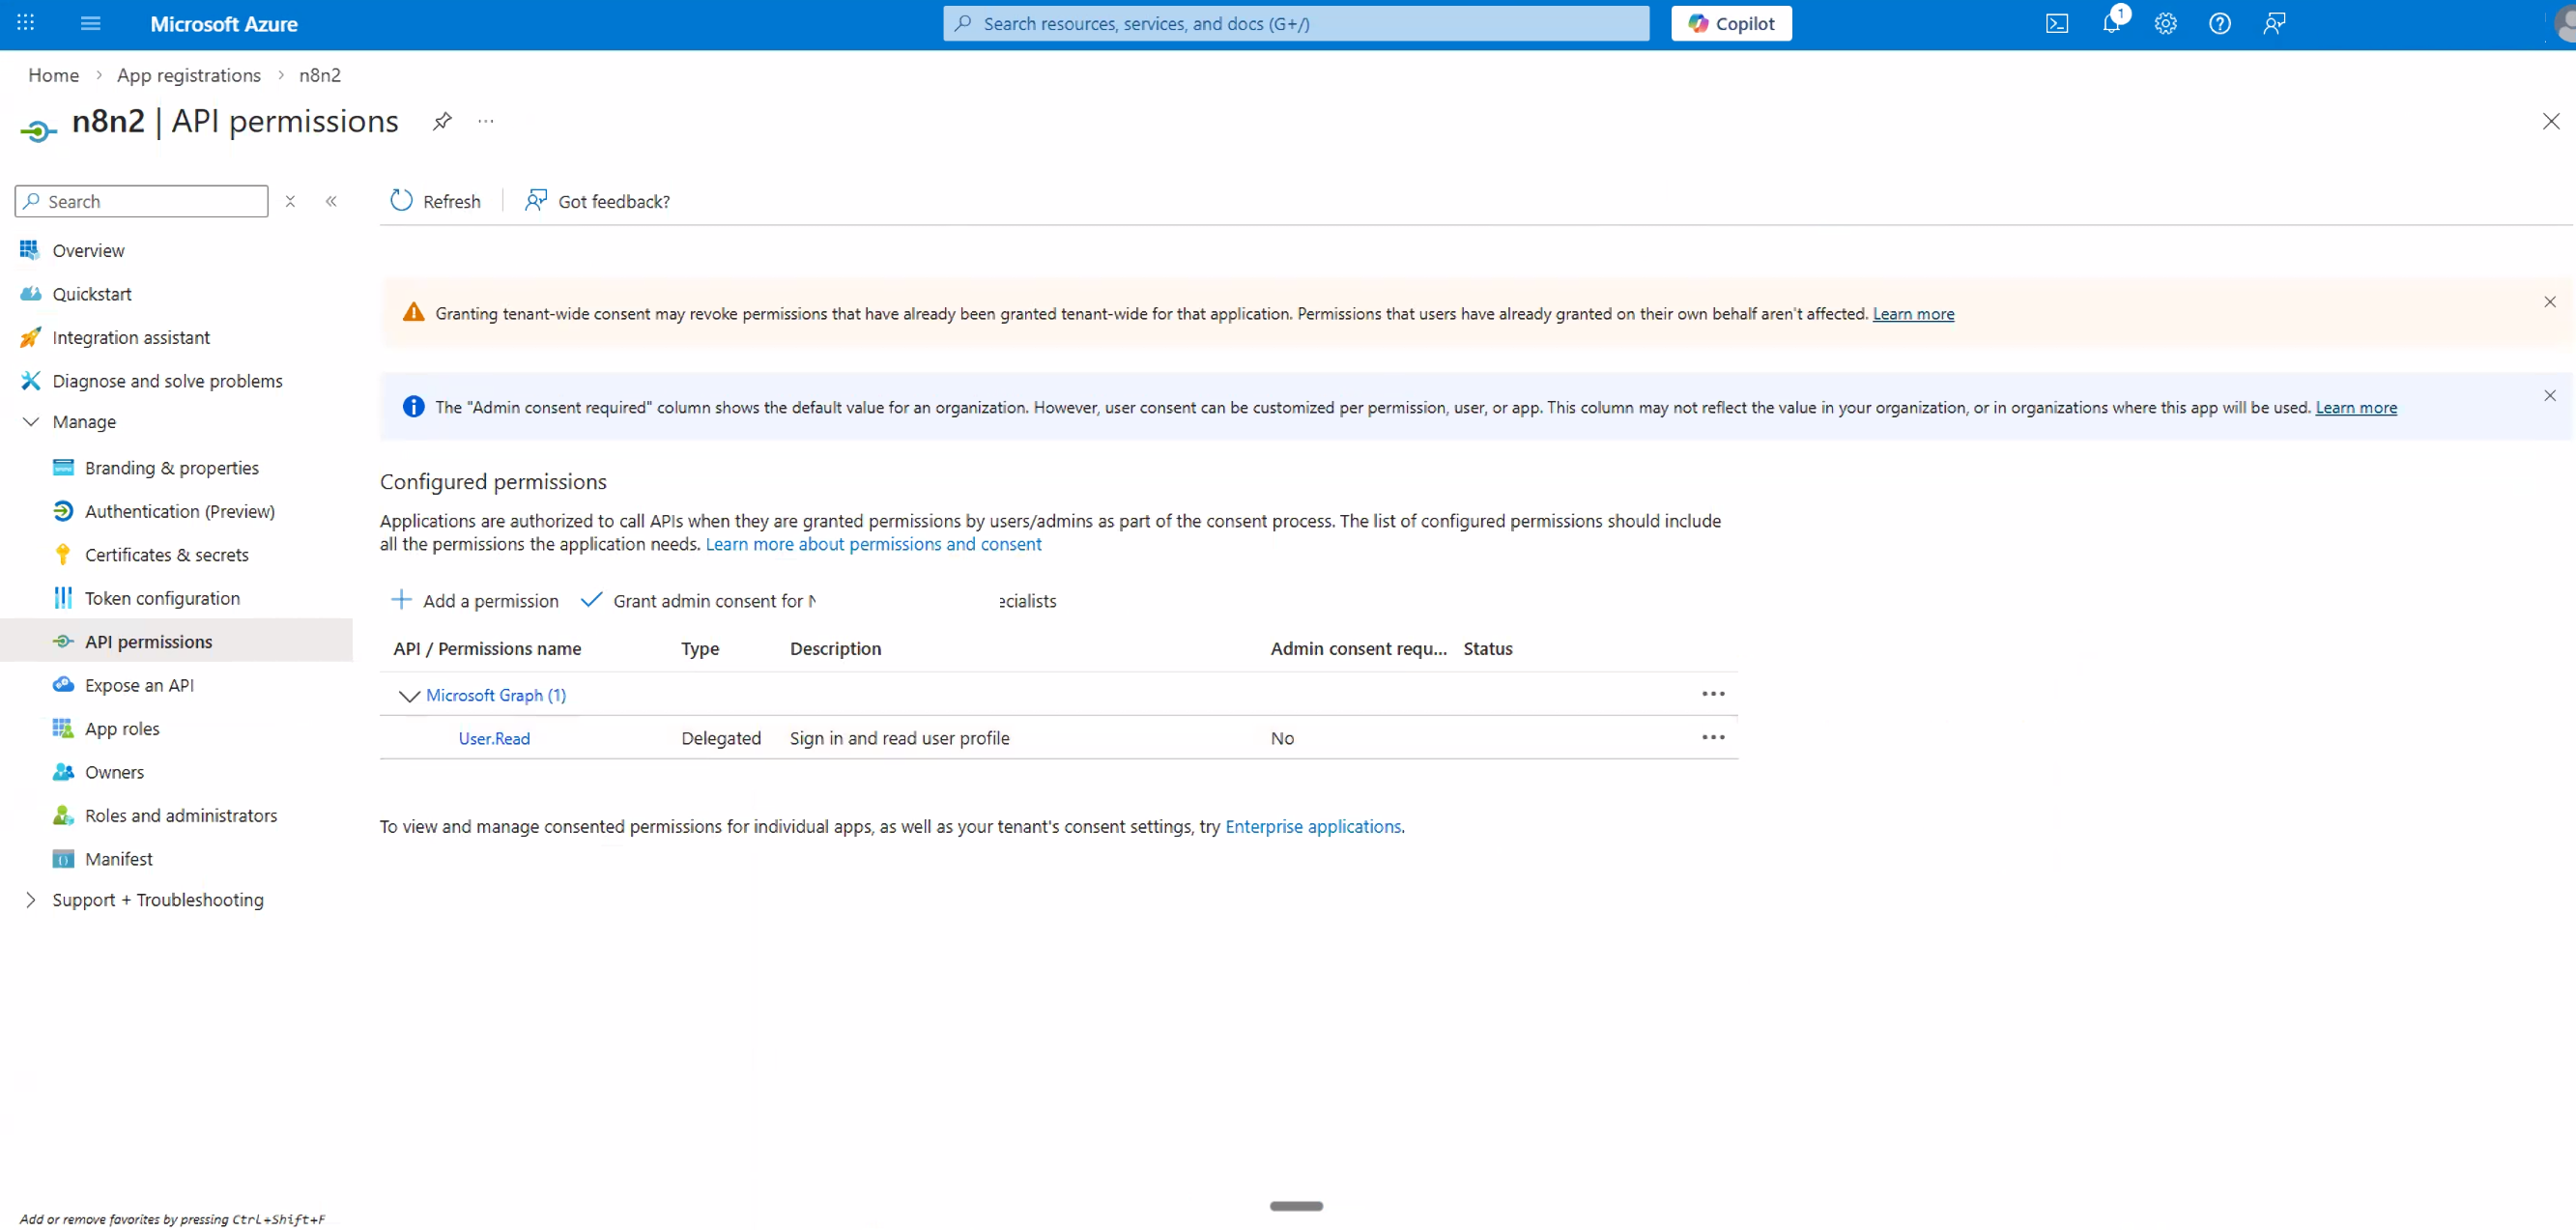
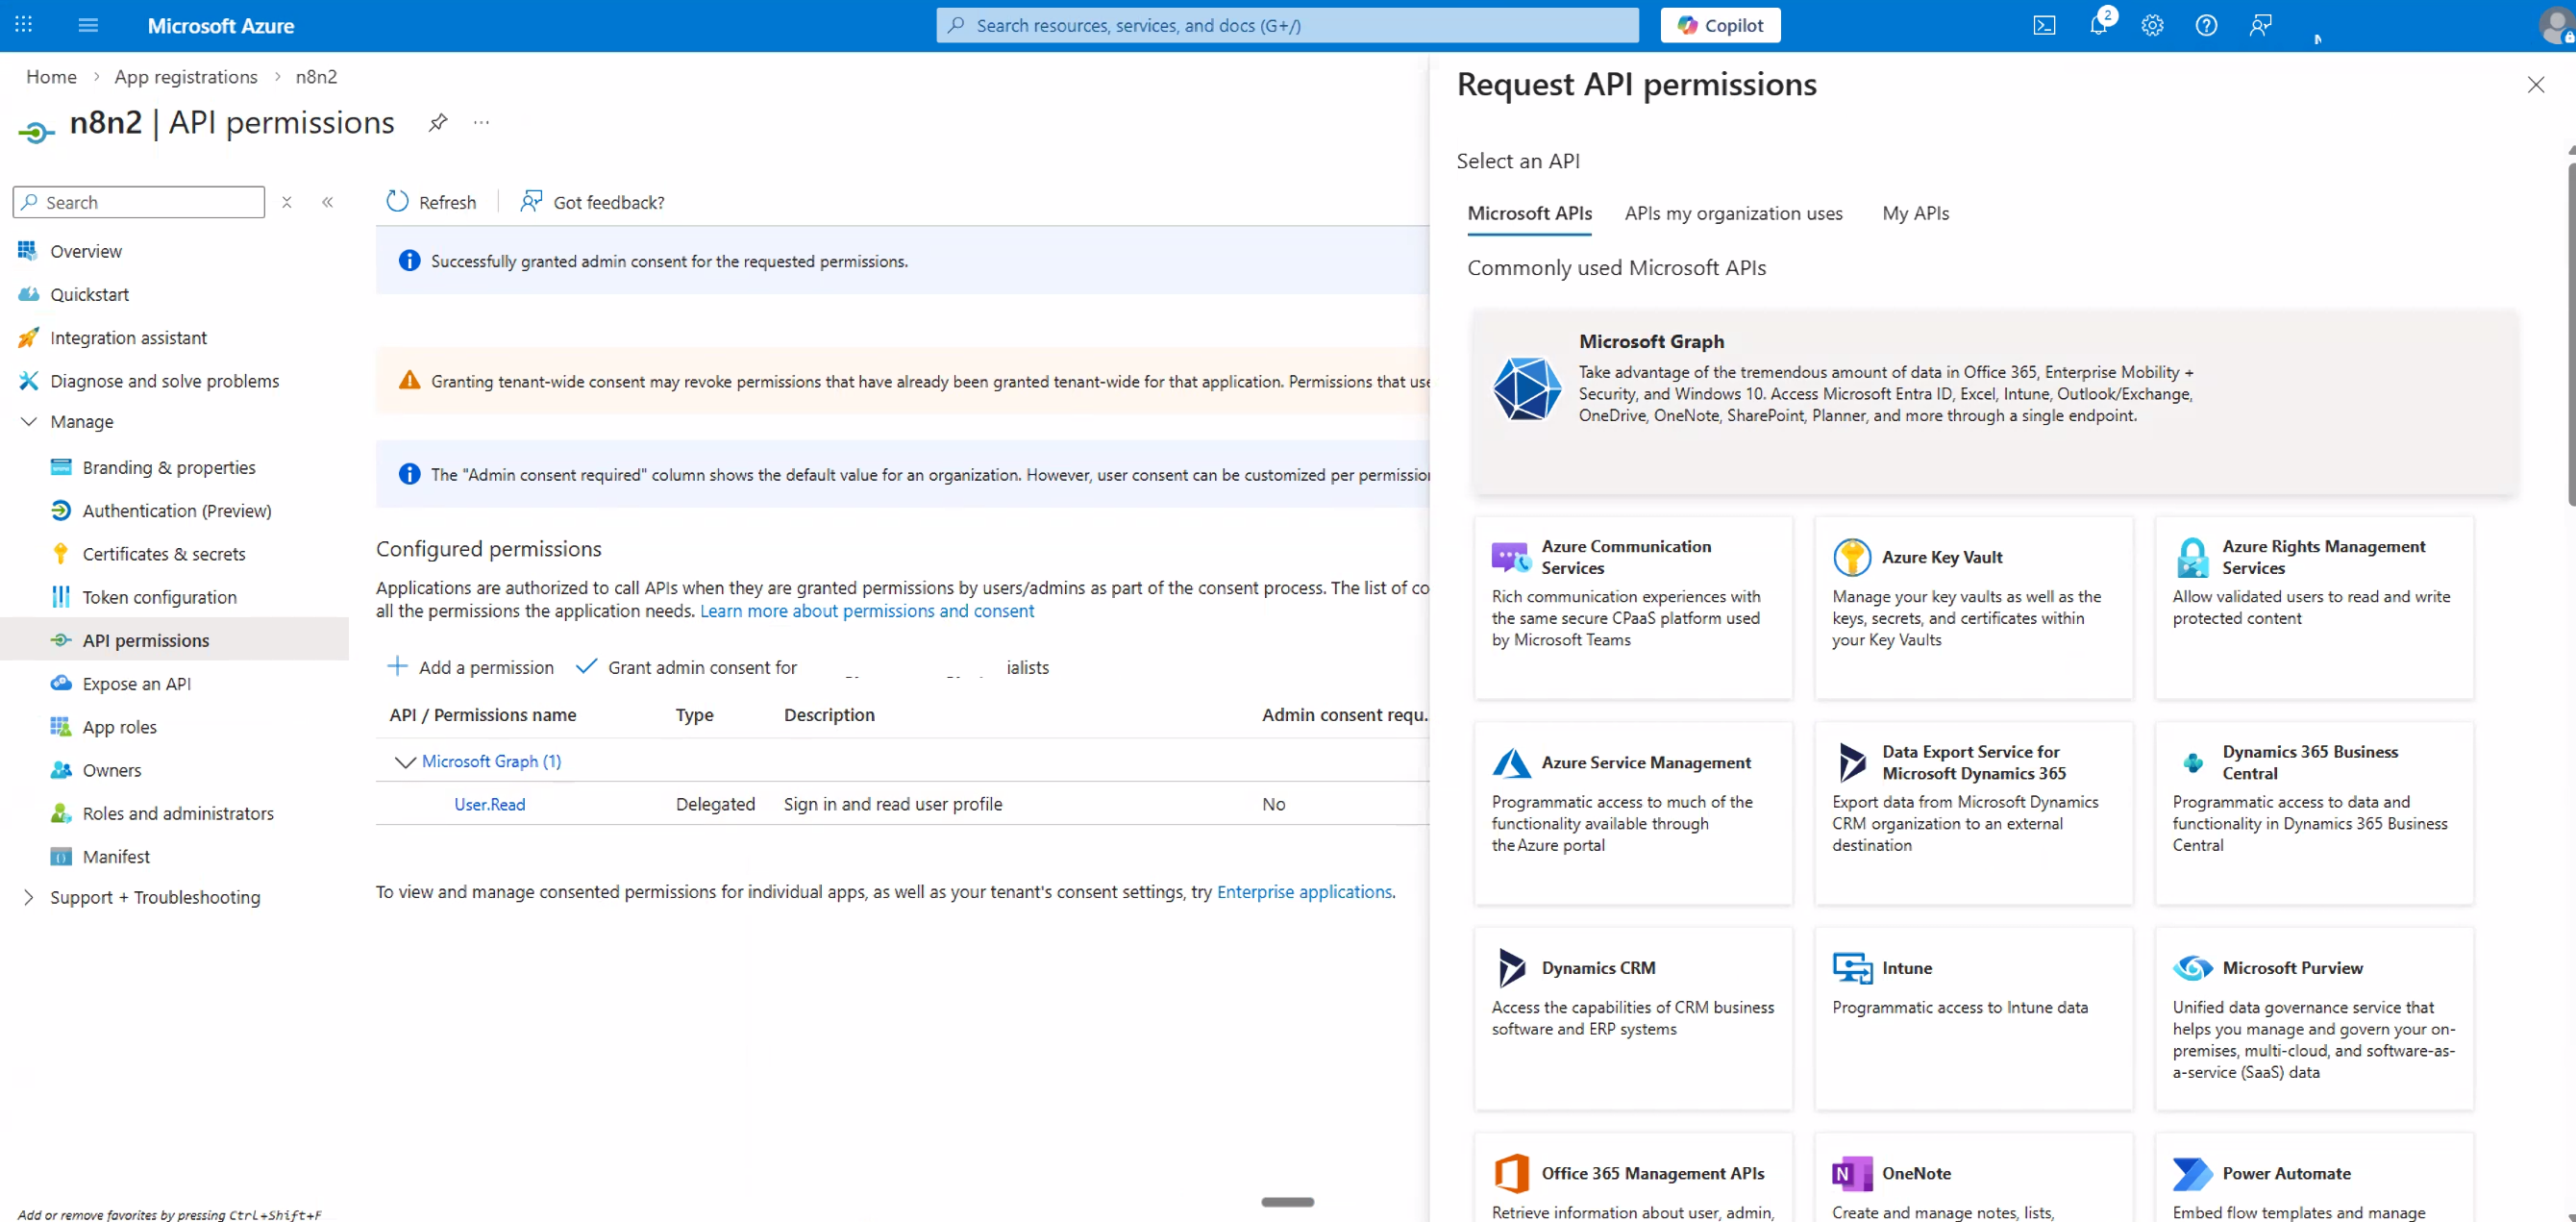
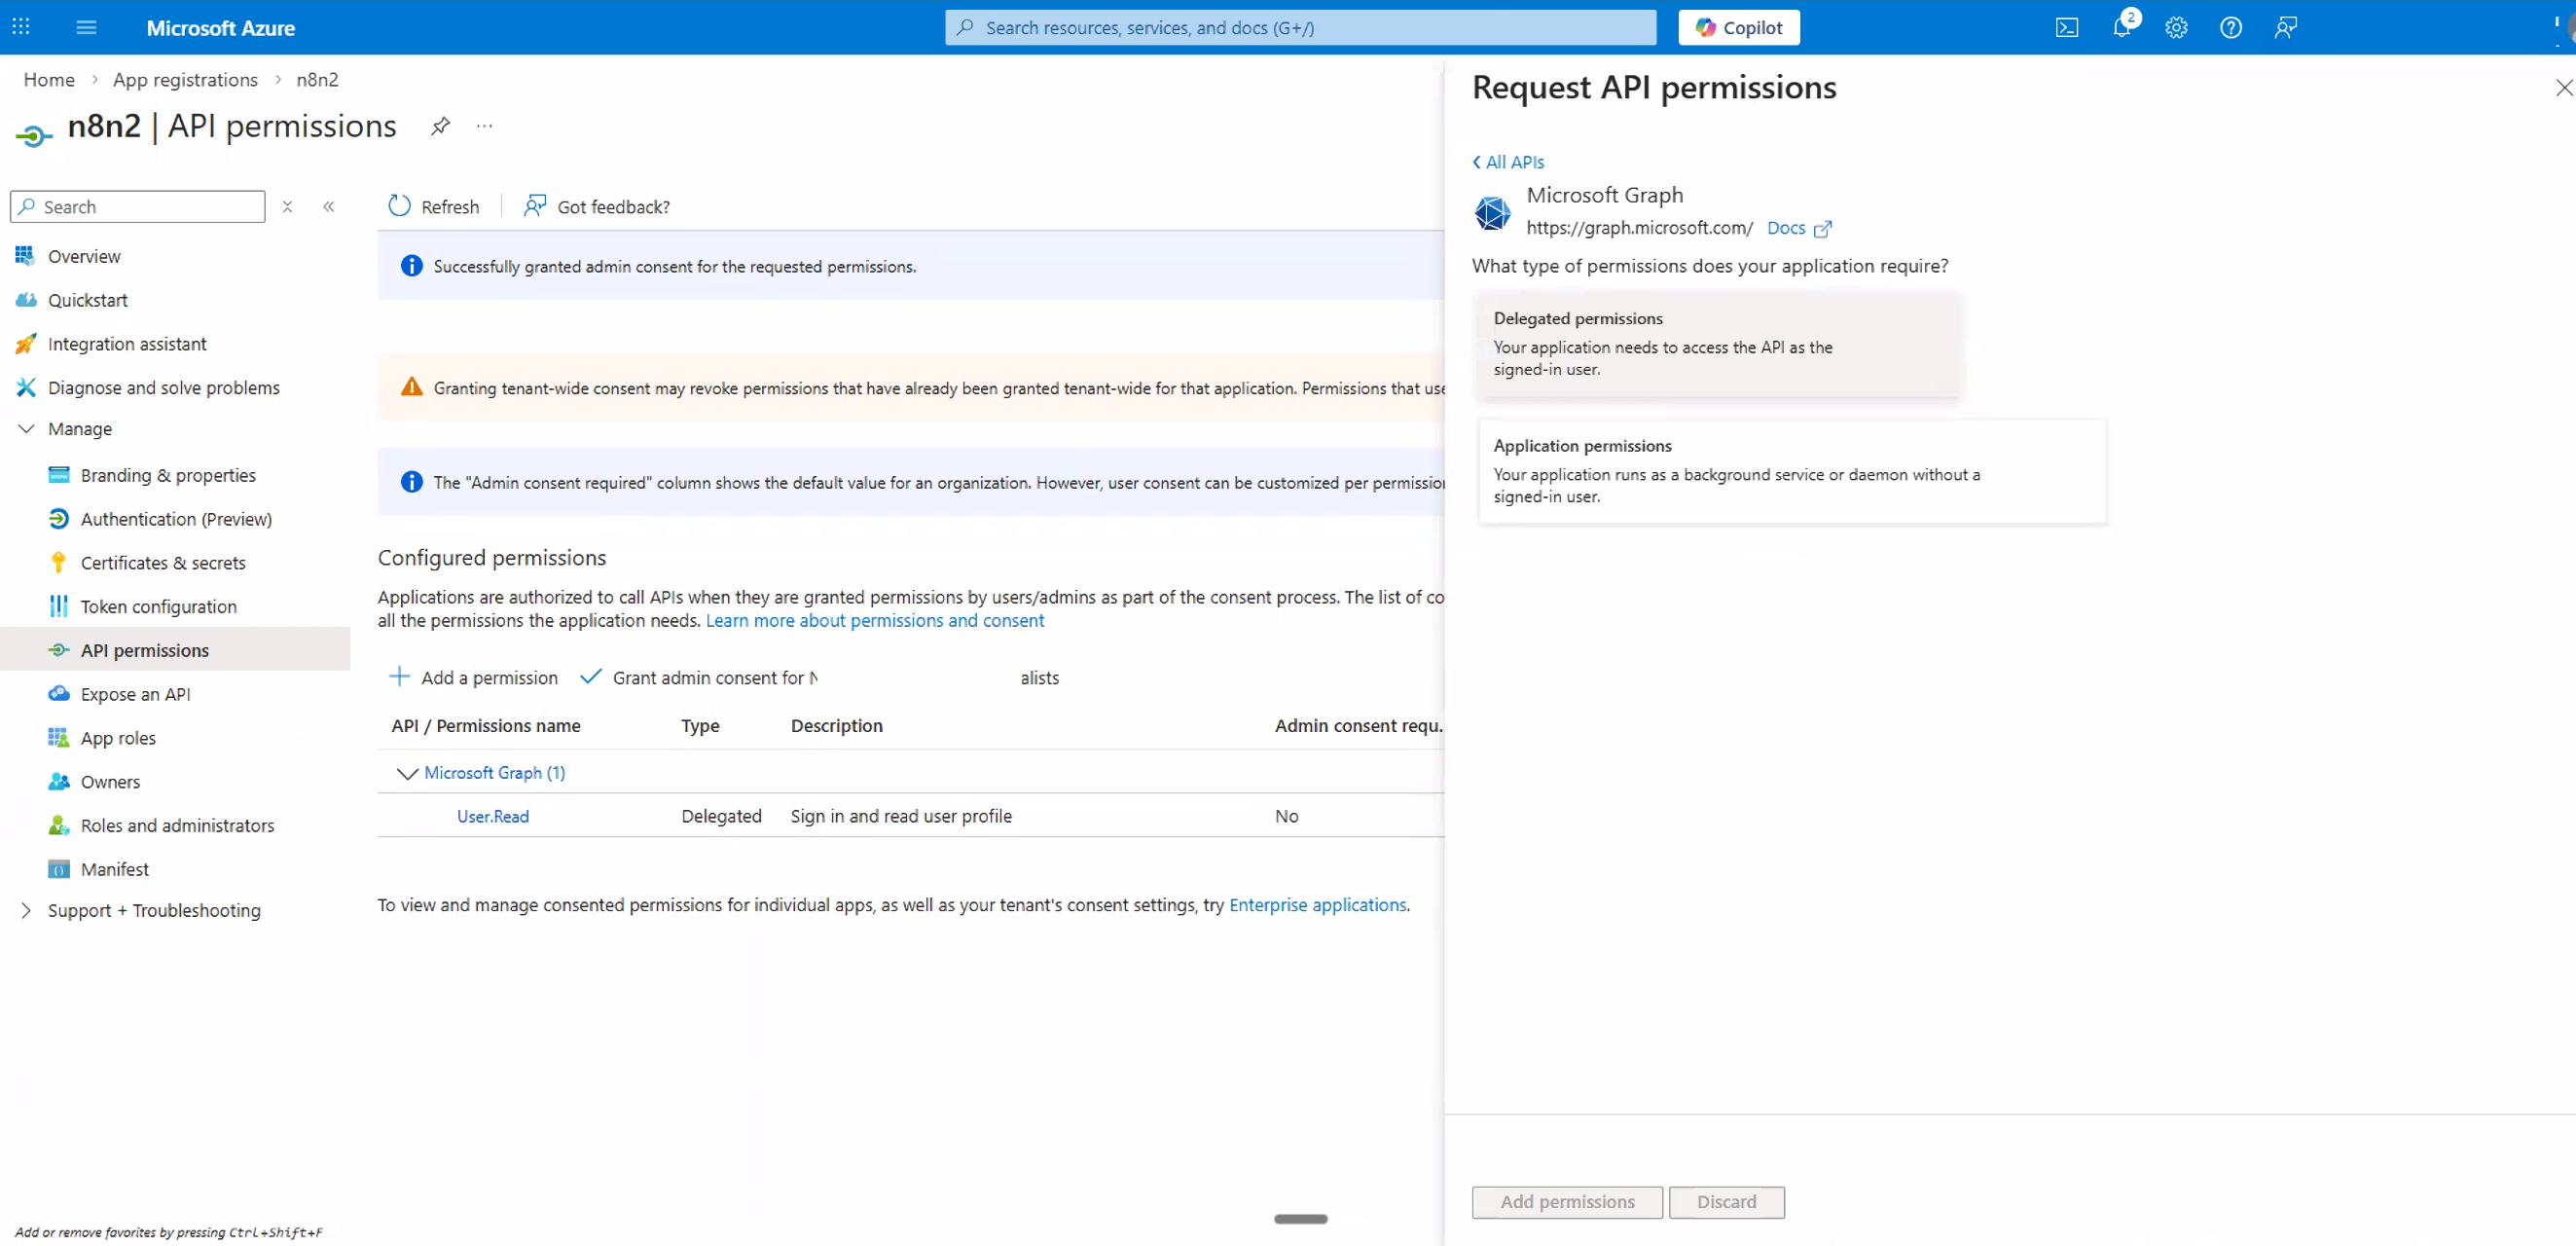
Click + Add a permission. In the panel that opens, select Microsoft Graph — this is the API that handles Outlook, Excel, OneDrive, Calendar, and more.
Select Delegated permissions. This ensures n8n acts on behalf of your signed-in user rather than as a background service.
Now add the required permissions. You'll search for and tick each permission category below. After selecting all the permissions you need, click Add permissions.
Permissions to Add
The table below lists all the permissions you should add. You don't need every category — only add the ones relevant to the Microsoft services you plan to use in n8n. However, we recommend adding all of them for maximum flexibility.
| Category | Permissions | Used For |
|---|---|---|
| OpenID | offline_access | Keeps n8n connected long-term via refresh tokens |
| Mail | Mail.Read, Mail.ReadWrite, Mail.Send | Outlook — reading, writing, and sending email |
| Contacts | Contacts.Read, Contacts.ReadWrite | Outlook — reading and managing contacts |
| Calendars | Calendars.Read, Calendars.ReadWrite | Outlook — reading and managing calendar events |
| Sites | Sites.Read.All, Sites.ReadWrite.All | SharePoint — reading and writing to sites |
| Files | Files.Read, Files.ReadWrite | OneDrive & Excel — reading and writing files |
offline_access is critical Without offline_access, n8n can only use your Microsoft connection during a single session. With it, n8n receives a refresh token that keeps the connection alive long-term — which is essential for automated workflows that run on a schedule.Here's what each permission step looks like in Azure:
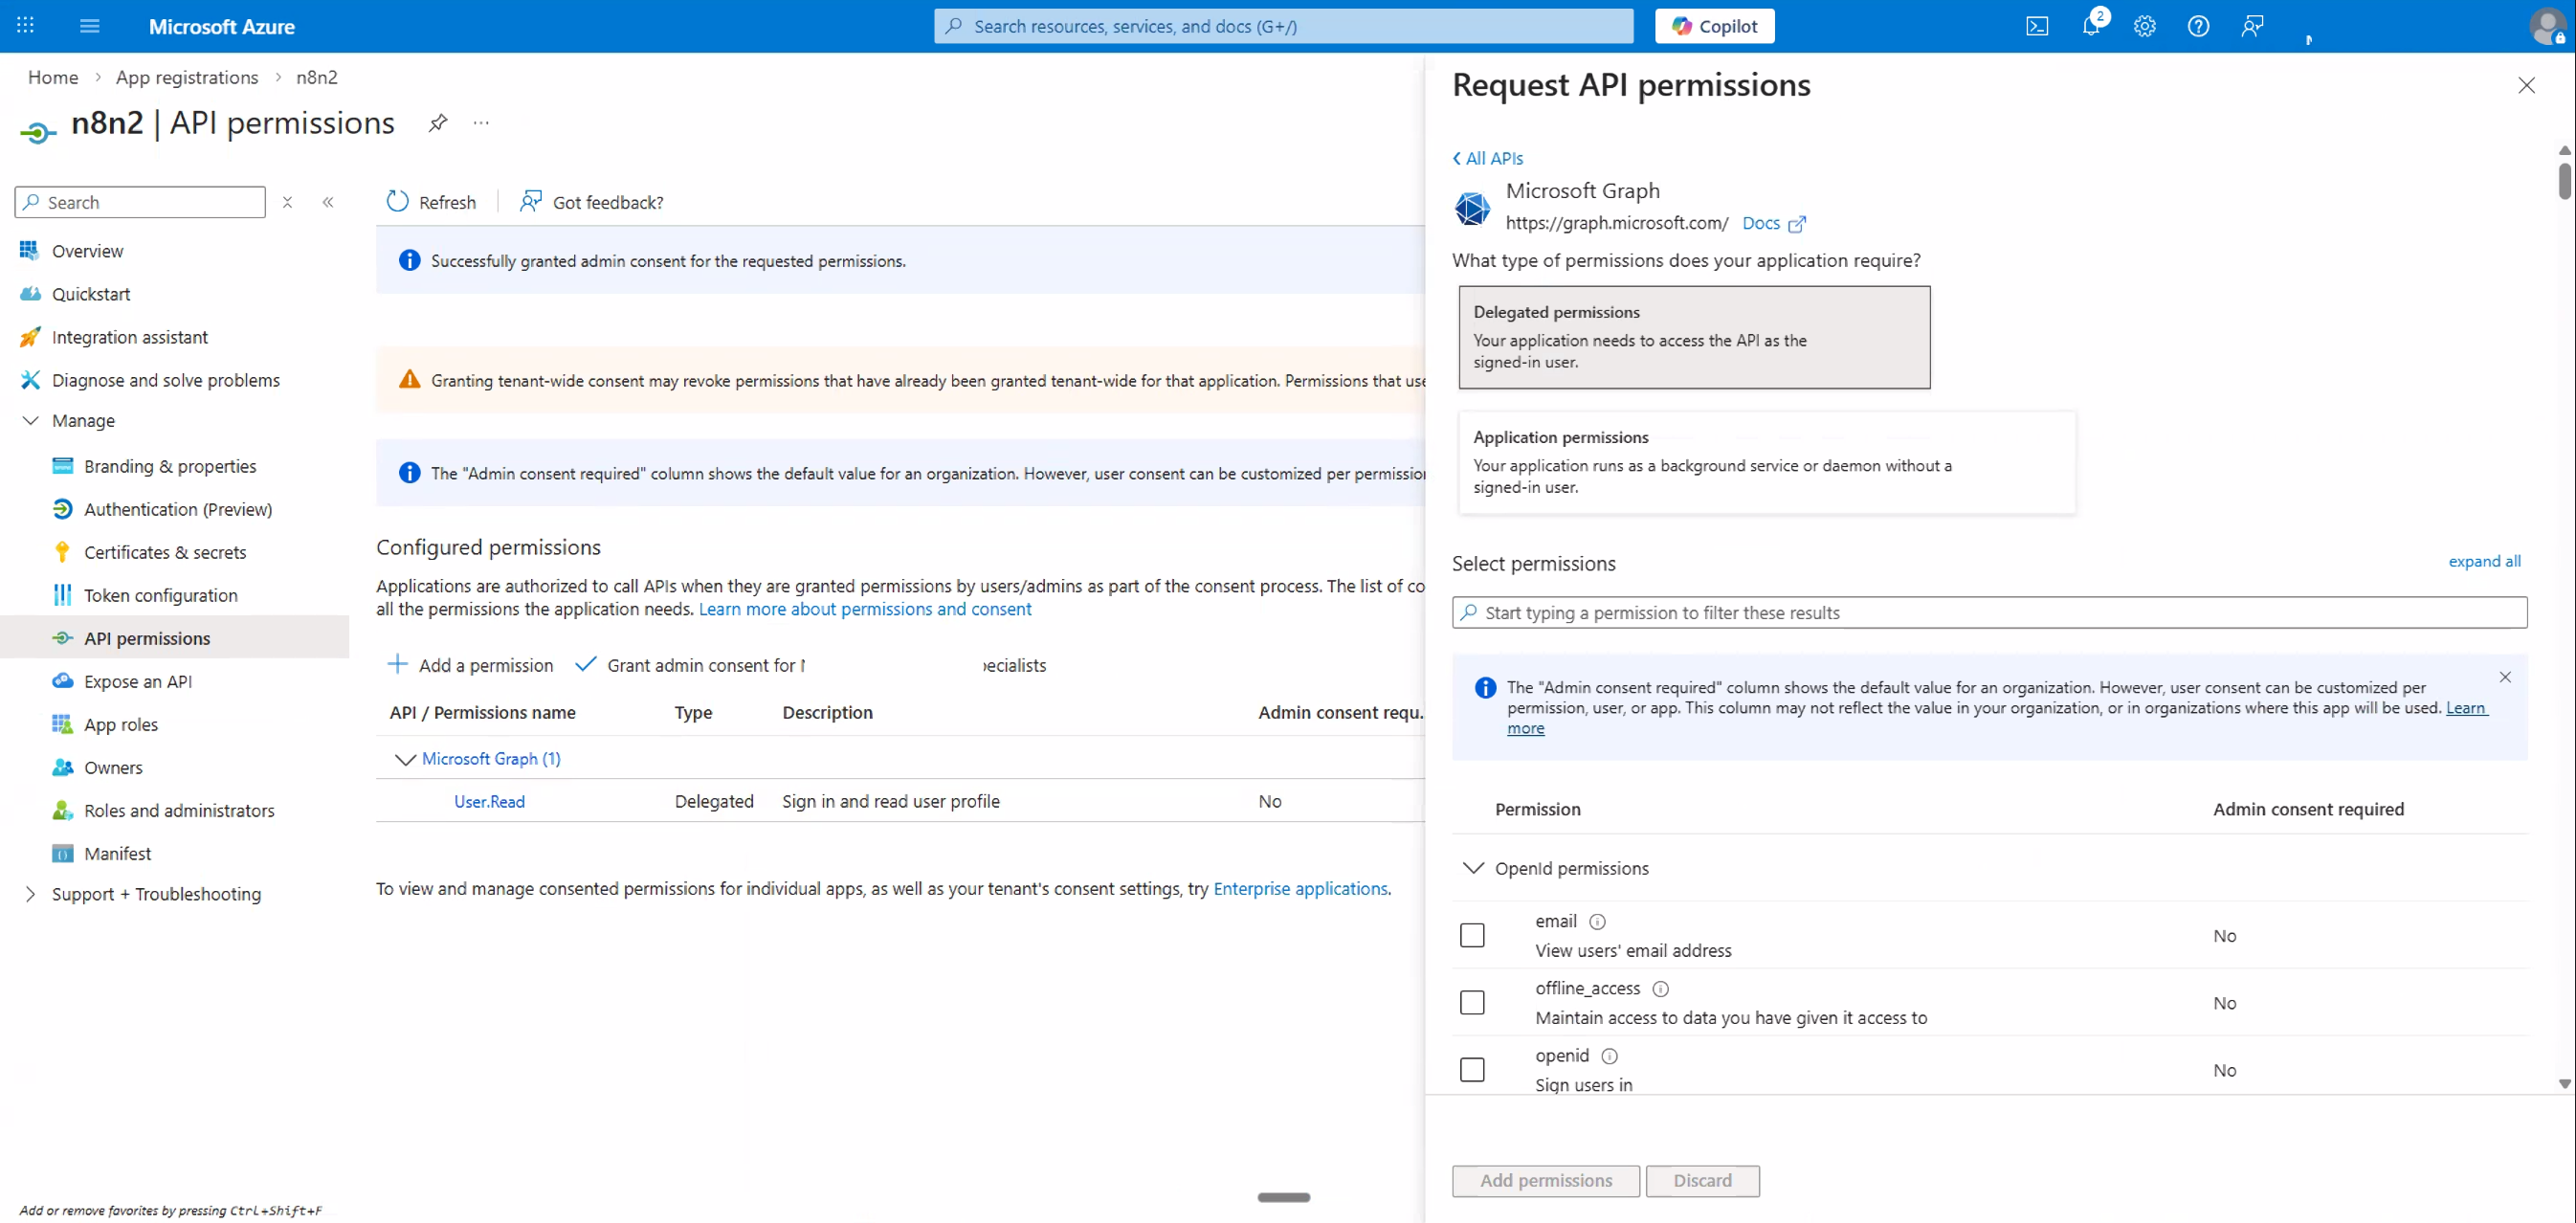
offline_access permission so n8n stays connected long-term.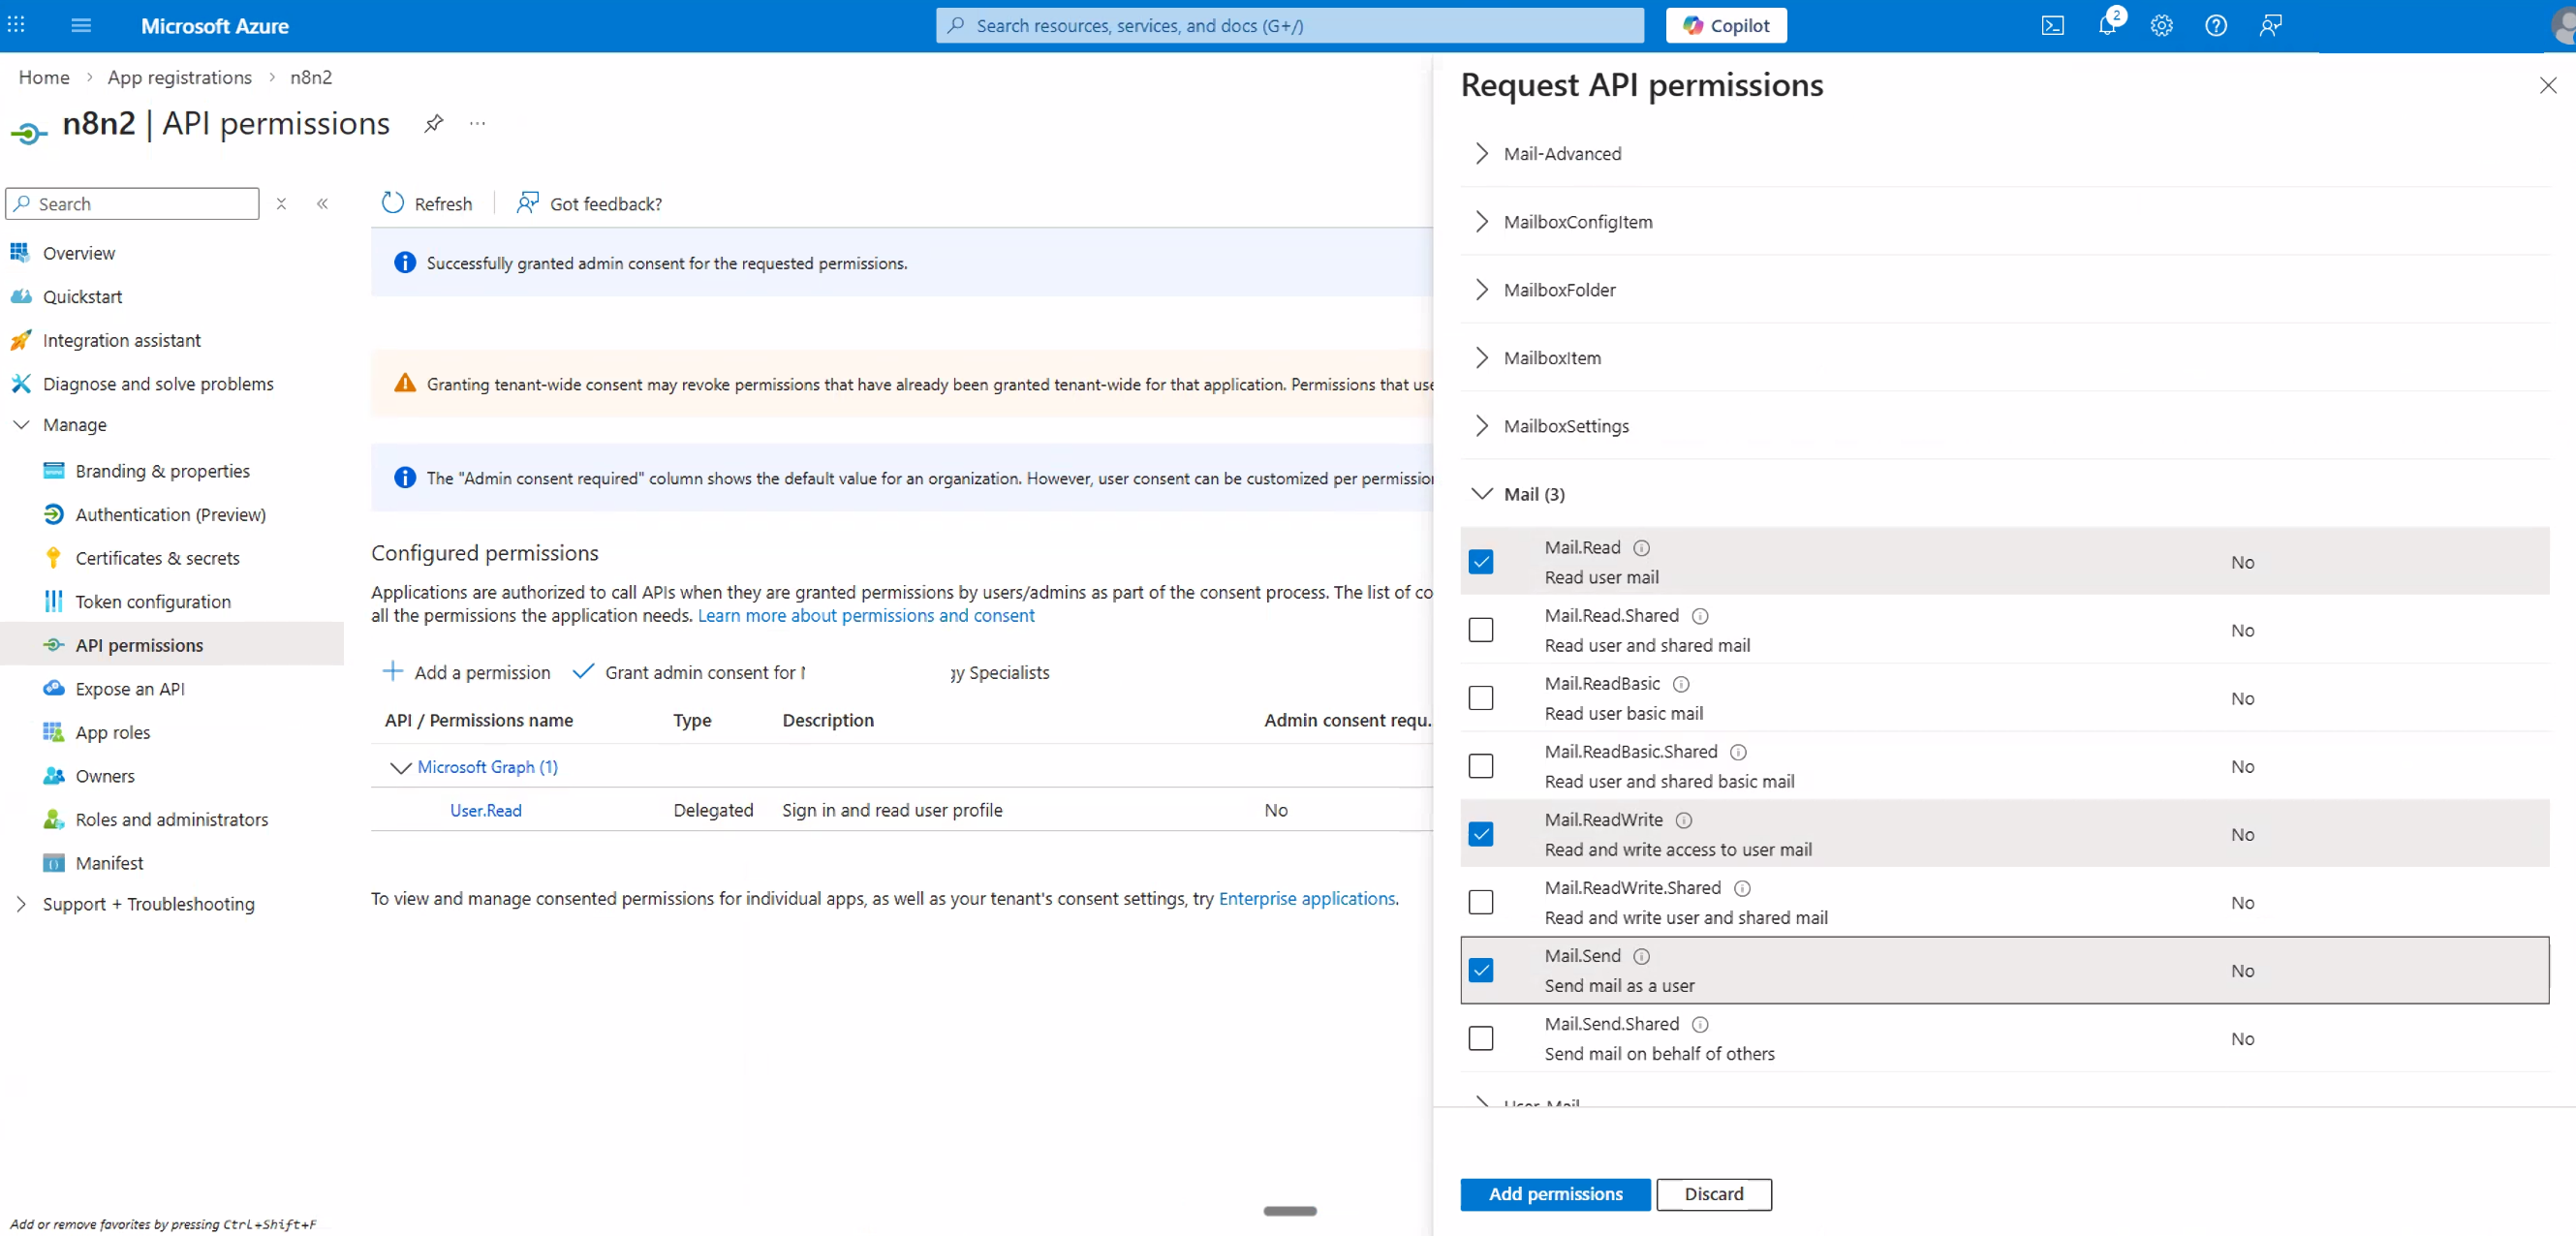
Mail.Read, Mail.ReadWrite, and Mail.Send.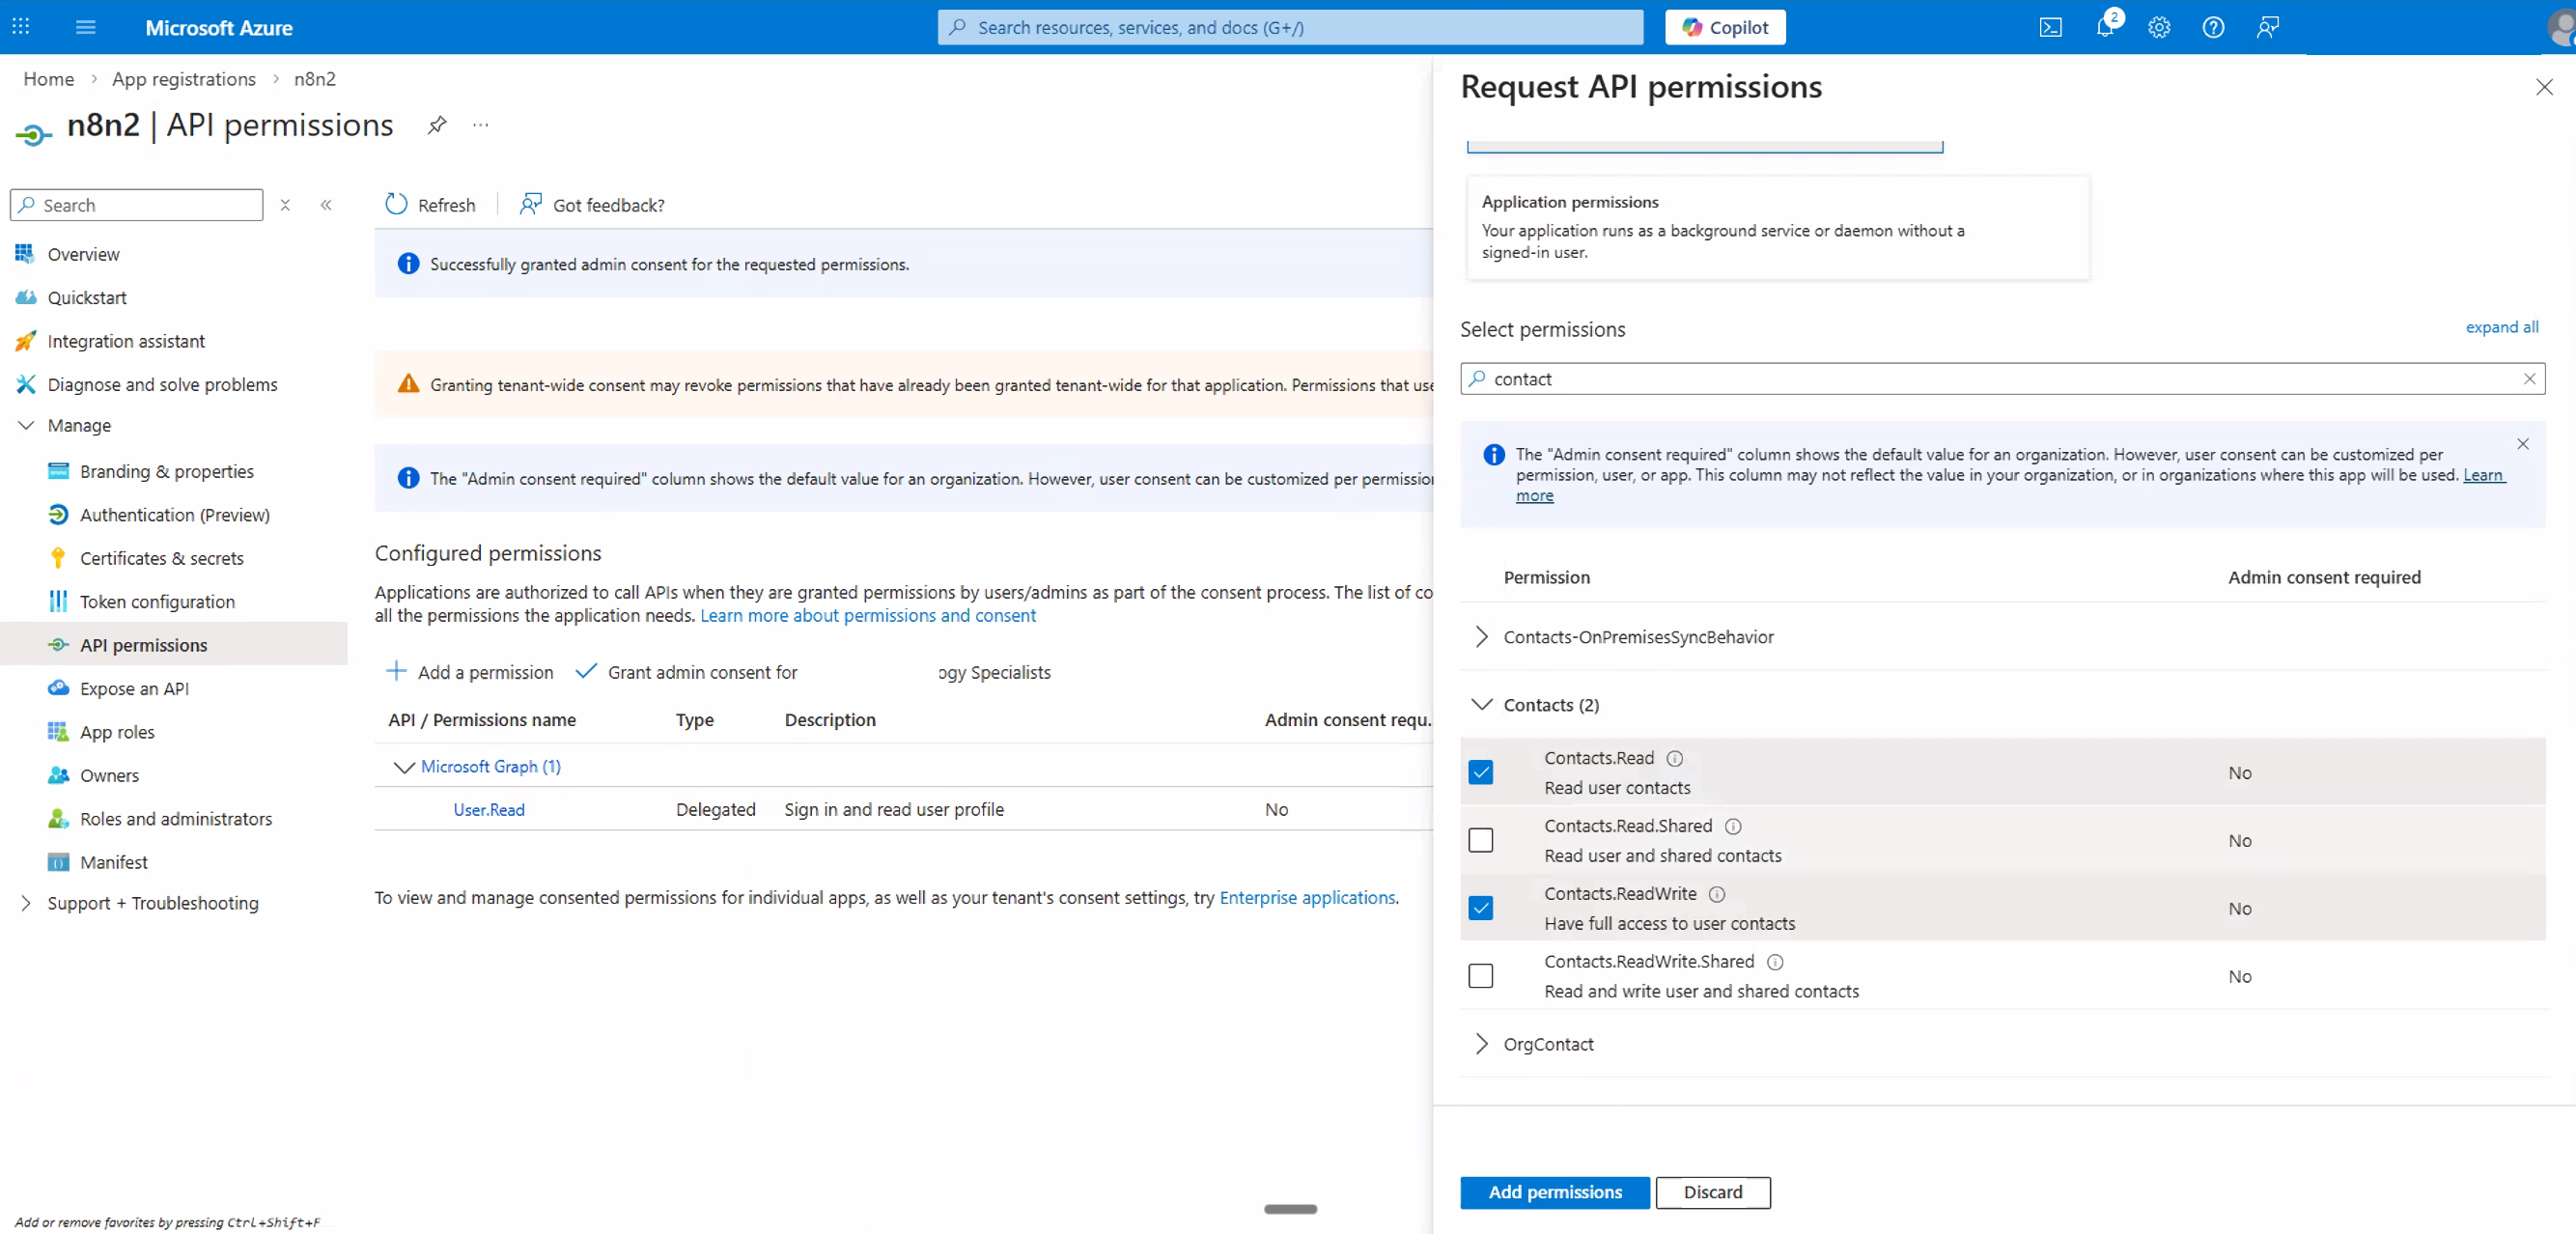
Contacts.Read and Contacts.ReadWrite.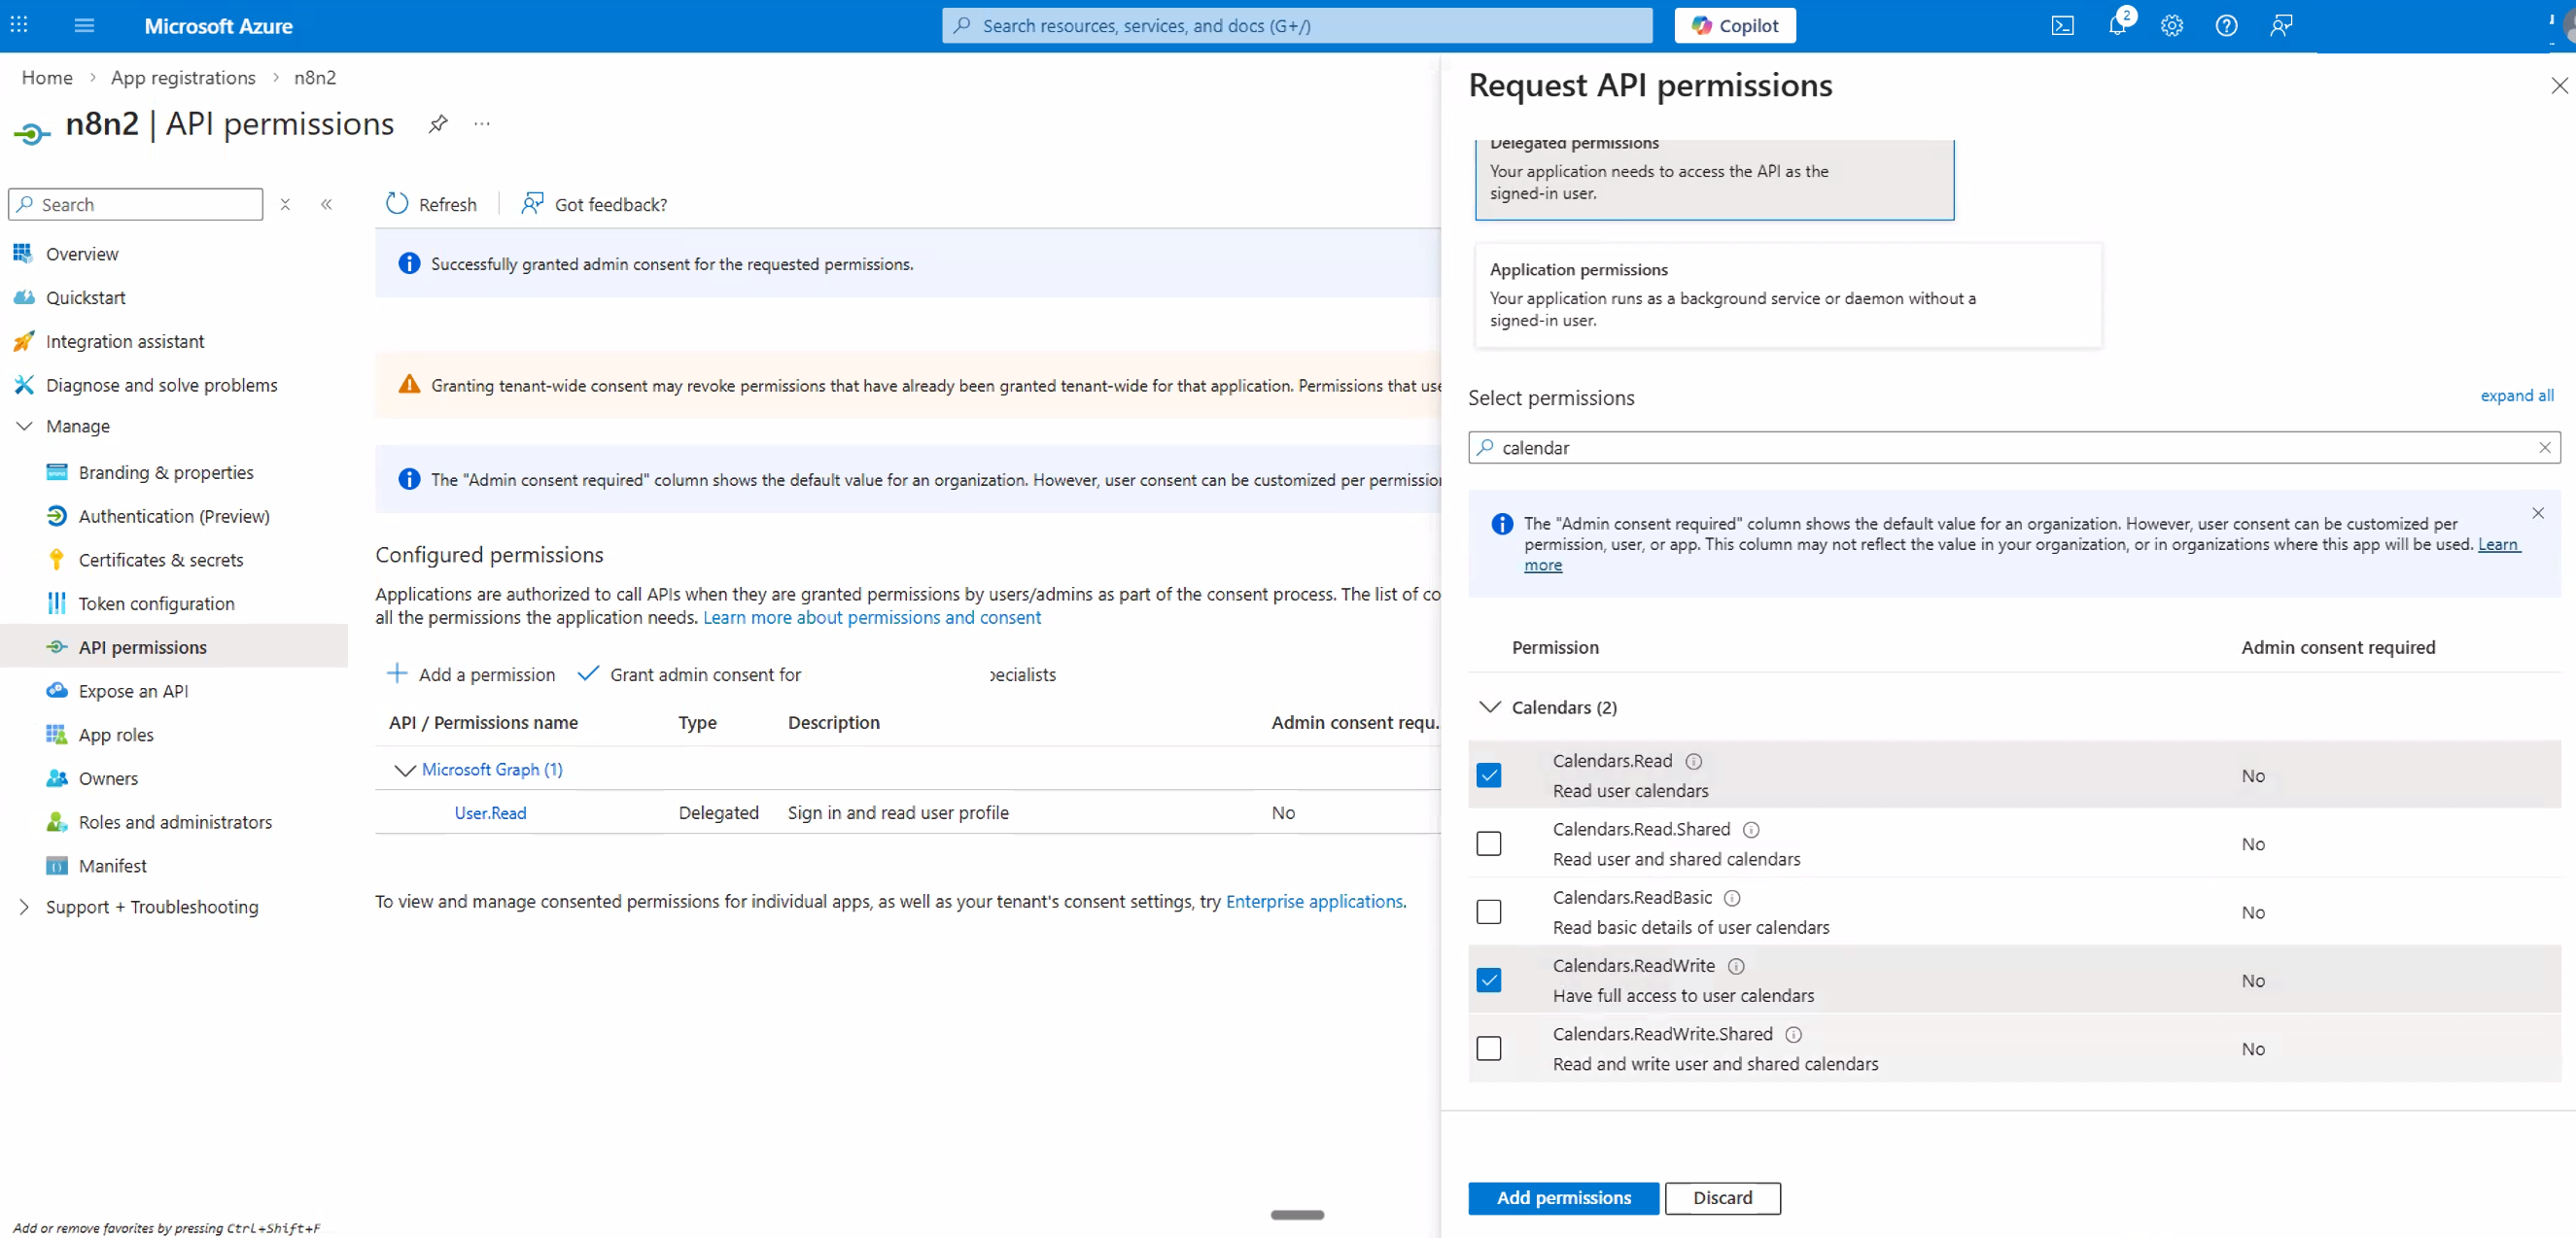
Calendars.Read and Calendars.ReadWrite.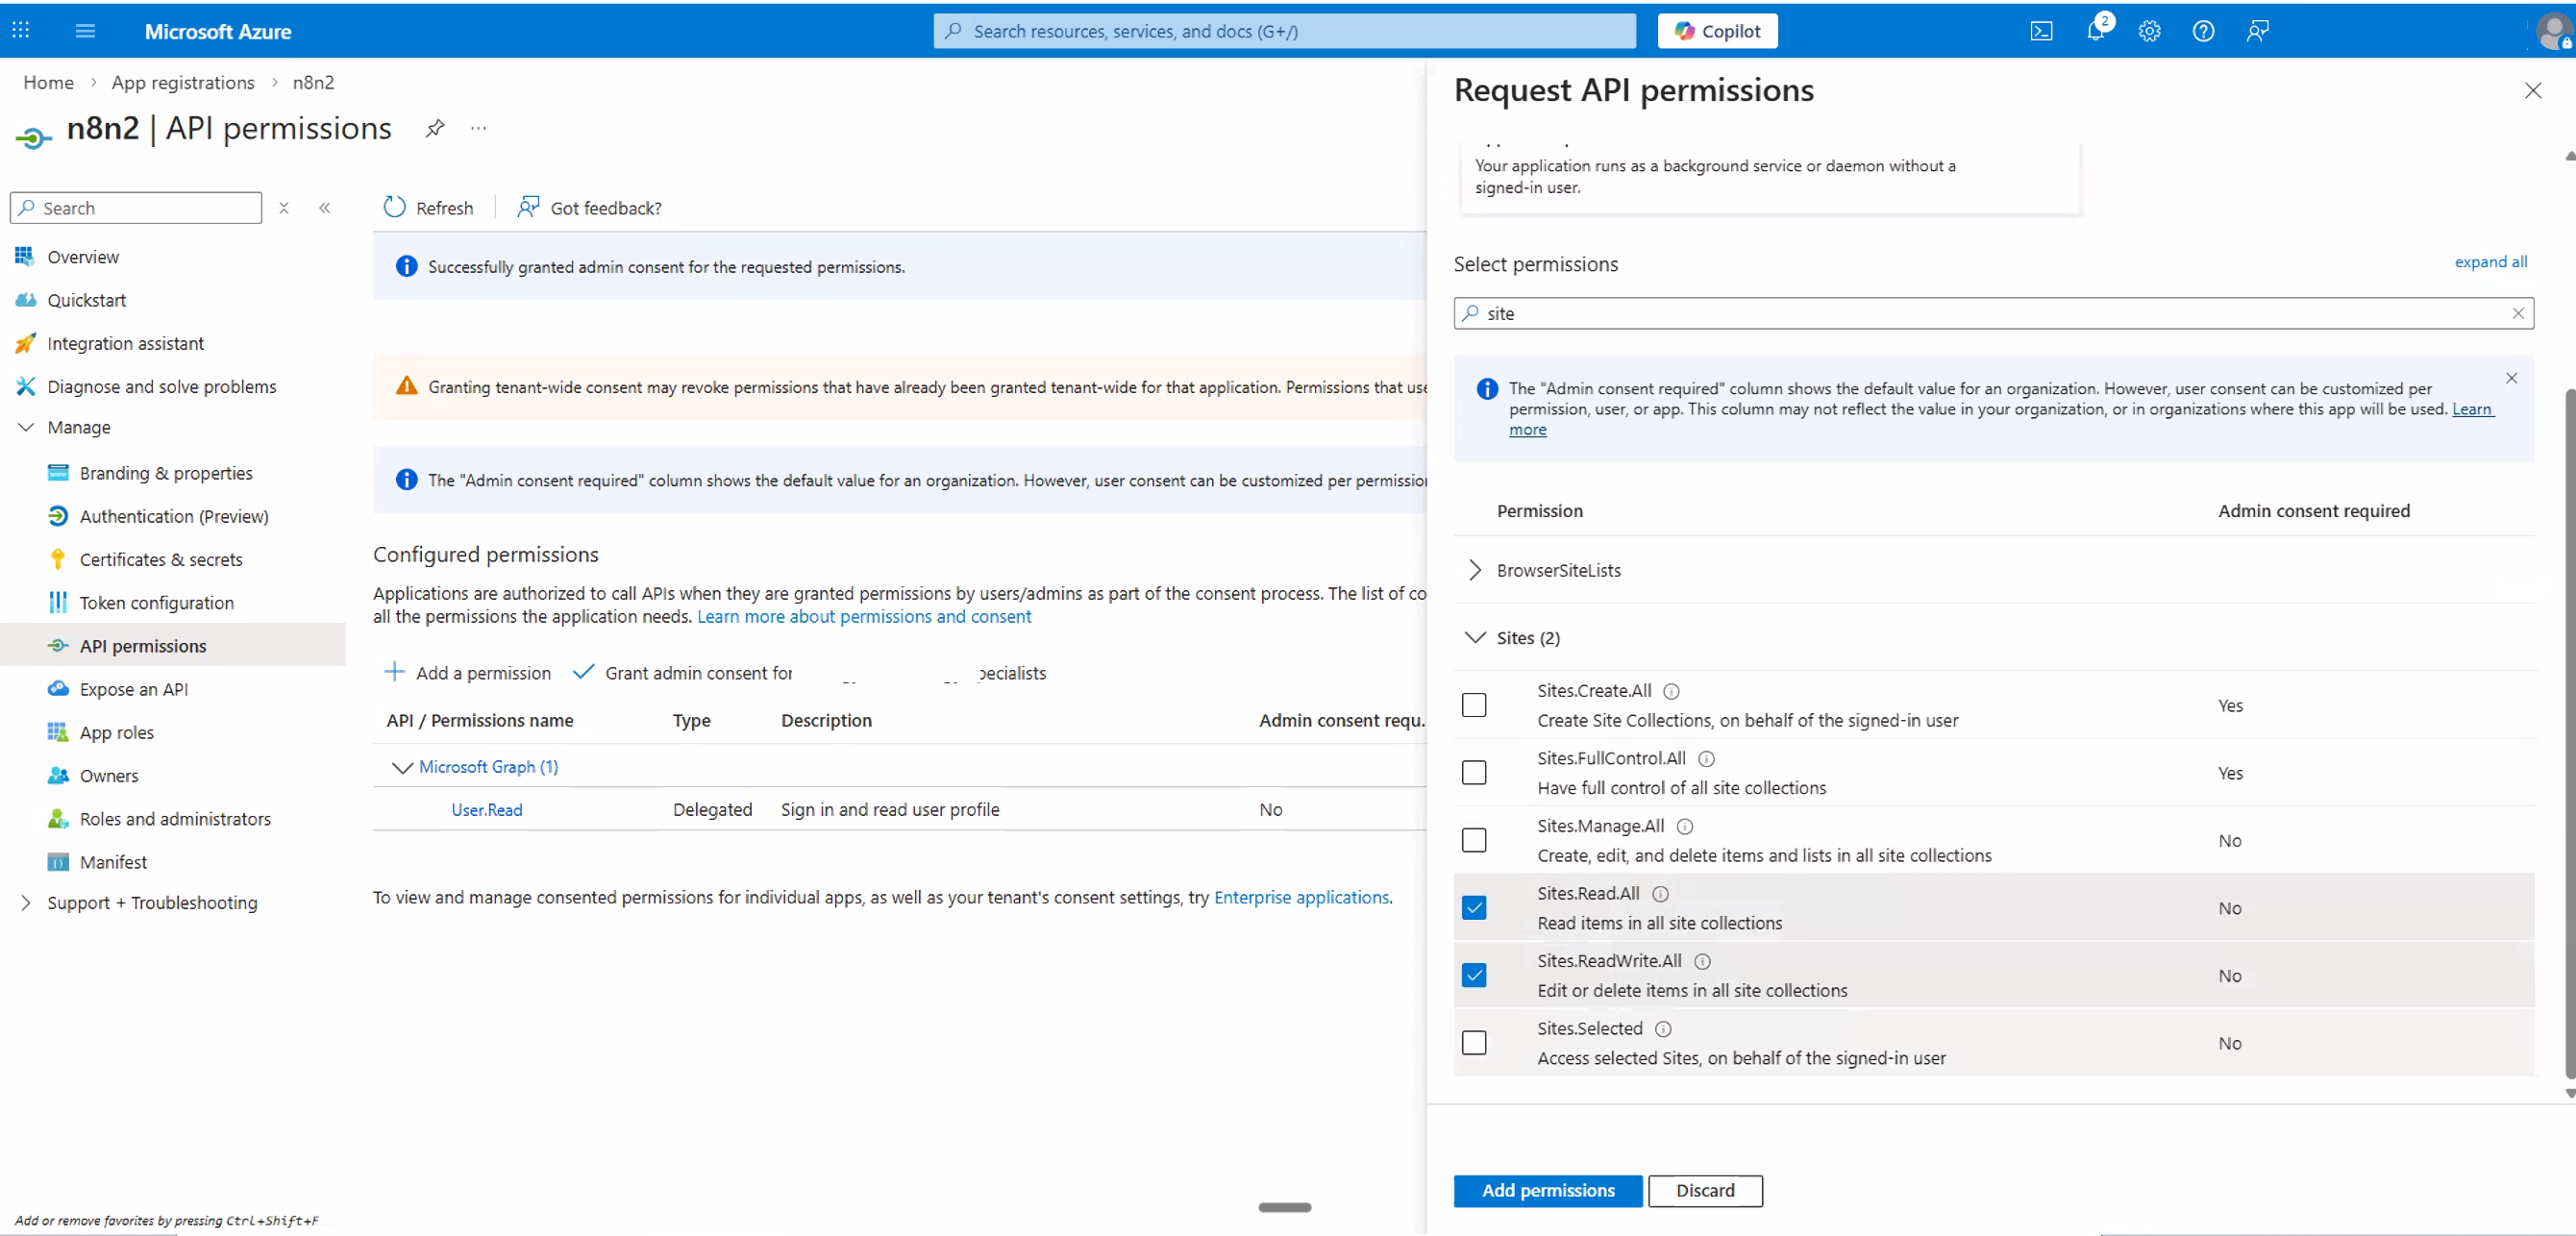
Sites.Read.All and Sites.ReadWrite.All (SharePoint).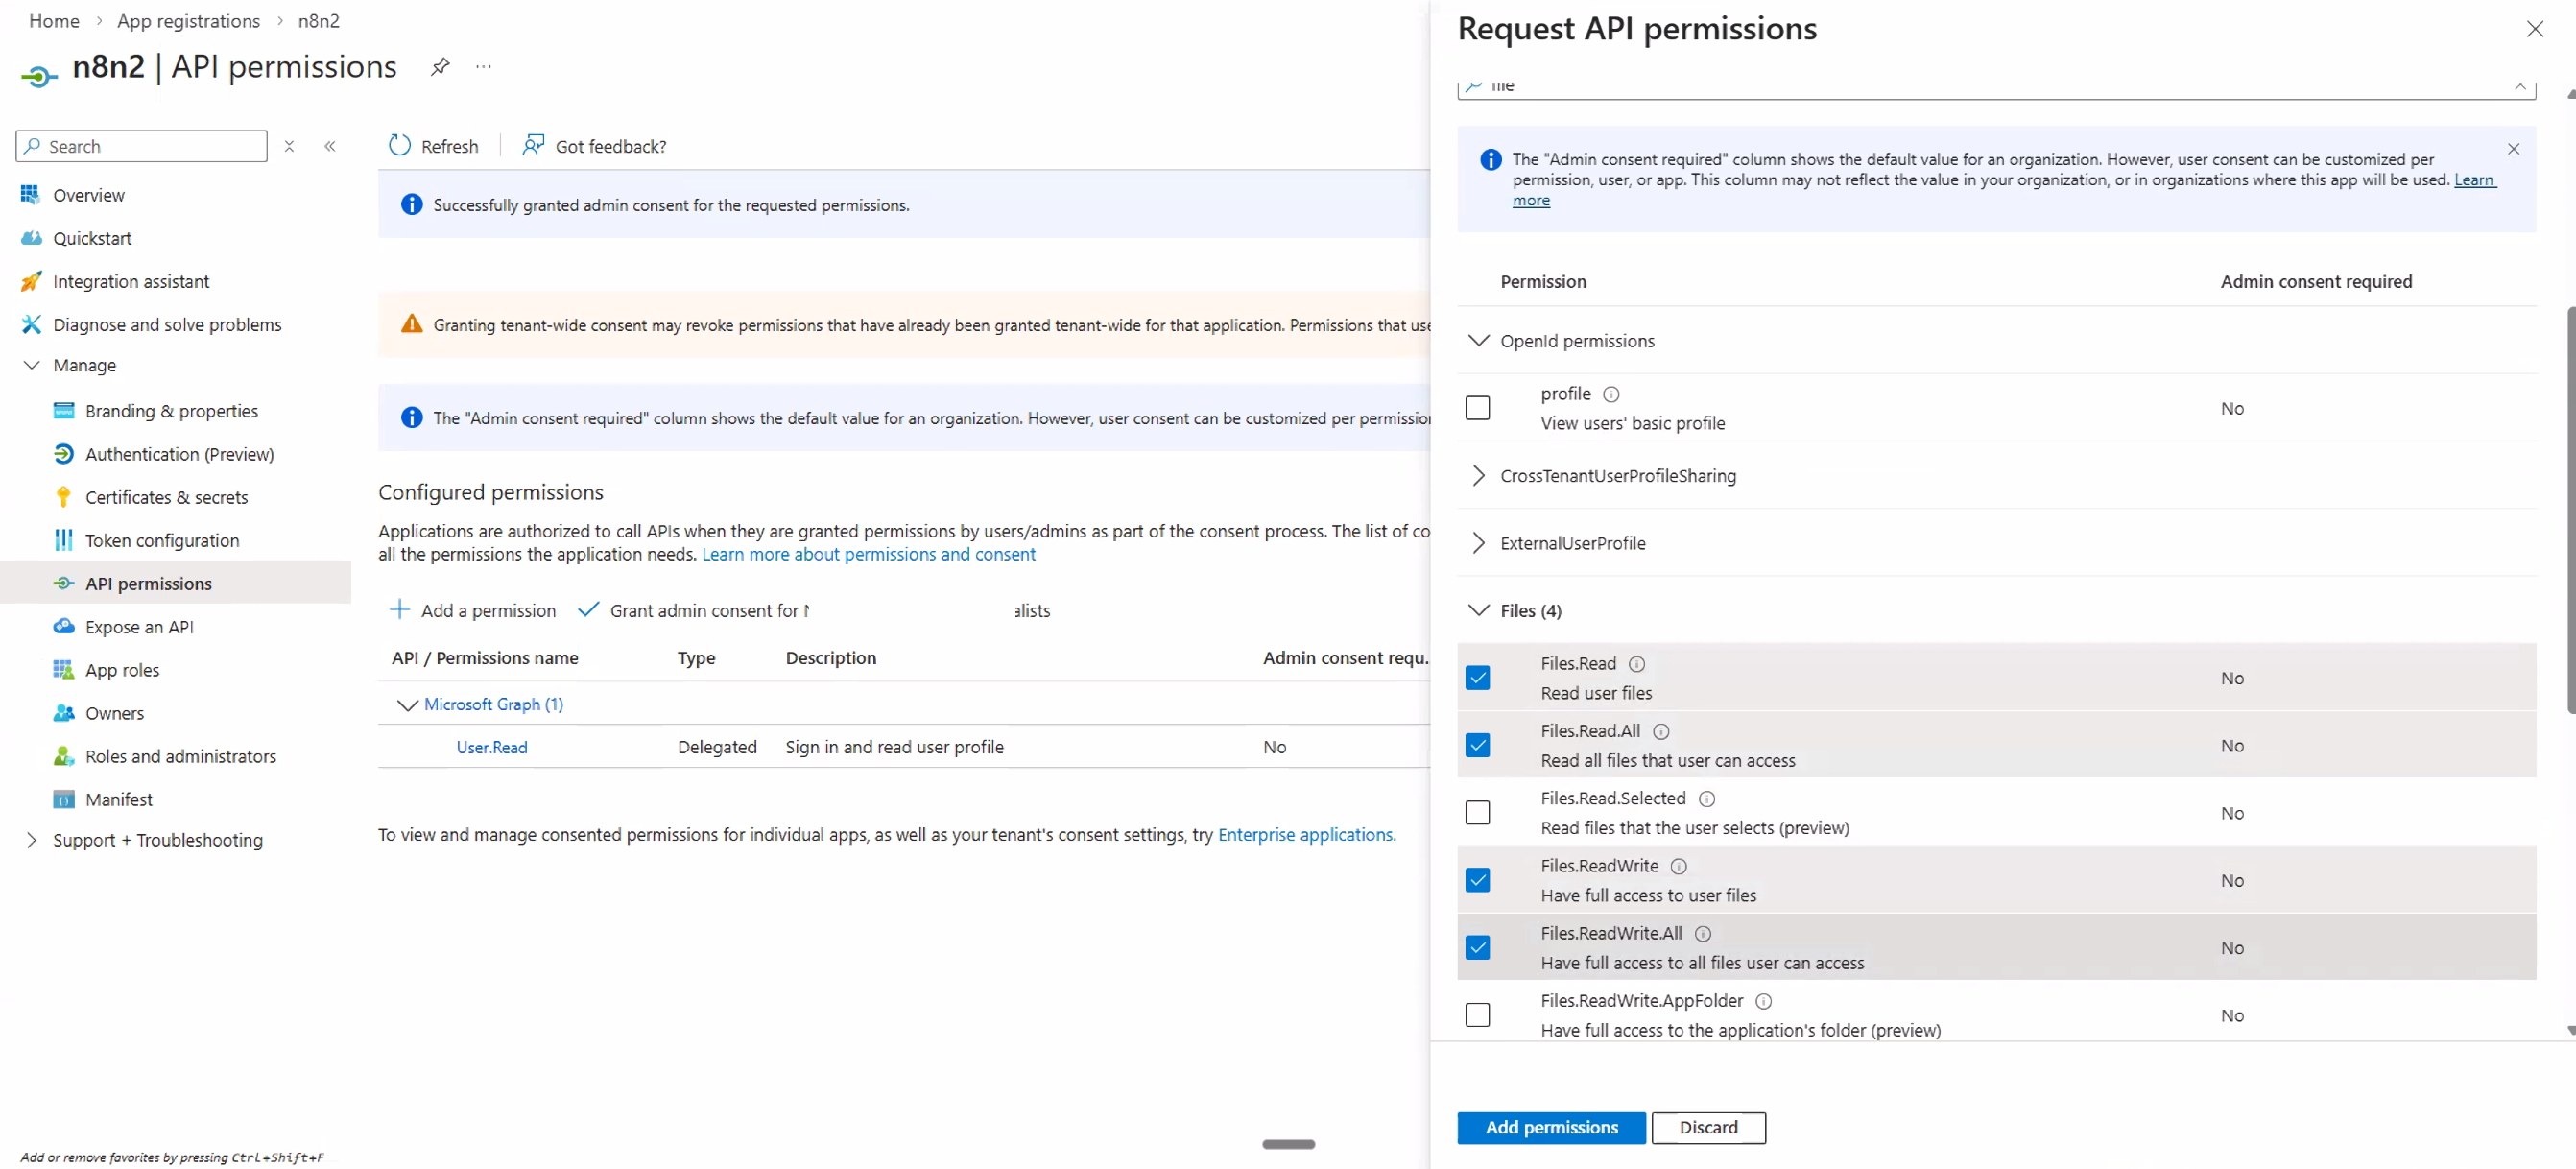
Files.Read and Files.ReadWrite (OneDrive/Excel).Double-check that offline_access is included in your permission list. This is easy to miss and is essential for n8n to maintain a persistent connection.
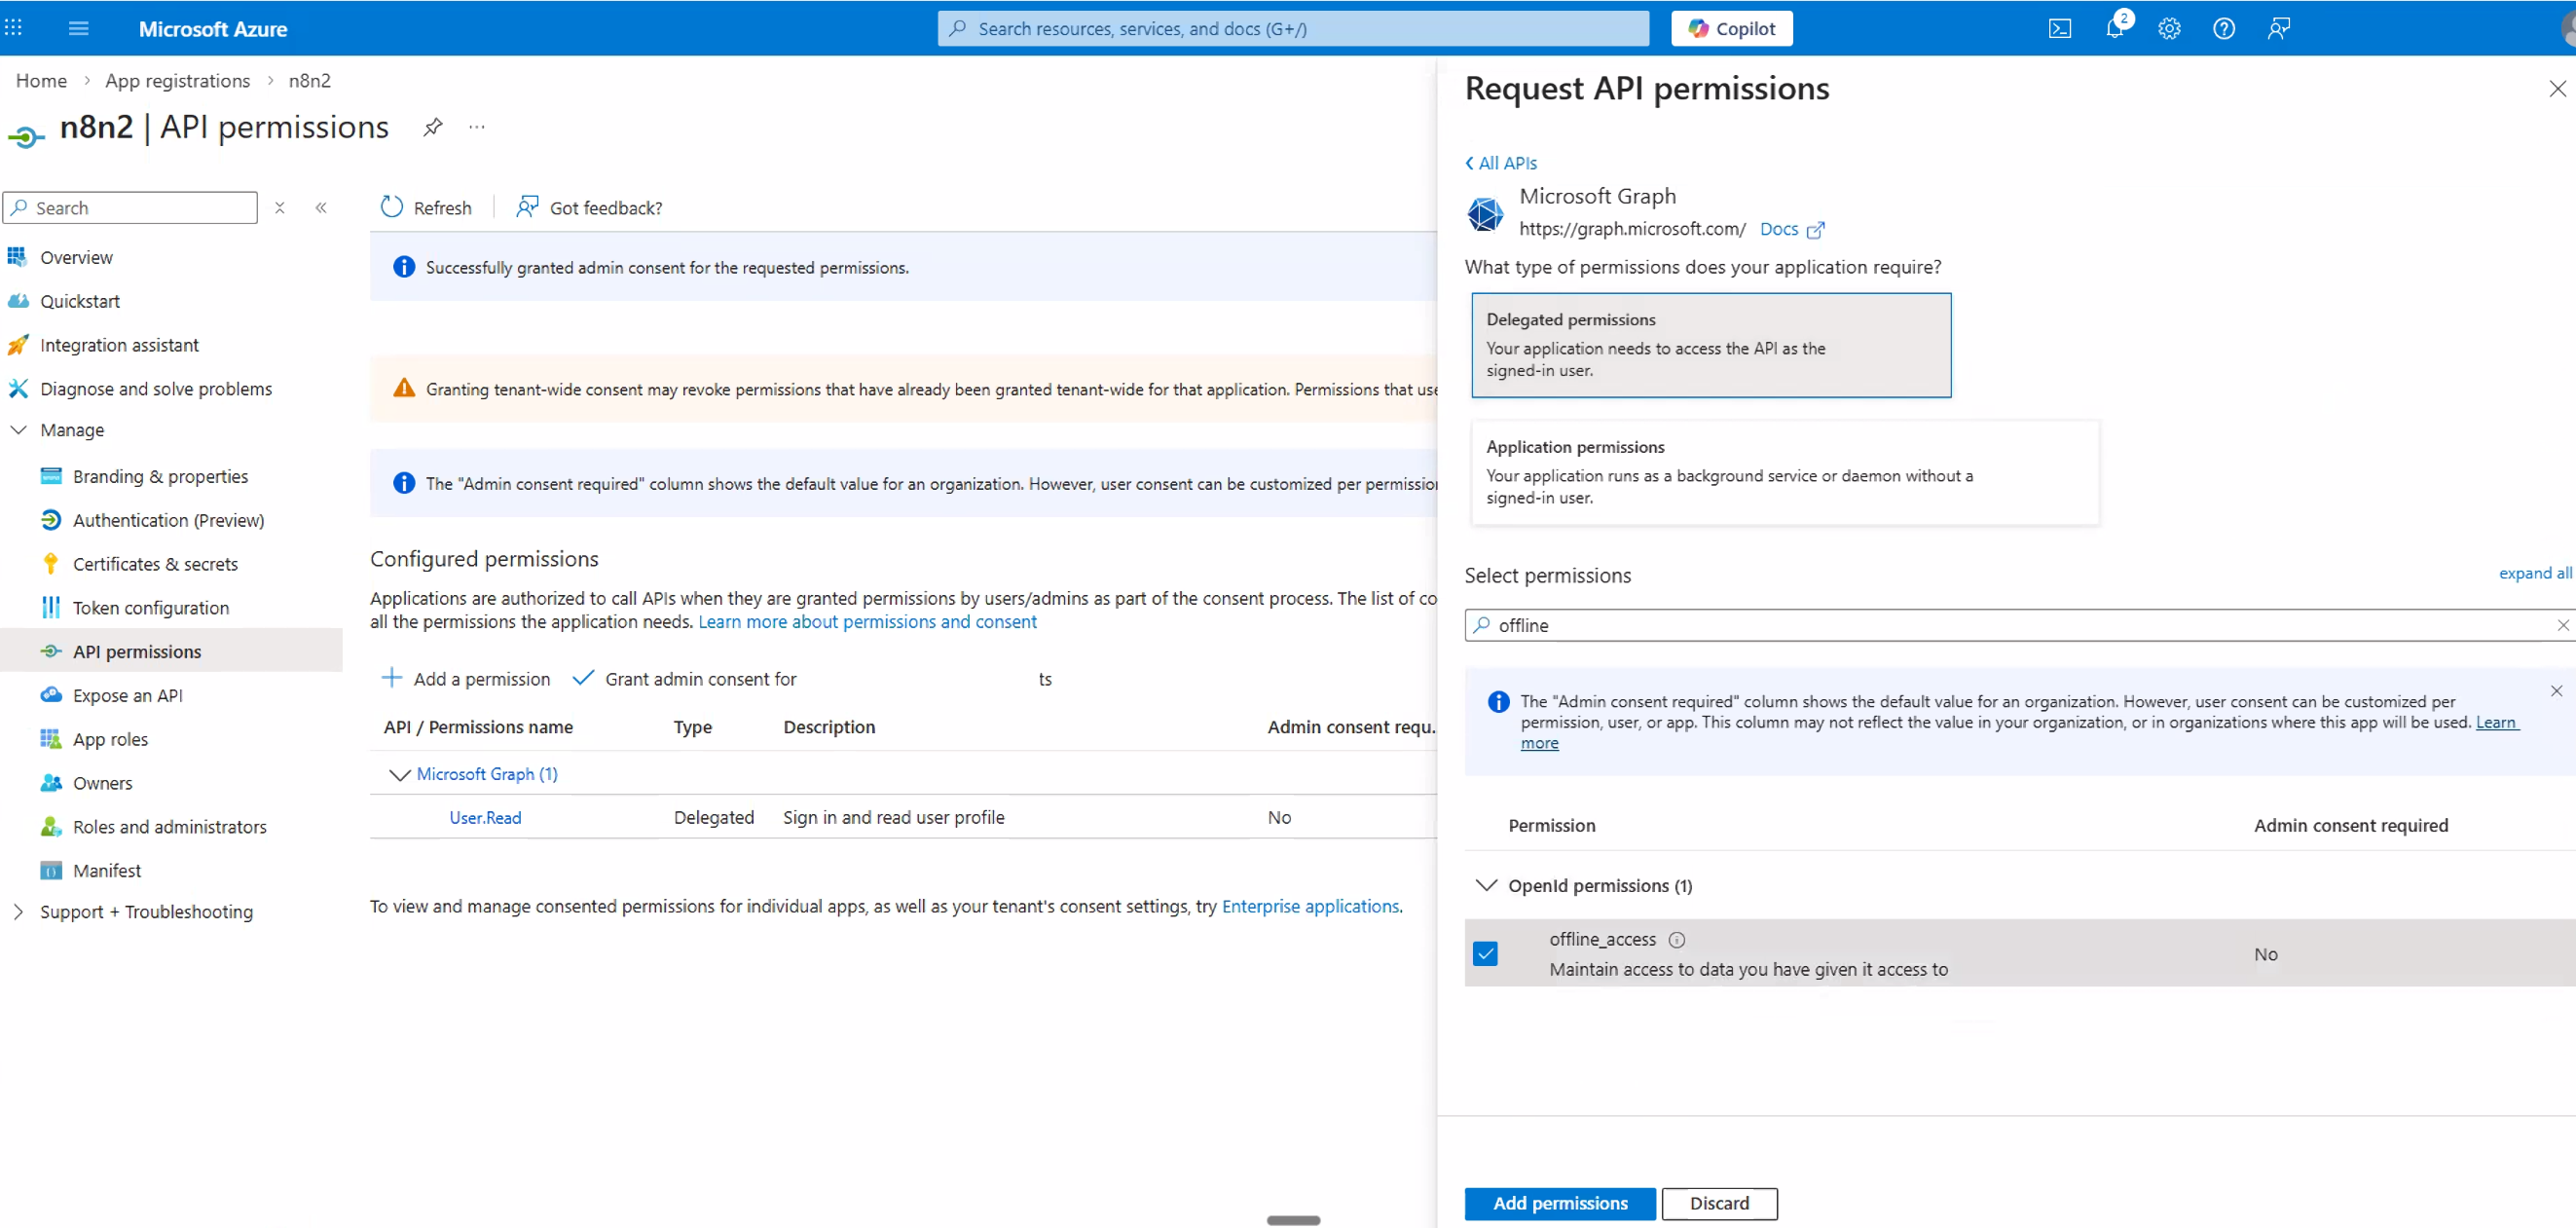
offline_access is explicitly selected in your permissions.7. Grant Admin Consent
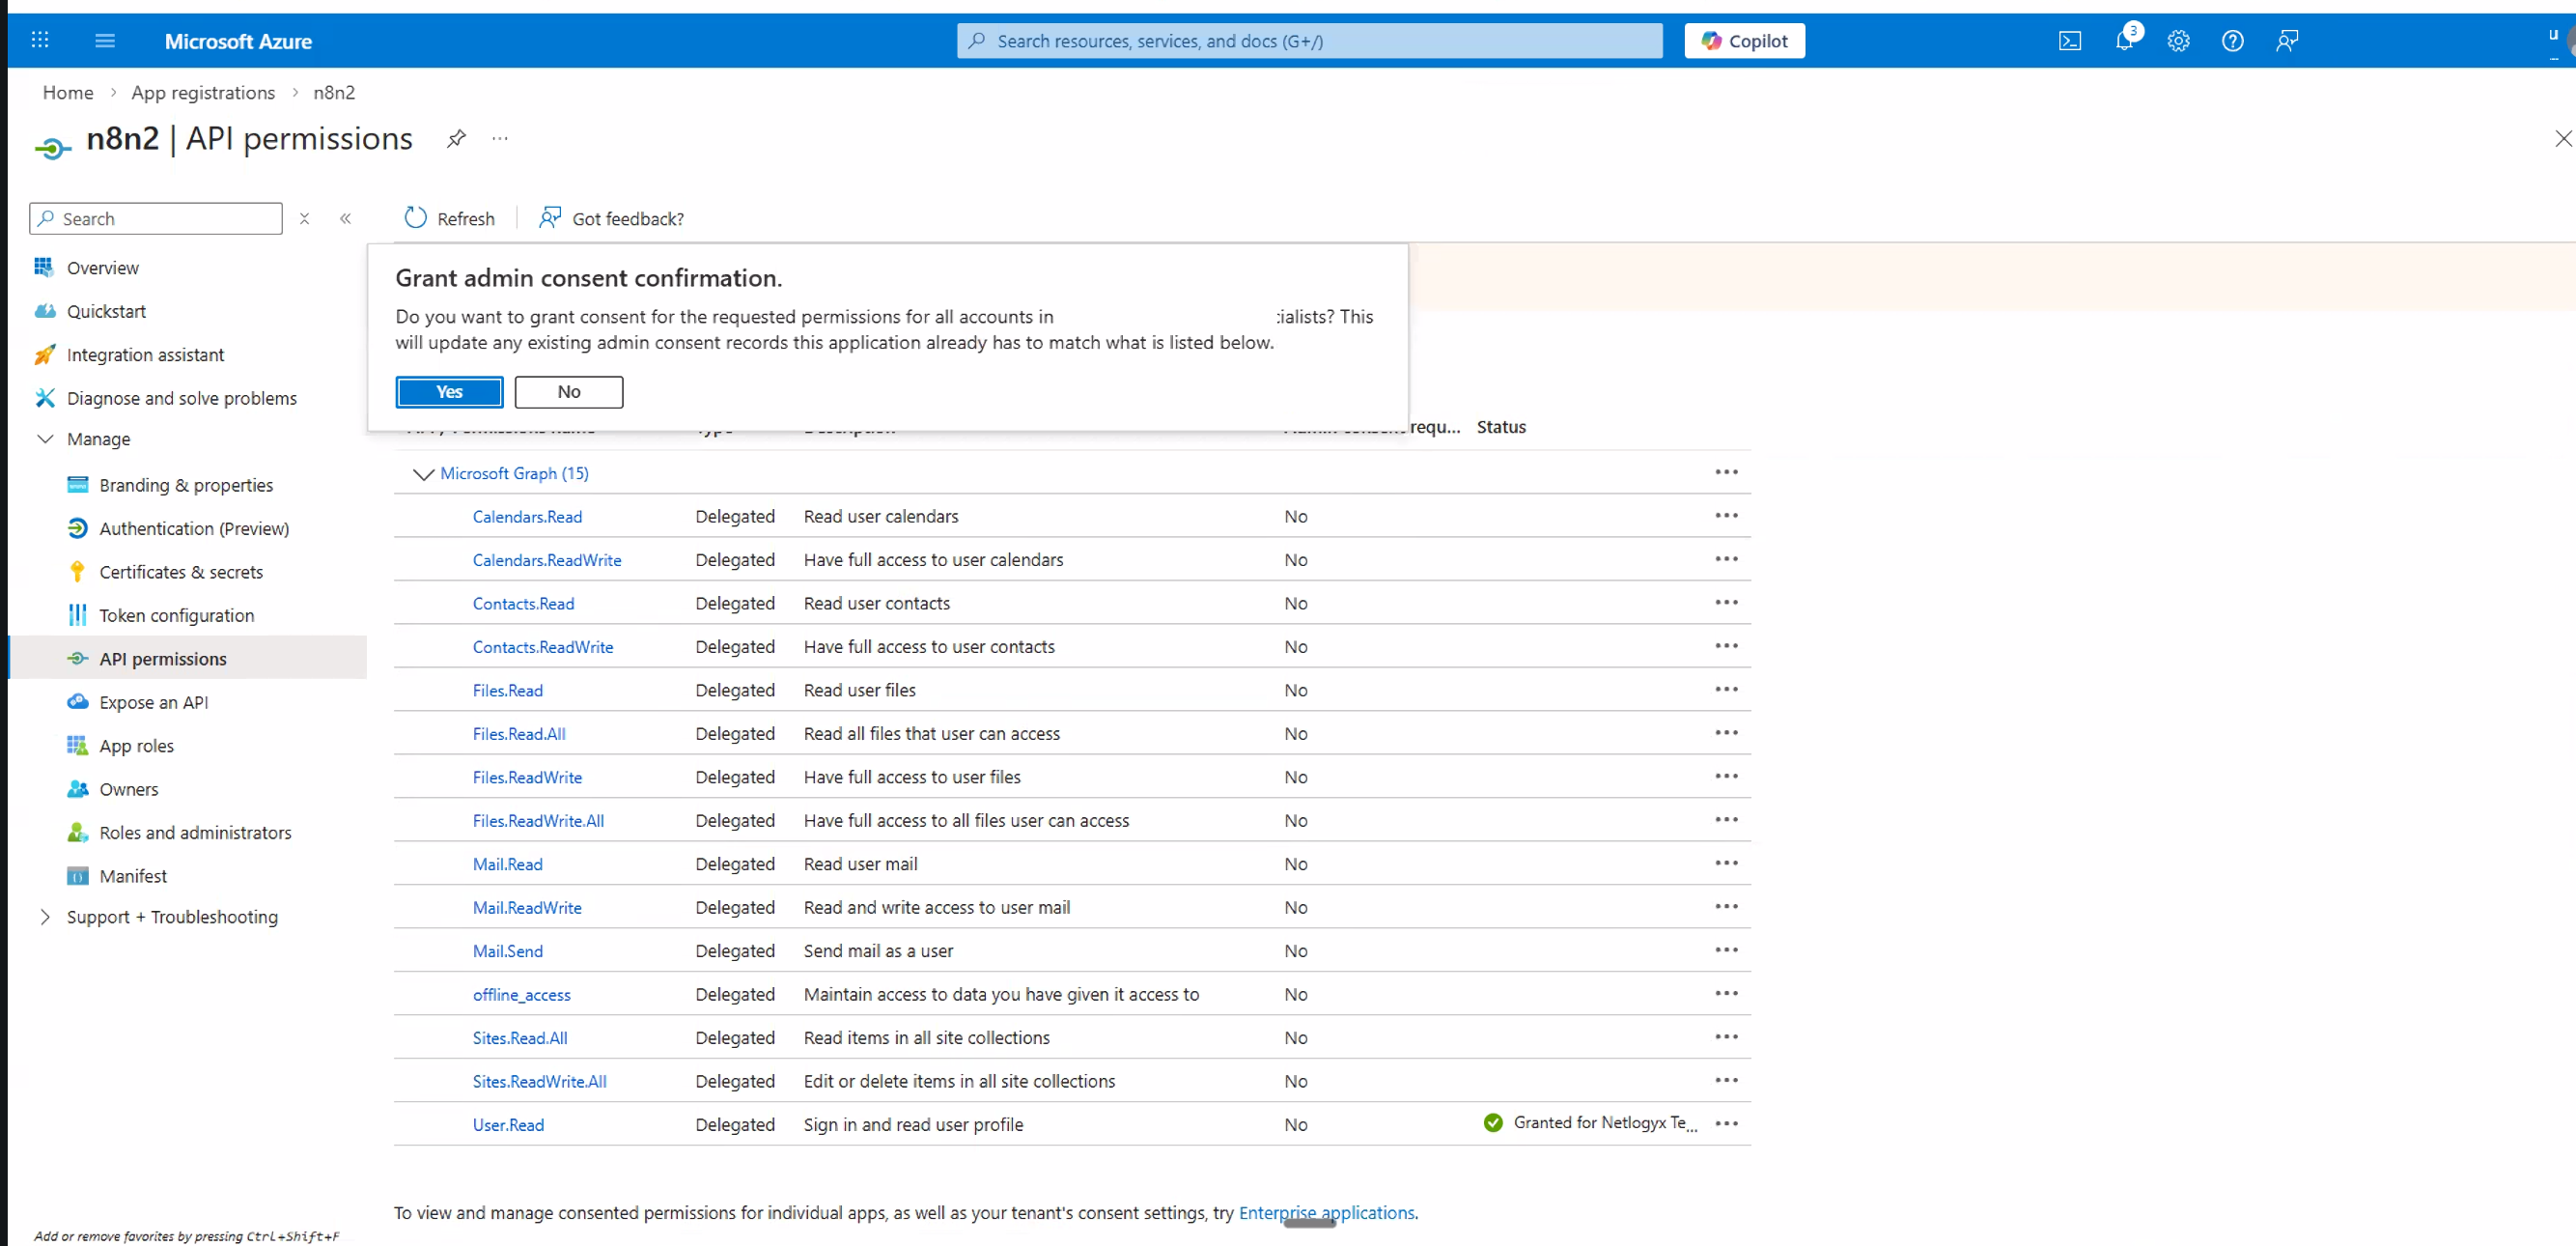
After adding all the necessary permissions, you need to grant admin consent so that these permissions are active for your organisation.
Back on the API permissions page, you should now see all your requested permissions listed (approximately 15 including the default User.Read). Review them to make sure everything looks correct.
Click the Grant admin consent for [your organisation] button. A confirmation popup will appear — click Yes to authorize the app.
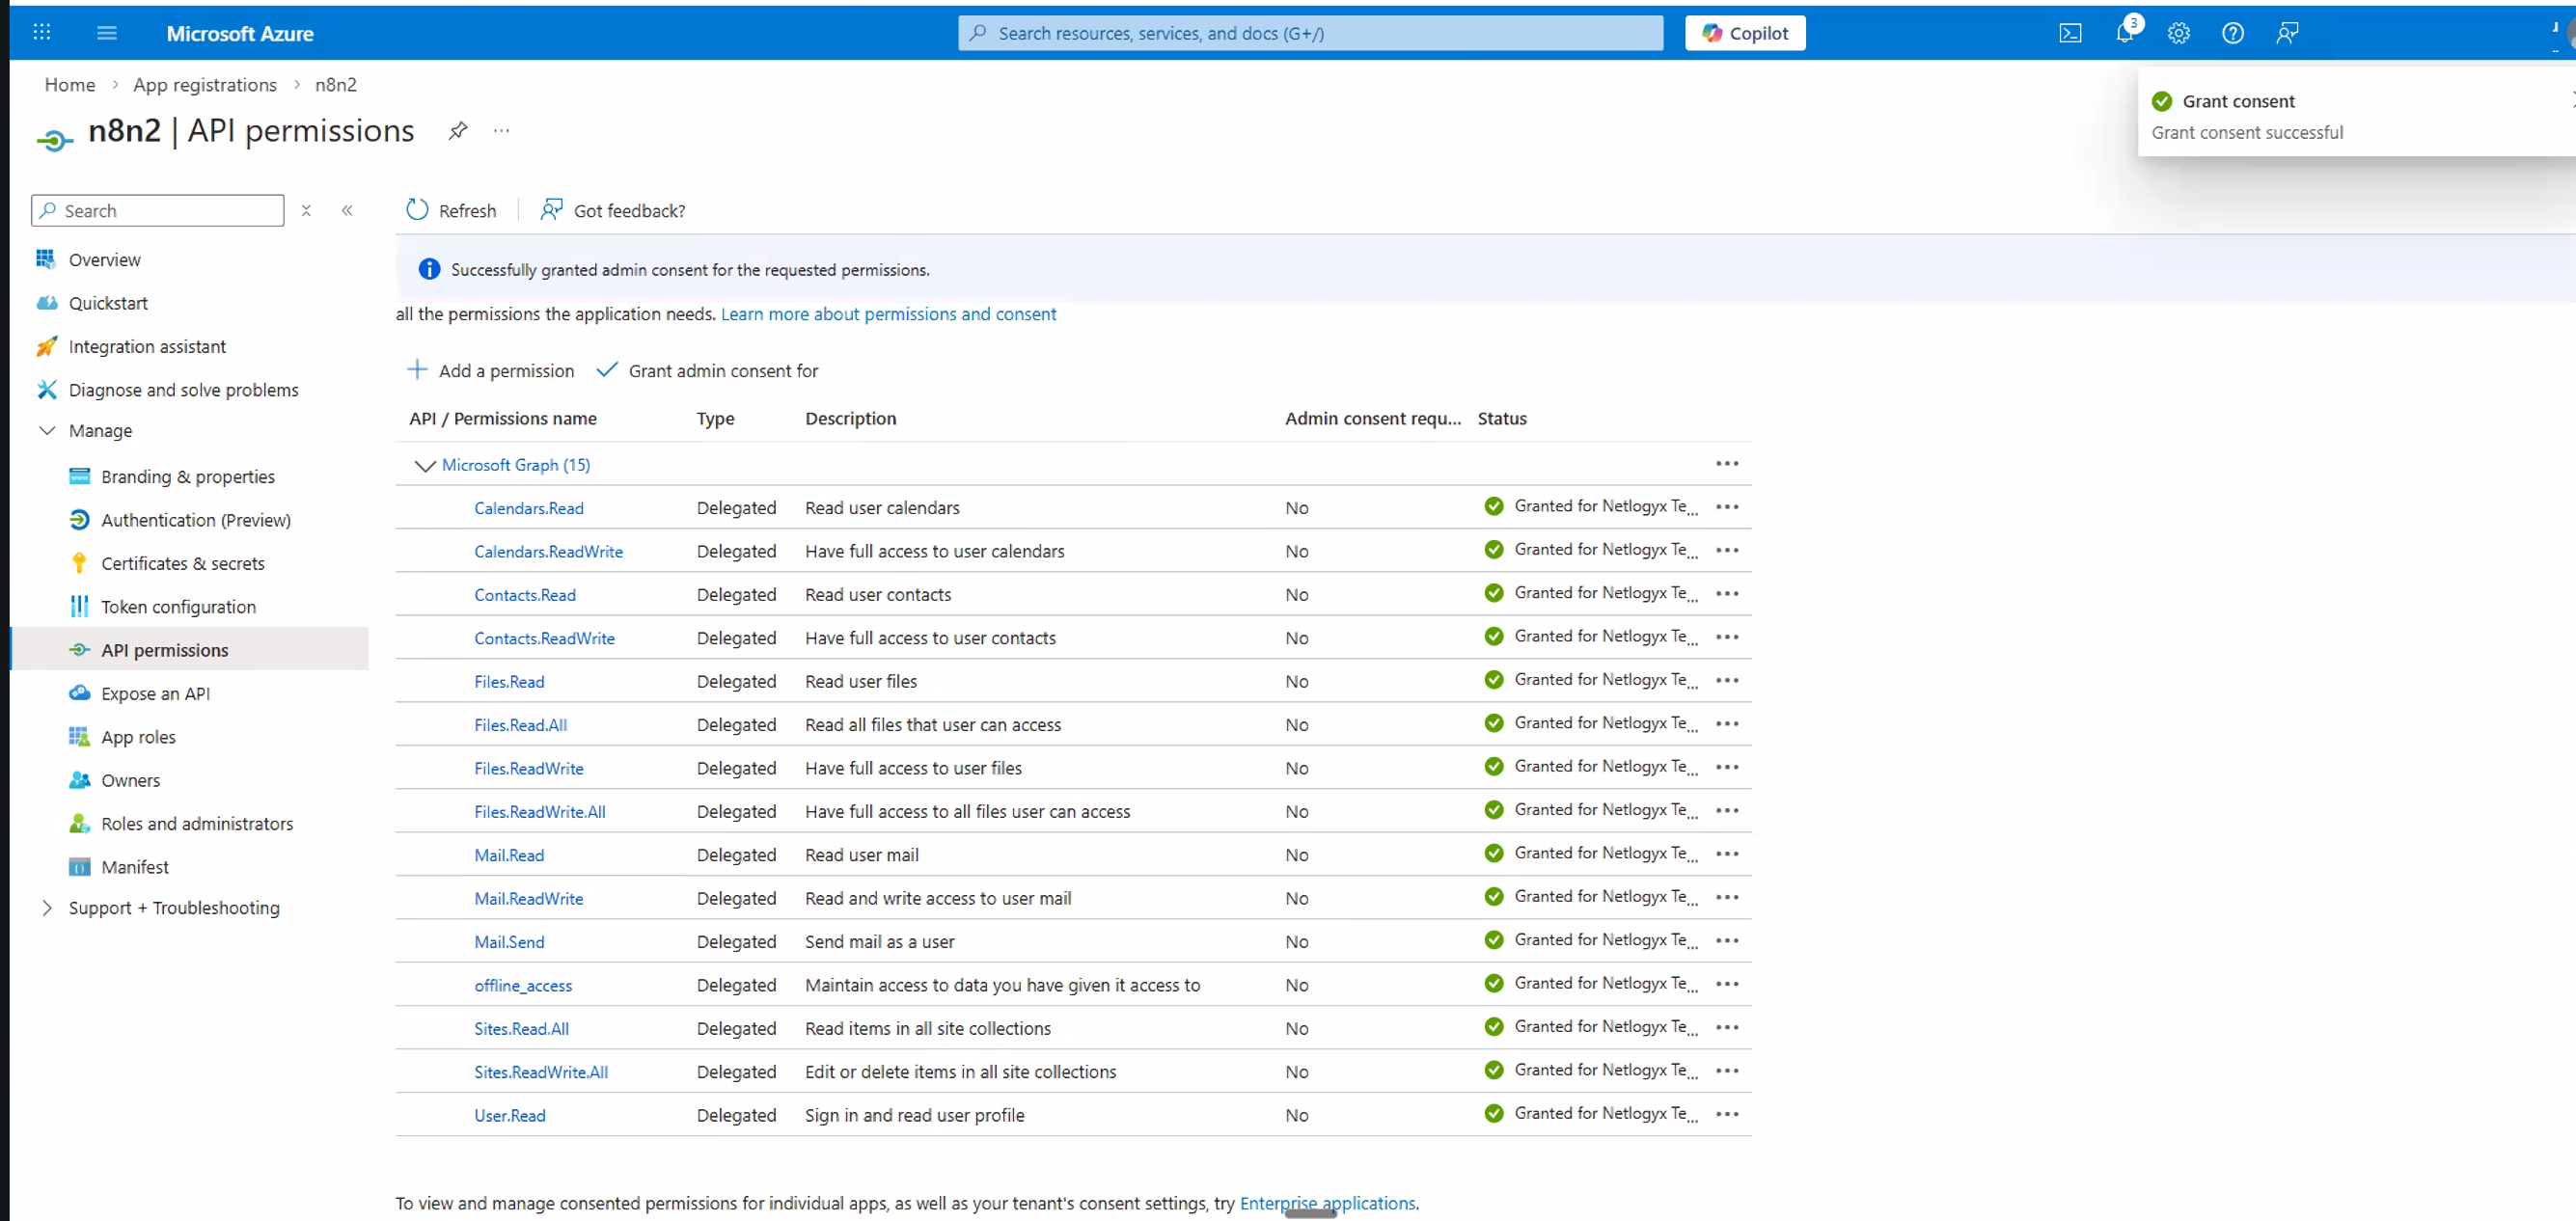
Once consent is granted, all permissions should now display green checkmarks in the Status column. This confirms everything is authorised and ready.
8. Create a Client Secret
The client secret acts as your application's "password" — n8n uses it along with the Client ID to authenticate with Microsoft.
In the left-hand navigation of your app registration, click Certificates & secrets.
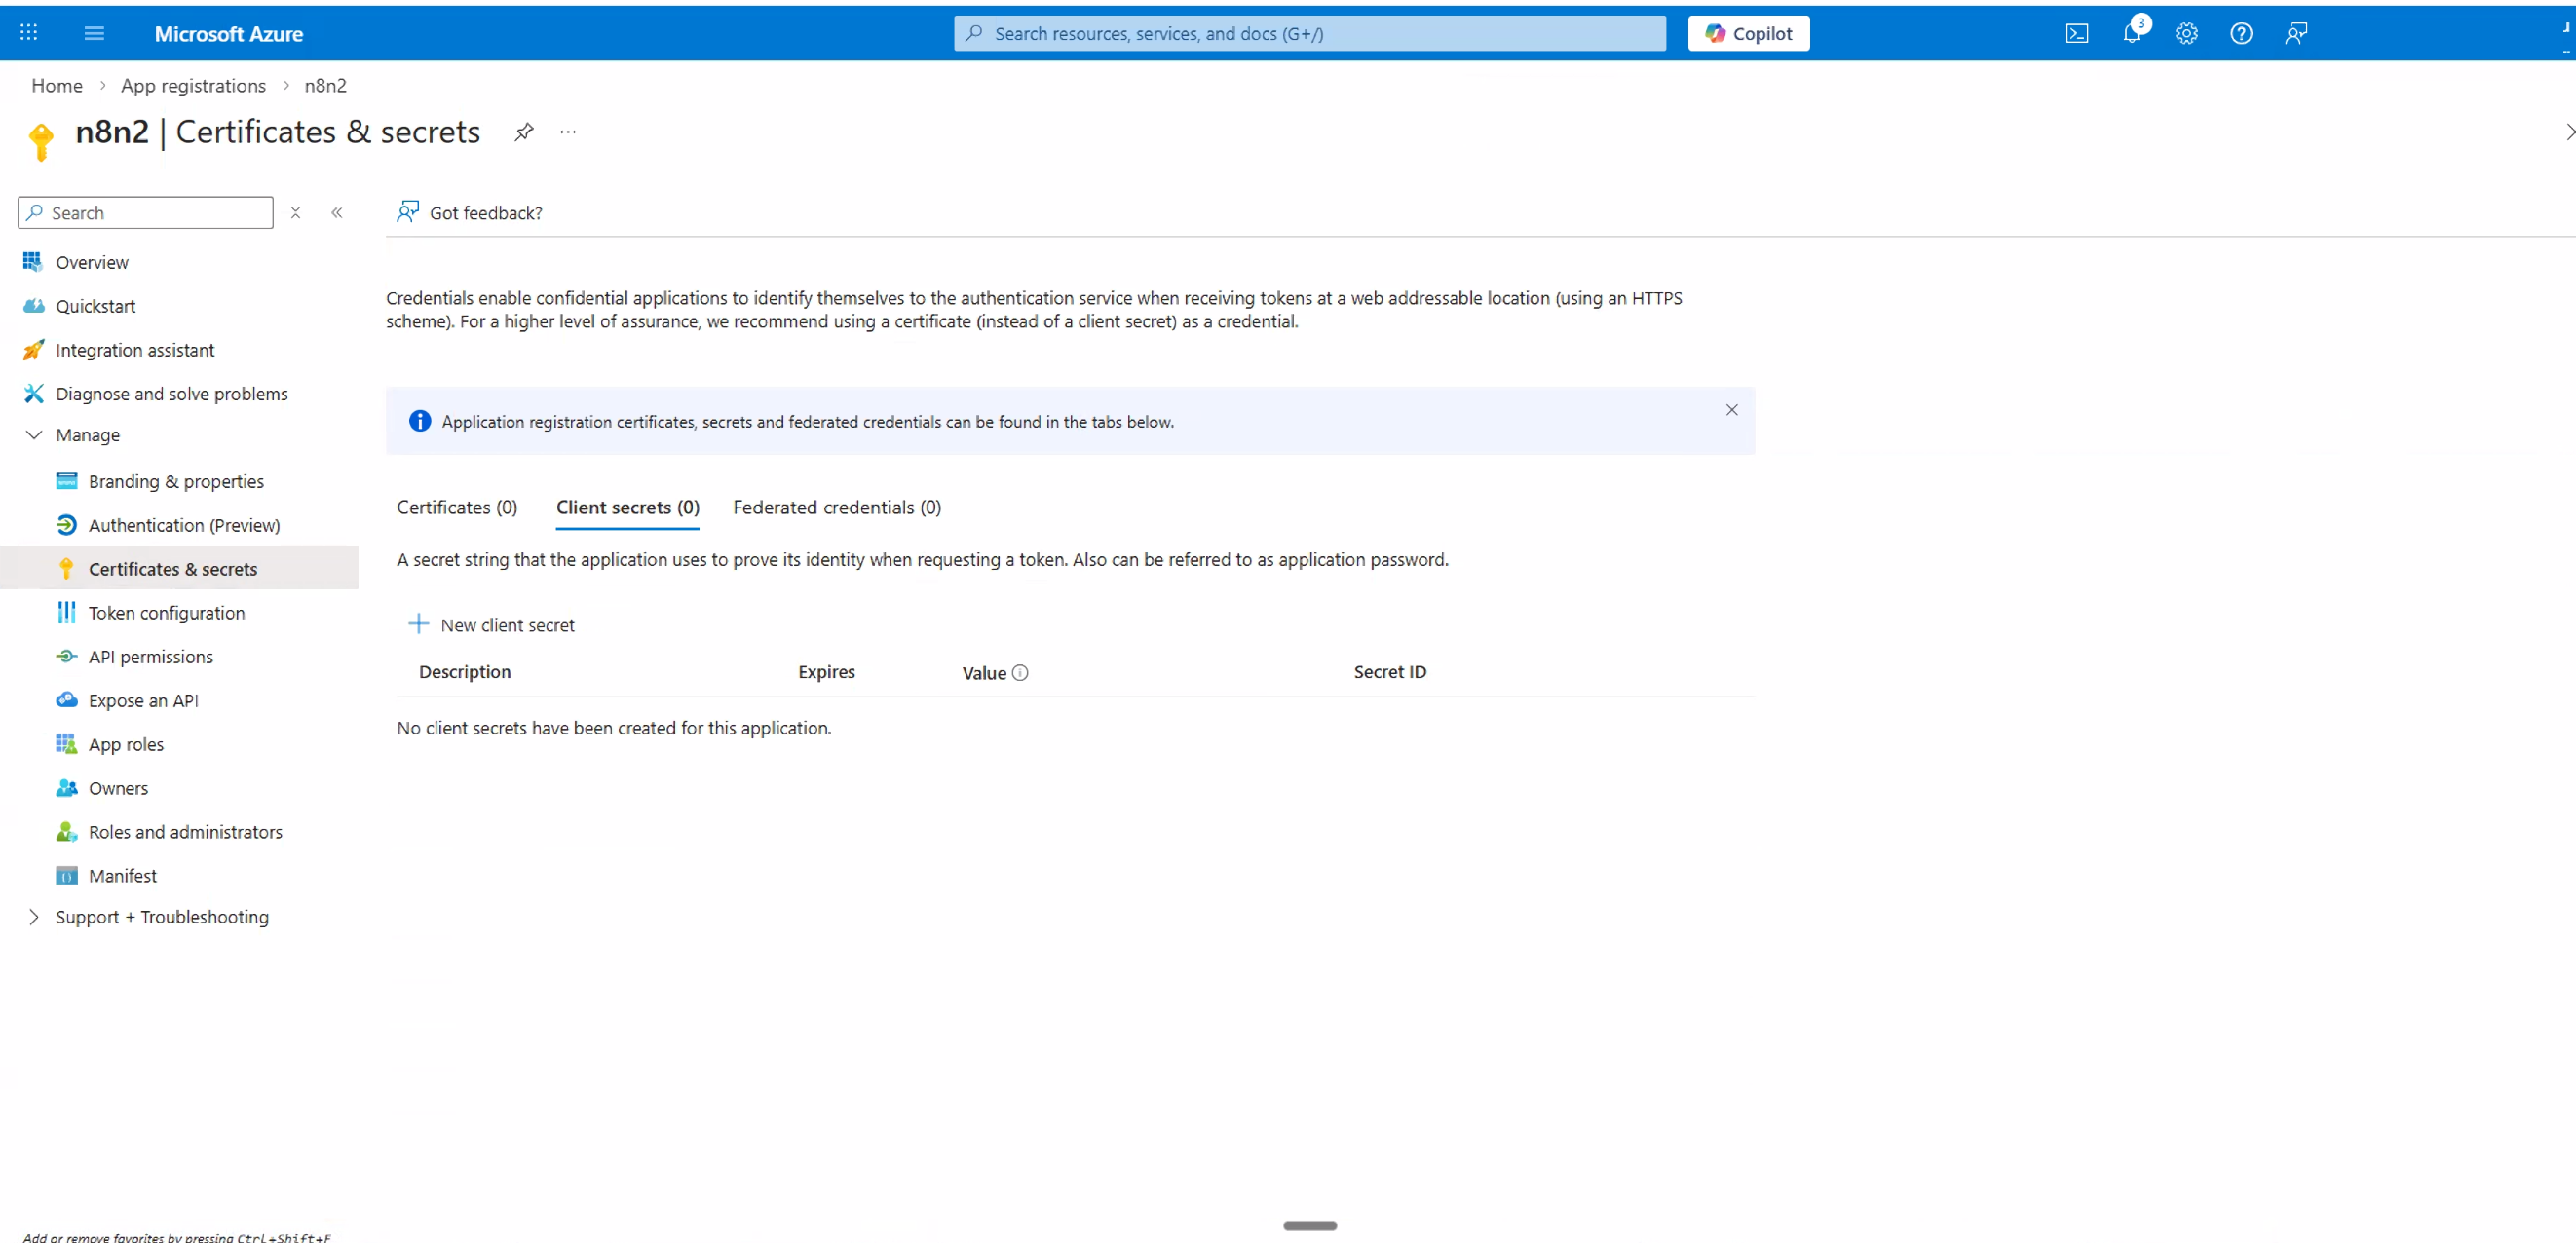
Under the Client secrets tab, click + New client secret.
Enter a Description (e.g. n8n credential) and choose an expiry period. We recommend 24 months (730 days) to reduce how often you need to rotate secrets. Click Add.
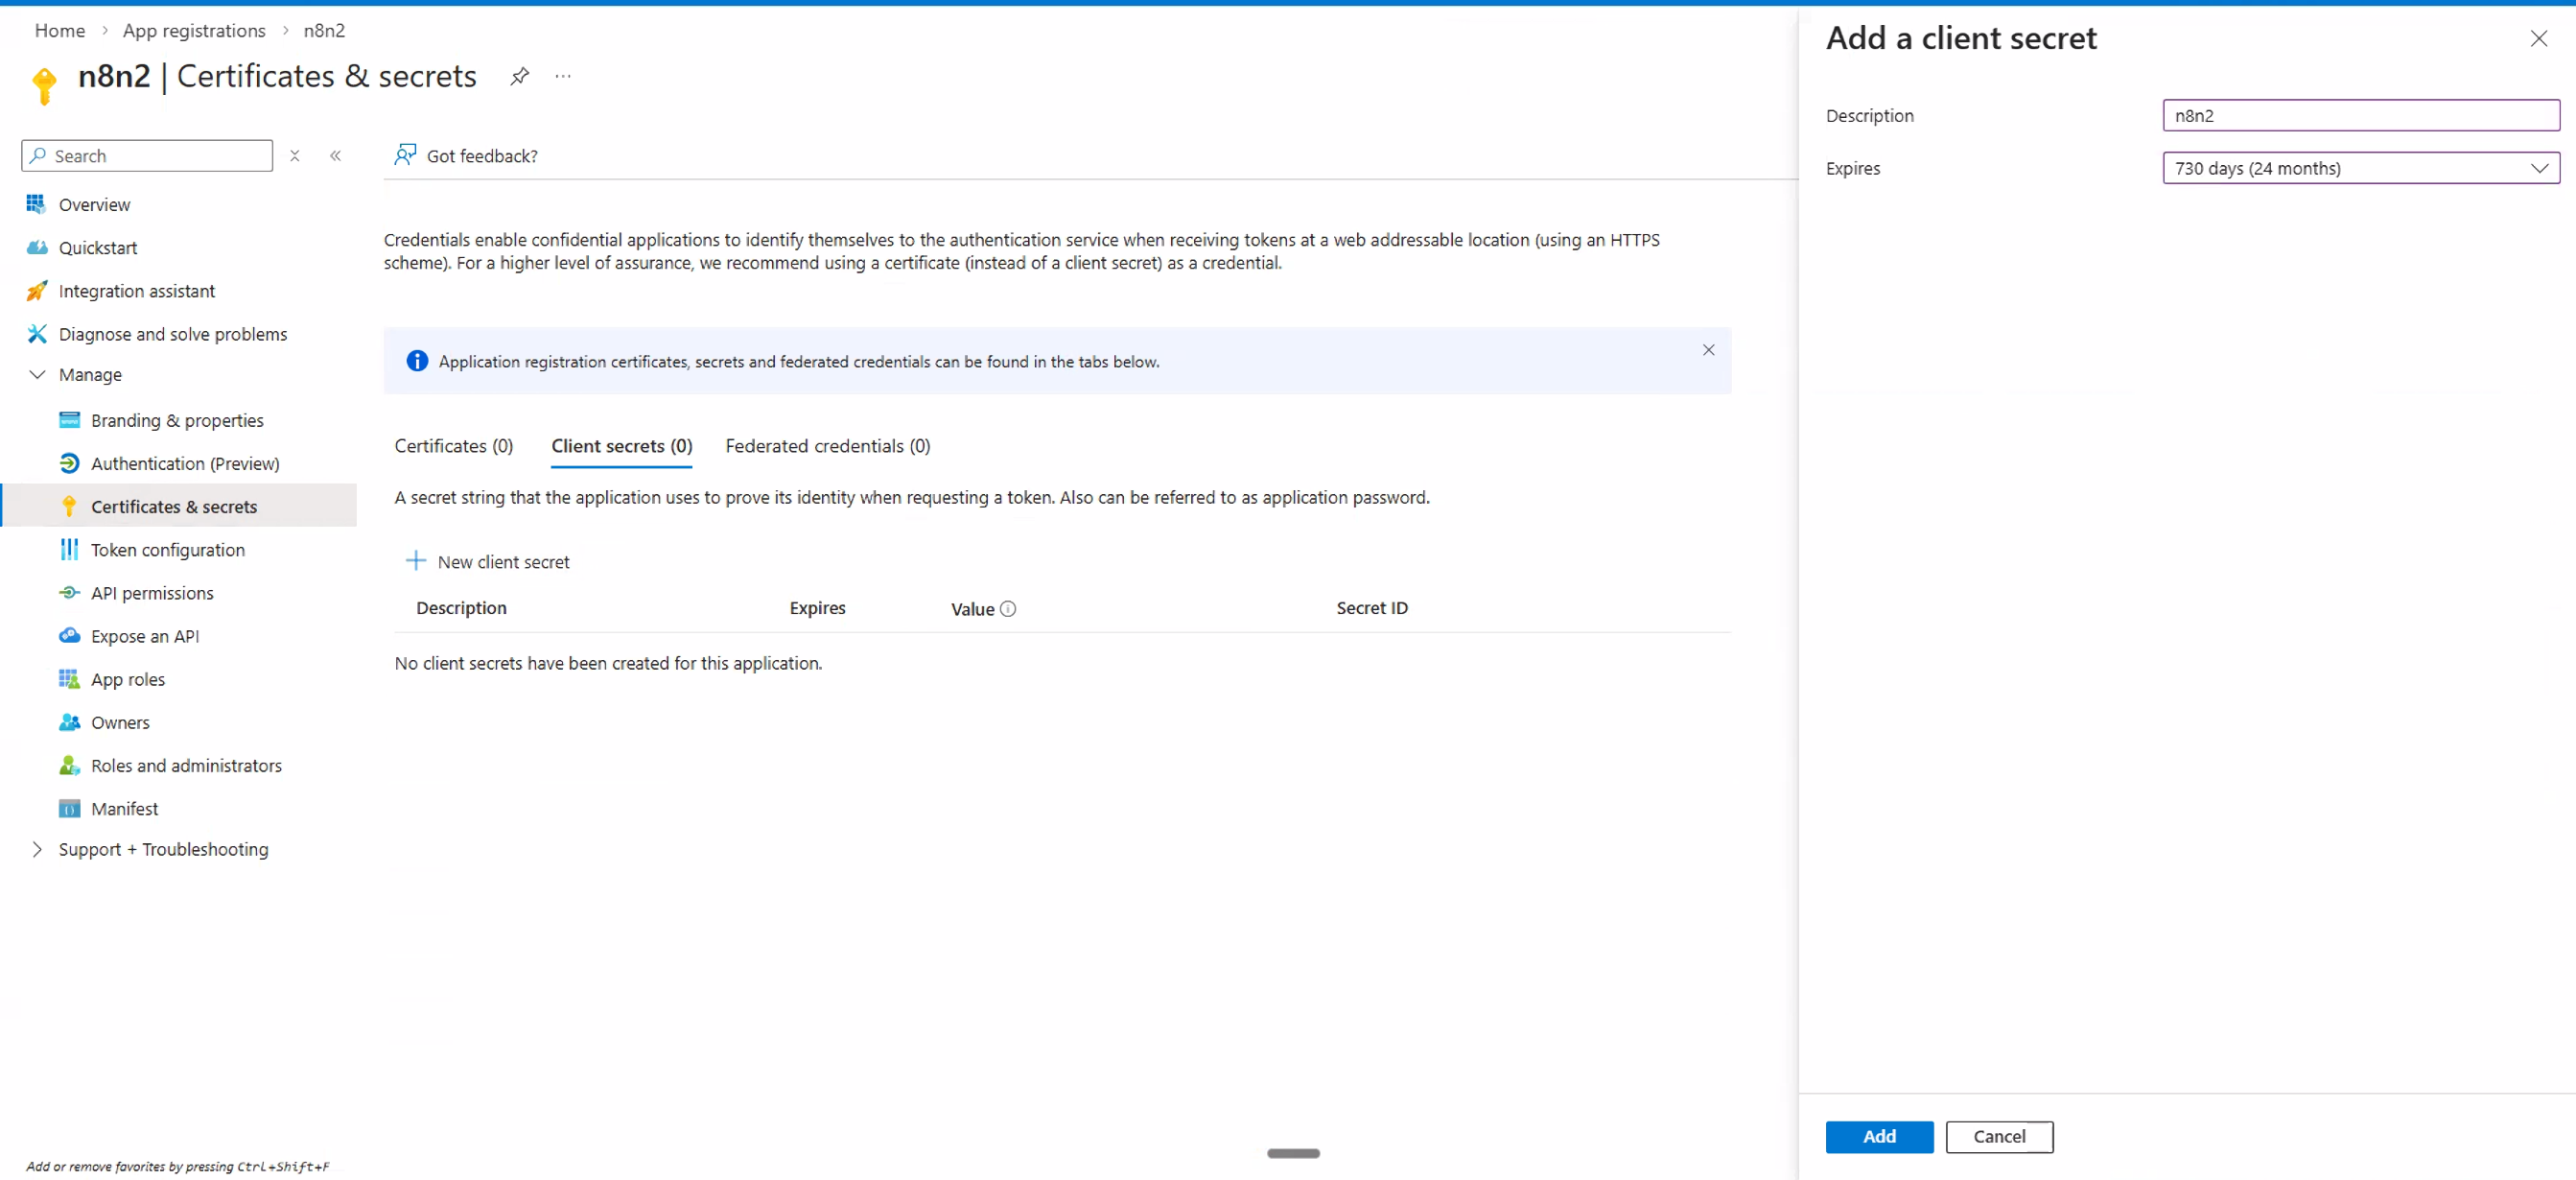
Your new secret will appear in the list. Immediately copy the Value (not the Secret ID) by clicking the copy icon.
9. Connect Your Account in n8n
Switch back to your n8n tab where you have the credential form open.
Paste the Application (client) ID you copied in Section 5 into the Client ID field.
Paste the Client Secret value you just copied in Section 8 into the Client Secret field.
Click the Connect my account button. A Microsoft sign-in window will pop up.
Sign in with the Microsoft account you want n8n to use, review the permissions being requested, scroll down and click Accept.
You should see a "Connection successful" confirmation in n8n. Your credential is now ready to use!
10. Troubleshooting: "Need Admin Approval"
If you're using a corporate Microsoft 365 / Entra ID (Azure AD) account and you see an error message saying "Need admin approval" when you try to connect, this means your organisation's IT policies require an administrator to approve third-party app access before users can consent.
What This Means
Your organisation's Microsoft Entra ID is configured so that users cannot grant consent to apps on their own. An administrator with the appropriate role (Privileged Role Administrator, Cloud Application Administrator, or Application Administrator) needs to approve the app registration.
What To Do
Contact your IT administrator and share the following information:
- The Application (client) ID from your Azure app registration.
- The name of the app you registered (e.g. "n8n – Awesomate").
- A request to grant tenant-wide admin consent for the application.
Your administrator can grant consent using one of two methods:
Method A: Via the Entra Admin Center
- Sign in to the Microsoft Entra admin center.
- Navigate to Entra ID → Enterprise apps → All applications.
- Find the app registration by name.
- Click Permissions under Security.
- Click Grant admin consent and confirm.
Method B: Via Direct URL
The admin can open this URL in their browser, replacing the placeholder values:
https://login.microsoftonline.com/{tenant-id}/adminconsent?client_id={client-id}
Replace {tenant-id} with your organisation's tenant ID (or a verified domain name), and {client-id} with the Application (client) ID from the app registration.
Once the admin has granted consent, go back to n8n and click Connect my account again. It should now work without the approval error.
11. Reference Links
- n8n Docs — Microsoft Credentials
- Microsoft Azure — App Registrations
- Microsoft Learn — Grant Admin Consent
- Microsoft Learn — Authentication & Authorization Basics
- Microsoft Graph — Permissions Reference
© 2026 Awesomate — Managed n8n Hosting & AI Automation