
How to Connect Xero to N8N Using a Custom Connection
This guide walks you through setting up a custom connection between your Xero account and N8N, giving you full access to Xero's API for tasks such as creating invoices, reading reports, and managing your ledger. It is intended for users who want to build automated workflows using Xero data inside their N8N environment.
Prerequisites
- An active Xero account with administrator access
- Access to your N8N account (via your company's subdomain.awesomate.io login)
- A Xero custom connection purchase (covered in Step 2)
- Access to developer.xero.com
Step 1: Understand What a Custom Connection Enables
A custom connection gives you full access to Xero's API, going well beyond what the standard free API offers. With this connection in place, you can create customers and invoices, read financial reports, access your general ledger, and much more. This level of access is recommended for anyone who wants to build reliable, data-rich automations with Xero. A custom connection is a paid feature within Xero and costs $10 per connection.
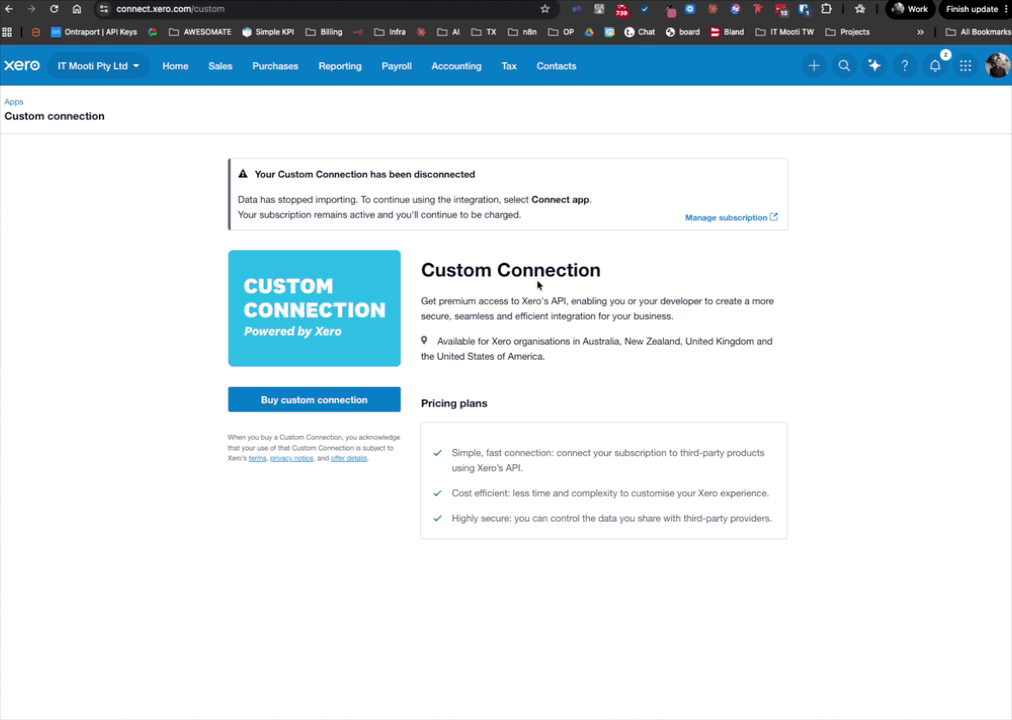
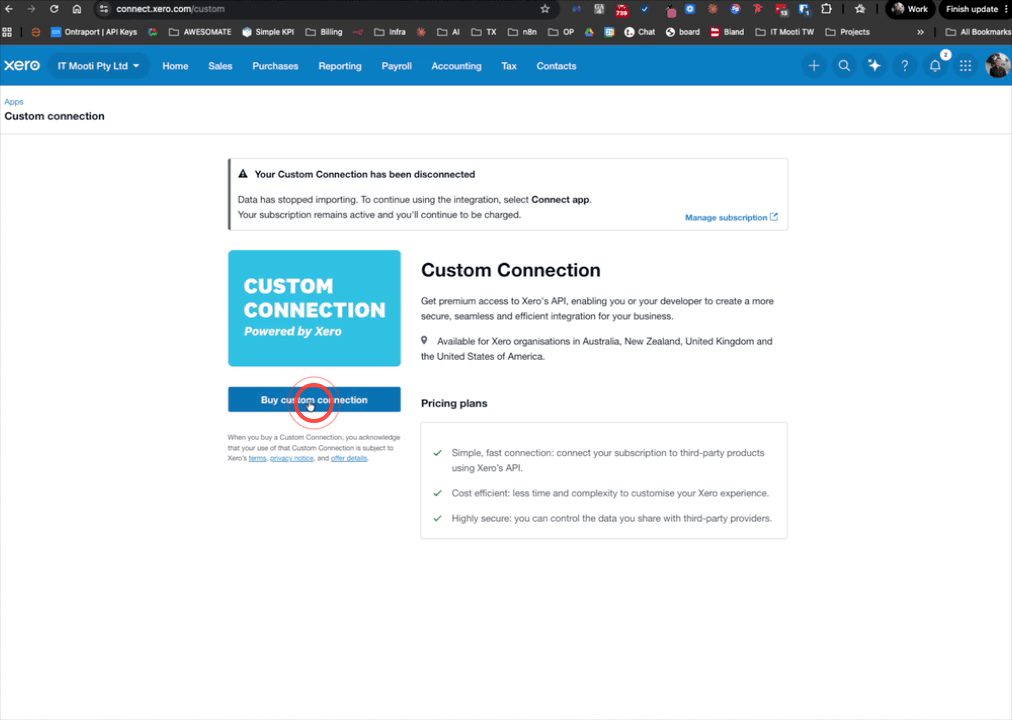
Step 2: Purchase a Custom Connection in Your App
To get started, click Buy Custom Connection within your app. This will take you to the purchase page where you can select the plan that suits your needs and buy as many connections as required. Once you have made your selection, click Confirm Plan to complete the purchase. After the purchase is confirmed, you will be able to create custom connections within your Xero account.
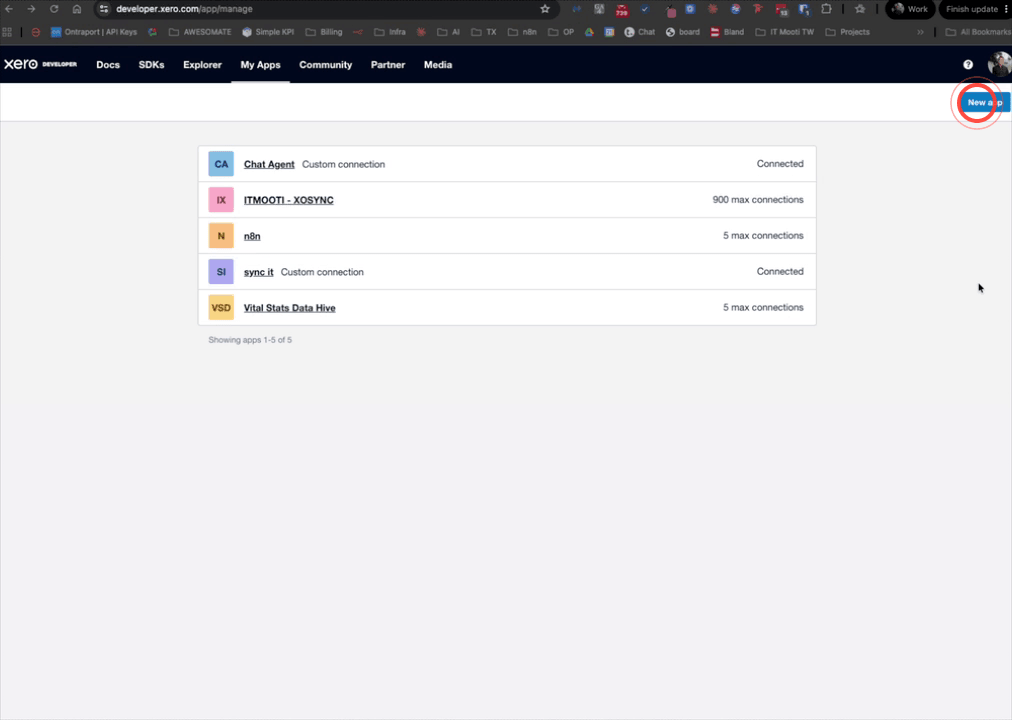
Step 3: Create a New App at developer.xero.com
Open your browser and navigate to developer.xero.com/app/manage. Once there, click New App to begin creating your integration. When prompted to choose an app type, select the Custom Connection option to proceed with the correct setup.
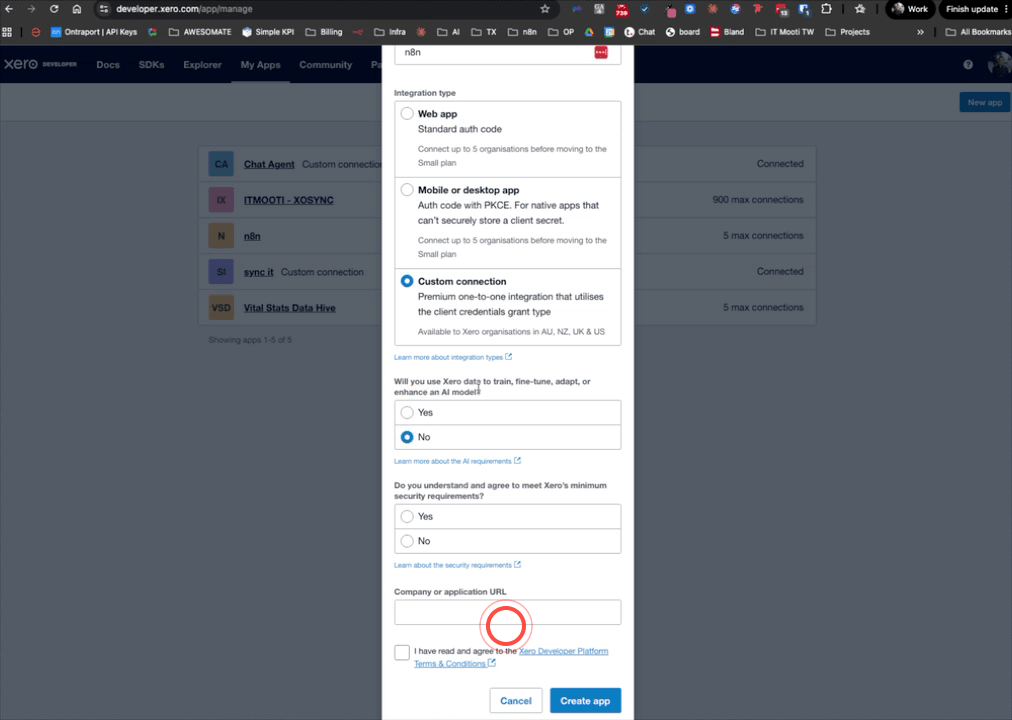
Step 4: Configure the App Name and URL
Give your app a name — N8N is a suitable choice. Confirm that you are not using AI to train data and that you understand the minimum requirements. In the Application URL field, enter your company's awesom8 login URL in the format https://yourslug.awesom8.io, replacing yourslug with your actual company slug. Once all fields are filled in, click Create App to continue.
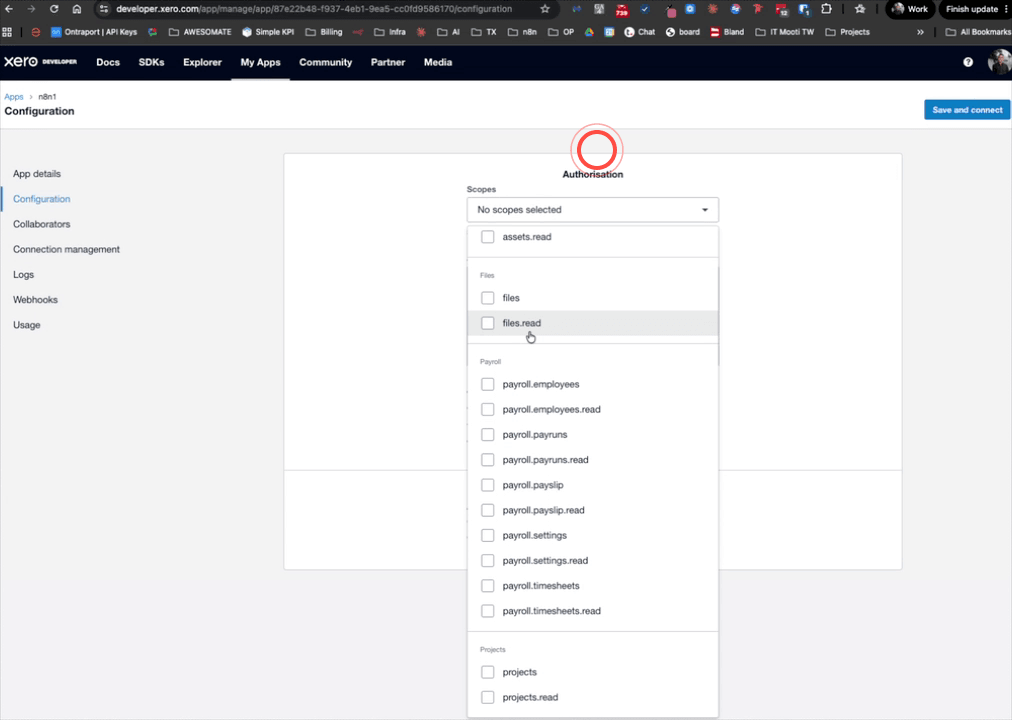
Step 5: Select API Scopes for Your App
On the scopes page, you will choose what actions this app is permitted to perform. At a minimum, select all of the accounting-related scopes, as these cover payments, reports, and ledger data that are essential for most workflows. You may also wish to add scopes for assets, files, and payroll if those are relevant to your use case. There are approximately 24 scopes available in total — select all that apply to your intended workflows.
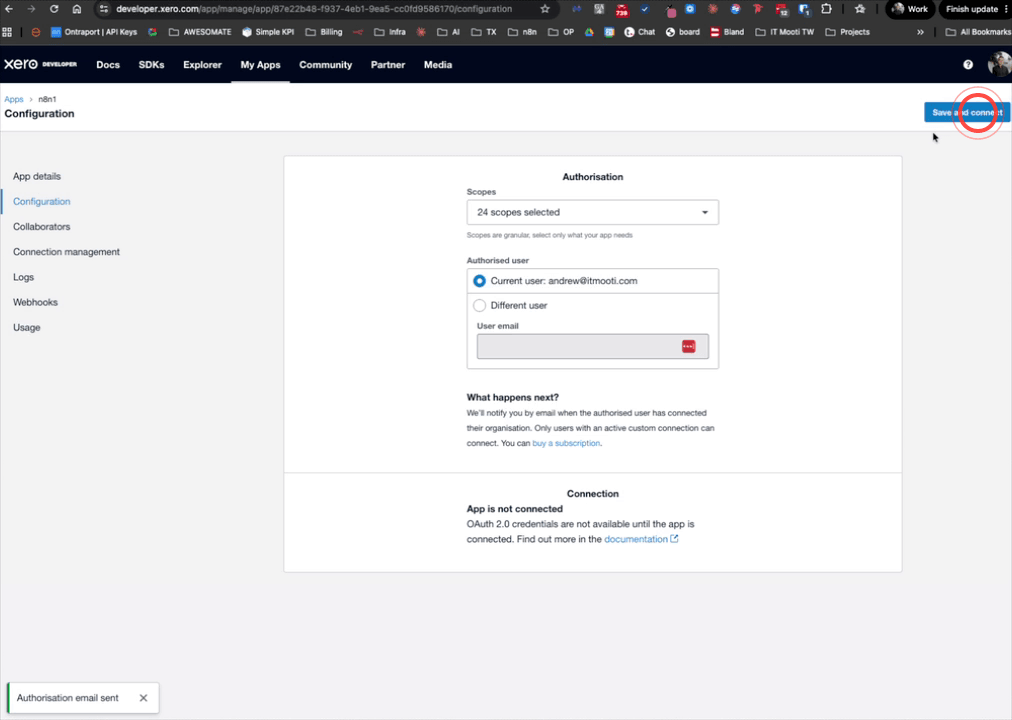
Step 6: Authorise the App and Retrieve Your Credentials
Add your authorised user to the app, then click Save and Connect. Xero will send an authorisation email to your inbox — open that email and click the link to authorise the app. Once authorised, return to the app page in the Xero developer portal where your Client ID and Client Secret will now be visible. Keep this page open or copy these values somewhere safe, as you will need them in the next steps.
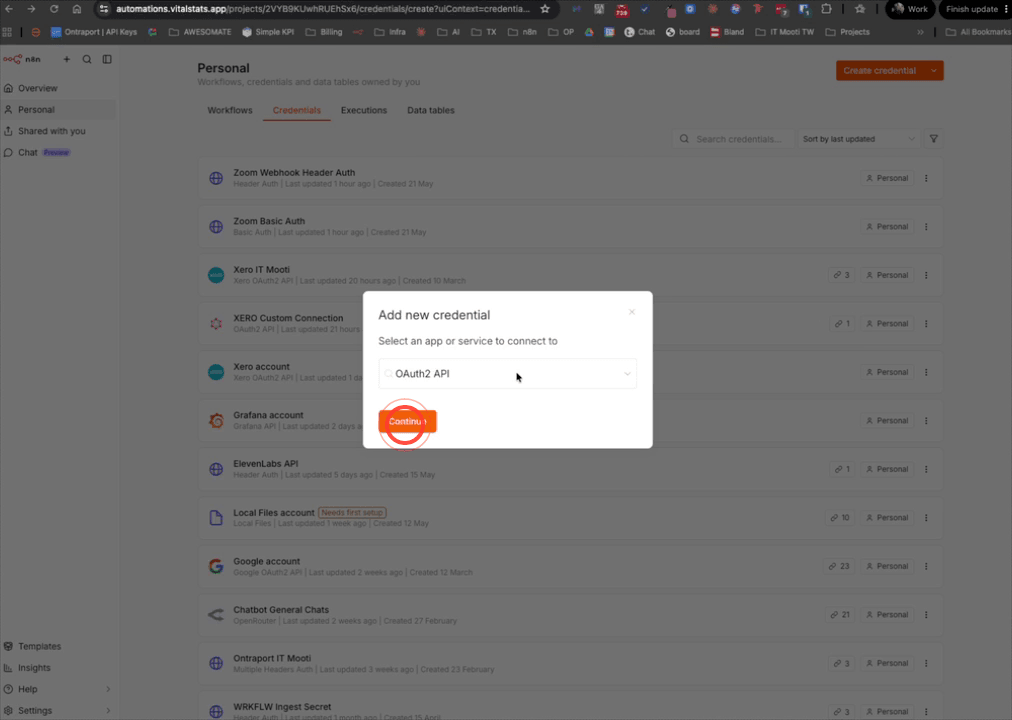
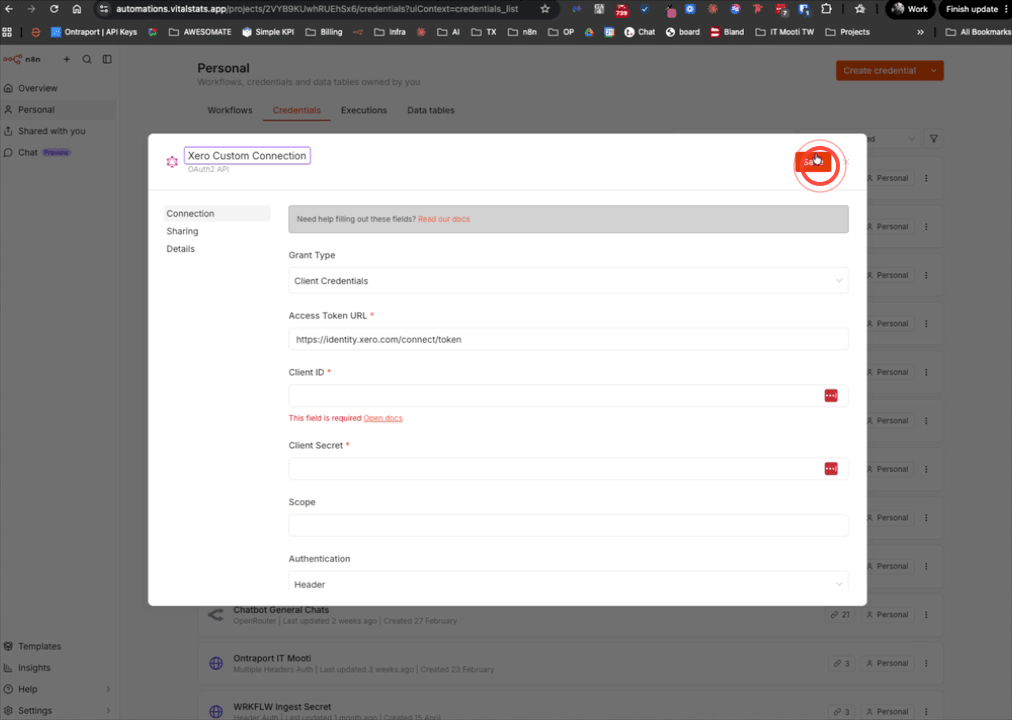
Step 7: Add an OAuth2 Credential in N8N
Log in to your N8N account and navigate to the Credentials page. Click to add a new credential, search for and select OAuth2 API, then click Continue. Configure the credential with the following settings:
- Grant Type: Client Credentials
- Token URL: https://identity.xero.com/connect/token
- Client ID: Paste the Client ID from your Xero app page
- Client Secret: Paste the Client Secret from your Xero app page
Step 8: Name and Save the Xero Credential
Once all the credential fields have been filled in, give the credential the name Xero Custom Connection so it is easy to identify later. Click Save to store the credential. Your Xero credential is now ready to be used inside any N8N workflow.
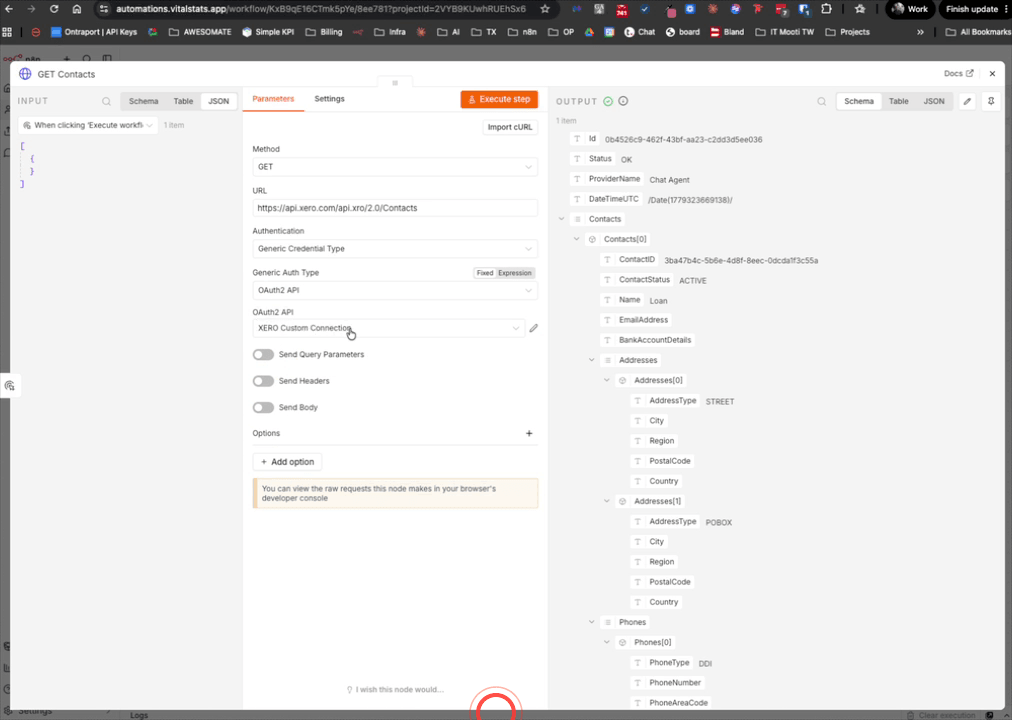
Step 9: Test the Connection With an HTTP Request
To confirm everything is working correctly, create a new HTTP Request node in N8N. Set the method to GET and enter the following URL: https://api.xero.com/api.xro/2.0/Contacts. Under the authentication settings, set the type to Generic Credential Type and select your Xero Custom Connection credential from the list. Execute the node — if the connection is set up correctly, you will receive an OK status response along with your Xero contacts data.
Step 10: Install the Xero API Explorer Template
In your hub, navigate to the Templates section and search for XERO-API-EXPLORER-01. Click Install Template to import the workflow into your account. This template comes pre-loaded with HTTP request nodes for all major Xero API endpoints, saving you significant setup time and giving you a ready-to-use starting point for building Xero-connected workflows.
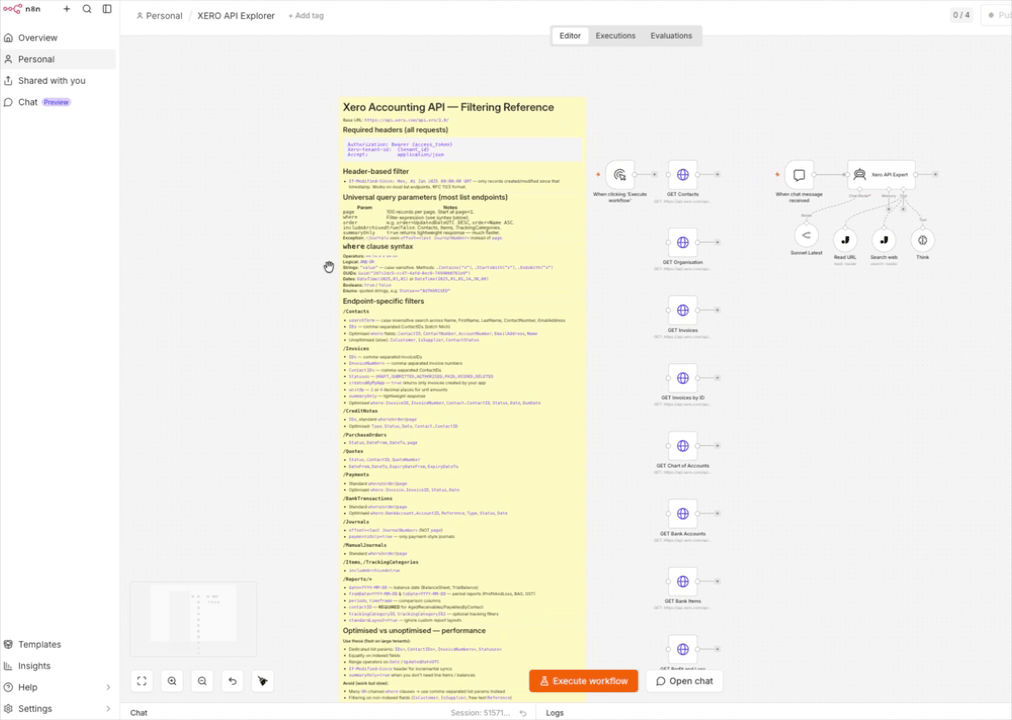
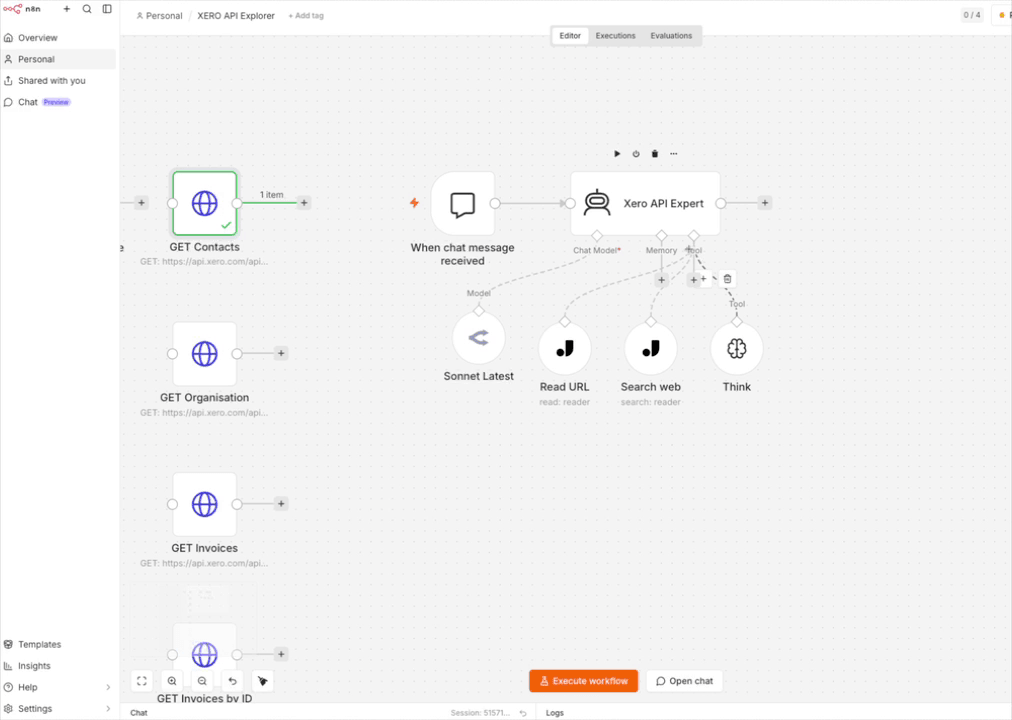
Step 11: Explore Pre-Built Xero API Endpoints
Once the template is installed, open the workflow to see all available Xero API endpoints already configured and ready to use. Each node corresponds to a different API action — you can execute any of them directly to retrieve live data from your Xero account. For example, you can filter contacts by name to return only those whose names begin with a specific letter. As long as your Xero Custom Connection credential has been set up correctly, all nodes should work immediately without any additional configuration.
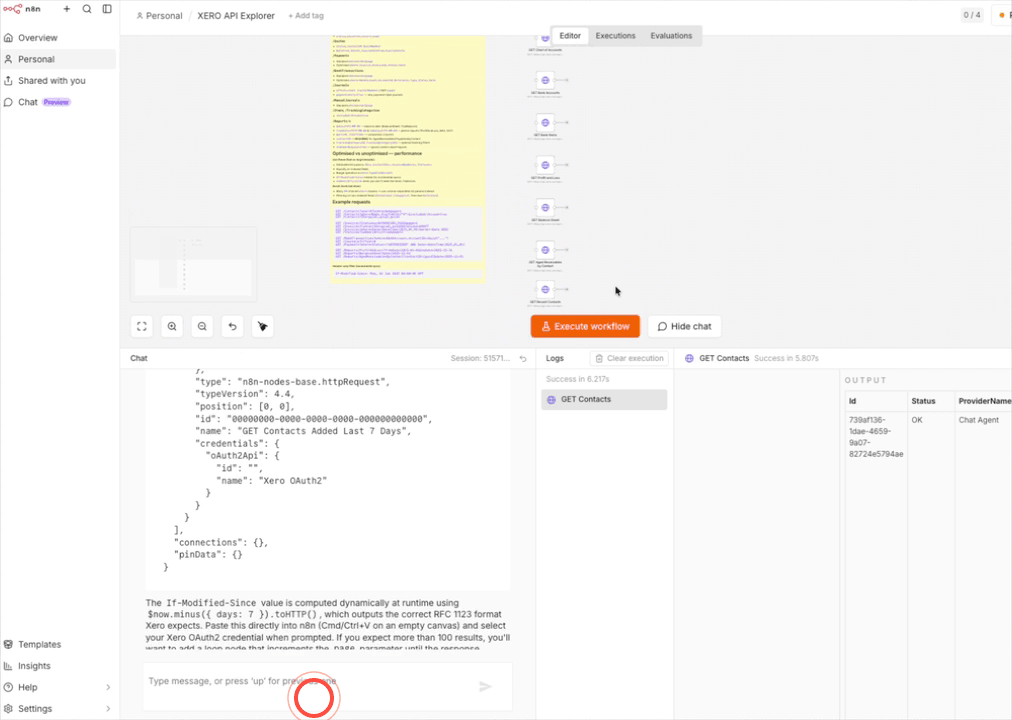
Step 12: Use the AI Agent to Build Custom API Nodes
The template also includes a Xero API Expert AI agent that you can use to ask questions about the Xero API and request ready-to-use node configurations. Type your question into the chat at the bottom of the agent — for example, "How do I get contacts added in the last 7 days?" — and the agent will respond with a full explanation and a JSON node configuration. Copy the JSON output from the chat response and paste it directly into your workflow template to instantly add a new, fully configured endpoint node.
Troubleshooting
Need Help?
Contact us at hello@awesomate.ai or raise a ticket in your Teamwork Desk portal.