
How to Generate Images, Video, and Music Using the Kie Media Studio in n8n
This guide walks you through setting up a chat-based AI media agent inside your n8n account that can generate images, video, and music on demand — all from a single interface. It is designed for Awesomate members who want to create branded media assets without needing separate subscriptions to multiple AI platforms.
Prerequisites
- An active n8n account hosted through Awesomate
- Access to the Awesomate Hub (hub.awesomate.ai)
- A kie.ai account (free to sign up)
- Your Business Identity Manager already configured in your n8n account (recommended, so the agent knows your business context)
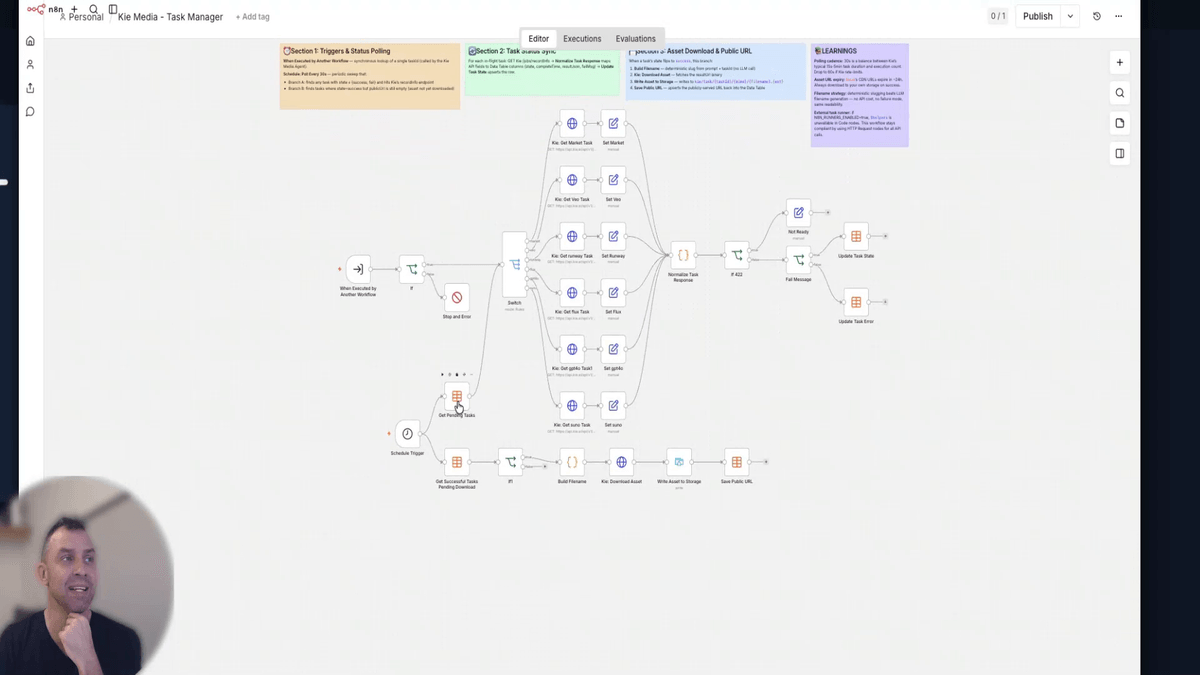
Step 1: Understand the Workflow Overview
Before you begin, it helps to understand what you are building. You will be setting up a single chat-based agent called Kie Media Studio that lets you request images, video, and music in plain English. Behind the scenes, two separate workflows handle the heavy lifting: one submits your media requests to kie.ai, and another runs in the background every 30 seconds to check when your files are ready and save them to your account automatically.
Step 2: Sign Up for kie.ai
Go to kie.ai and create a free account if you do not already have one. Kie is a single platform that gives you access to image, video, voice, and music generation models from multiple providers — including tools like Suno, Flux, GPT Image, and Gemini — all through one API. This means you only need one account and one API key to access all of these capabilities.
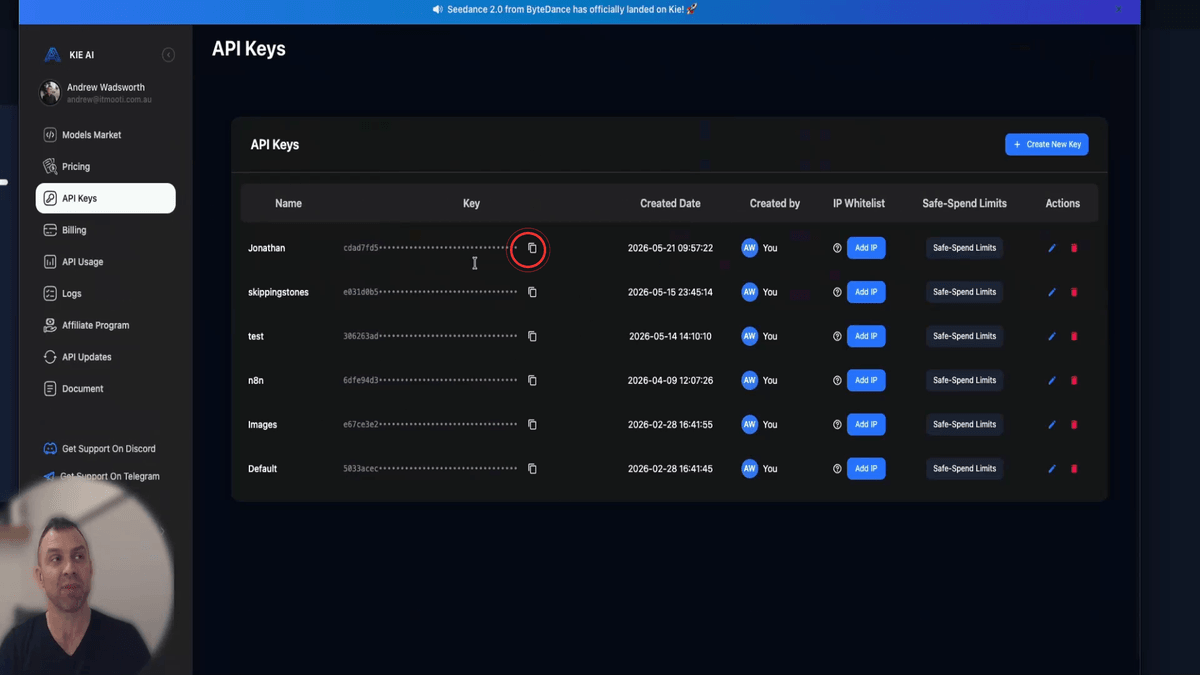
Step 3: Copy Your Kie API Key
Once you are logged into Kie, open your account settings and navigate to the API Keys section. If you do not already have a key, click Create New, give it a name (for example, your name or the name of your n8n account), and then click Copy. You will see a small tick icon appear to confirm the key has been copied to your clipboard. Keep this key handy — you will need it in the next step.
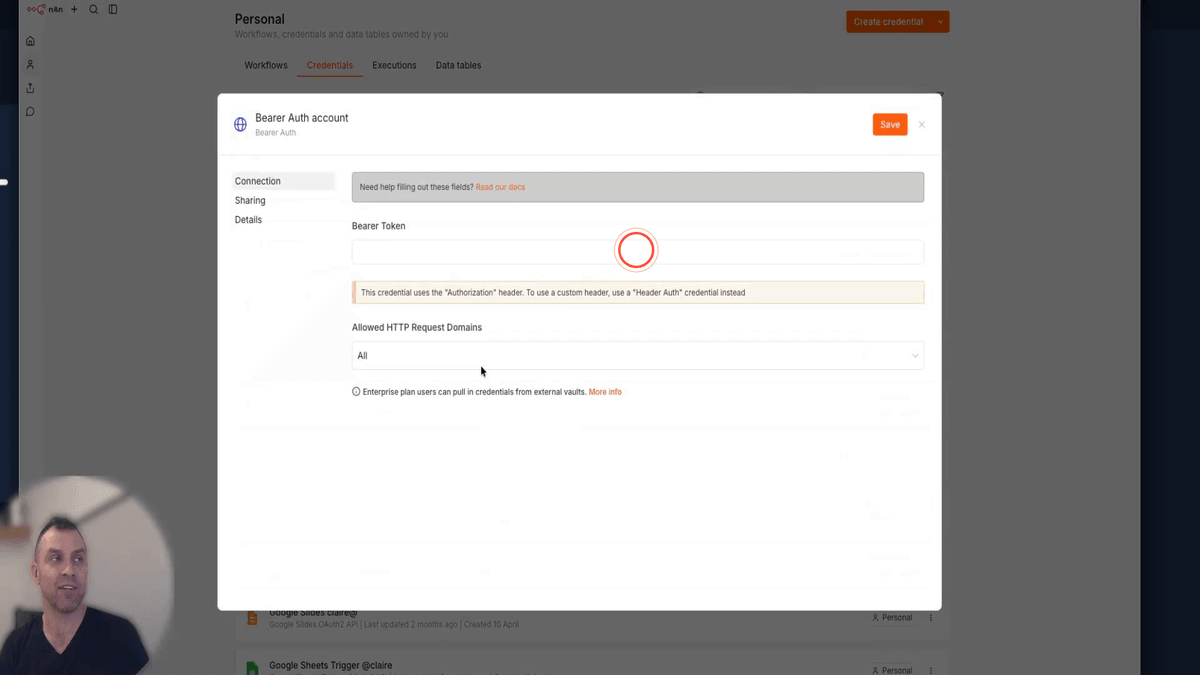
Step 4: Add Your Kie Credential in n8n
In your n8n account, click on Credentials in the left-hand menu, then click Create Credential. In the search box, type Bearer and select Bearer Auth from the results, then click Continue. Paste your Kie API key into the token field, then rename the credential to KIE. Click Save when you are done. This credential will be used by both Kie workflows to authenticate with Kie.
Step 5: Install the Kie Templates from the Awesomate Hub
Go to hub.awesomate.ai and log in using your magic link. Click on n8n in the navigation, then click Templates. In the search bar, type kie and press enter. Click Preview on the result, then click Install 3 Templates. This will install the Kie Media Agent and Kie Media Task Manager workflows directly into your n8n account. Installation may take up to 30 seconds.

Step 6: Configure the Kie Task Manager Data Tables
In your n8n account, open the Kie Media Task Manager workflow. This workflow contains five data table nodes that each need to be pointed to the correct table. For each node, double-click it, click From List, and select Kie Tasks from the dropdown. Repeat this for all five nodes — two on the left side of the workflow and three on the right. Do not publish the workflow until all five are set correctly.
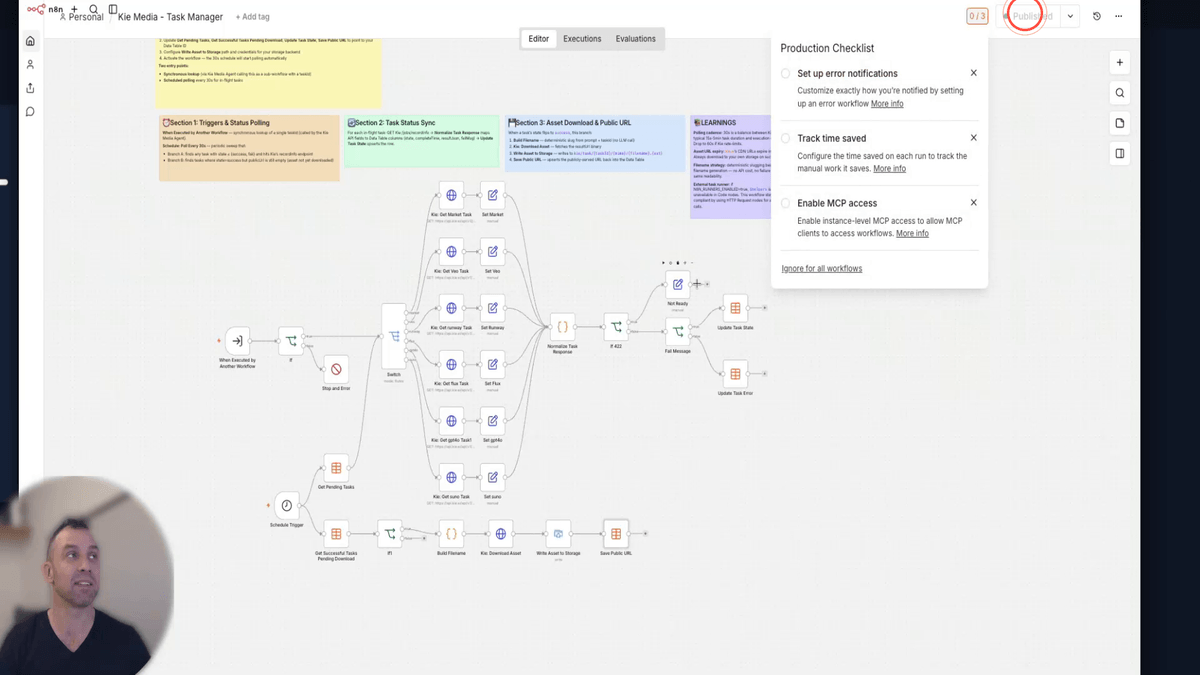
Step 7: Publish the Kie Task Manager Workflow
Once all five data table nodes are set to Kie Tasks, click the Publish button at the top of the workflow. This activates the Kie Task Manager, which will now run automatically in the background every 30 seconds. Its job is to check Kie for completed media tasks and save the resulting files to your n8n file storage so you never lose them.
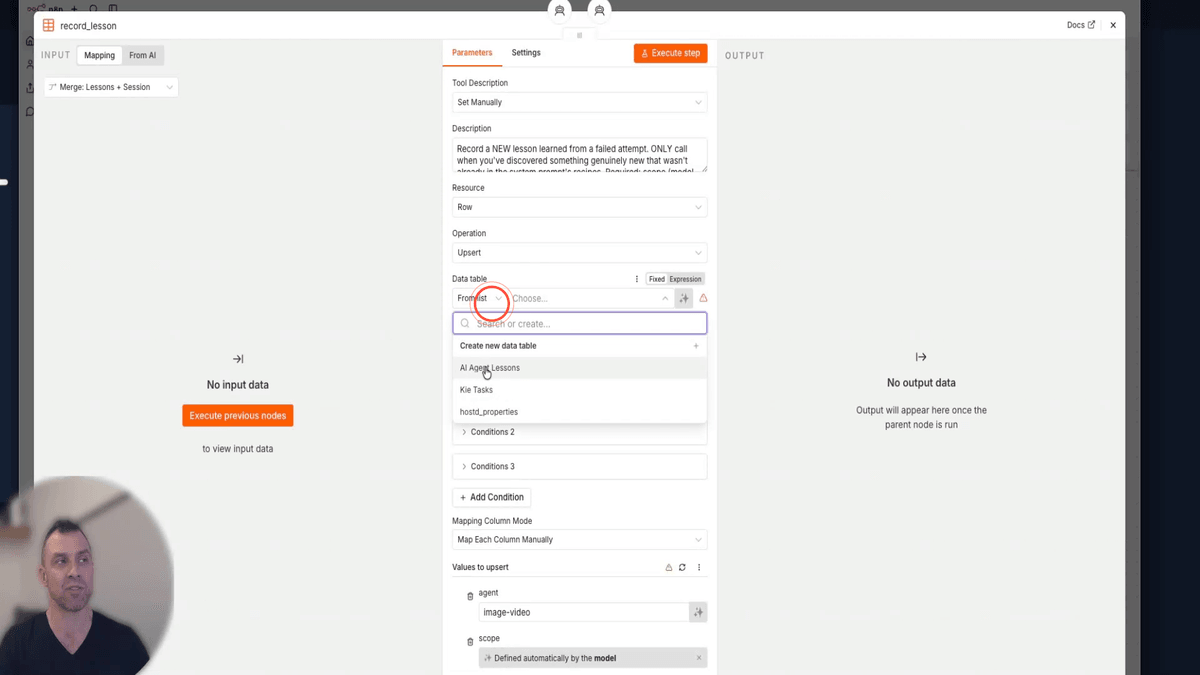
Step 8: Configure the Kie Media Agent Workflow
Open the Kie Media Agent workflow. You will need to configure several nodes before publishing. First, find the two AI Agent Lessons nodes — double-click each one, click From List, and select AI Agent Lessons. Next, find the two central tool nodes and set both of them to Kie Tasks using the same From List method. Once all four nodes are configured, click Publish.
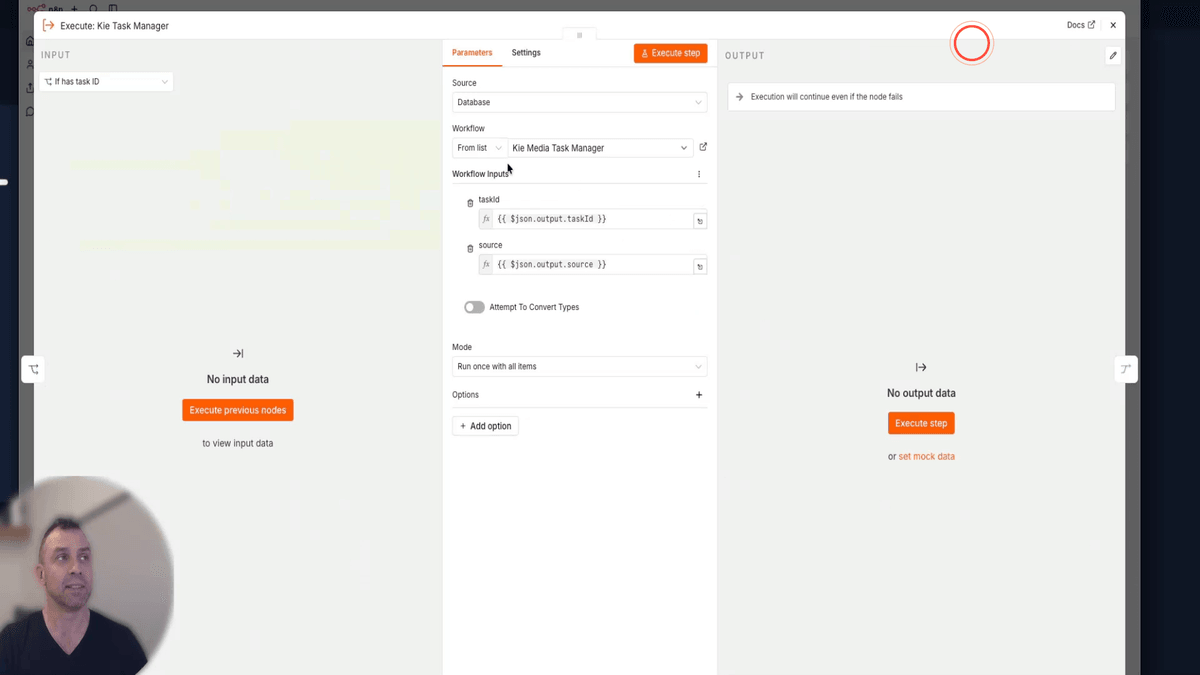
Step 9: Link the Execute Kie Task Manager Node
Still inside the Kie Media Agent workflow, locate the node labelled Execute Kie Task Manager. Click on it to open its settings, then find the workflow dropdown and select Kie Media-Task Manager from the list. This connects the media agent to the background task retrieval workflow so that completed files are automatically fetched and saved. Once this is done, click Publish if you have not already done so.
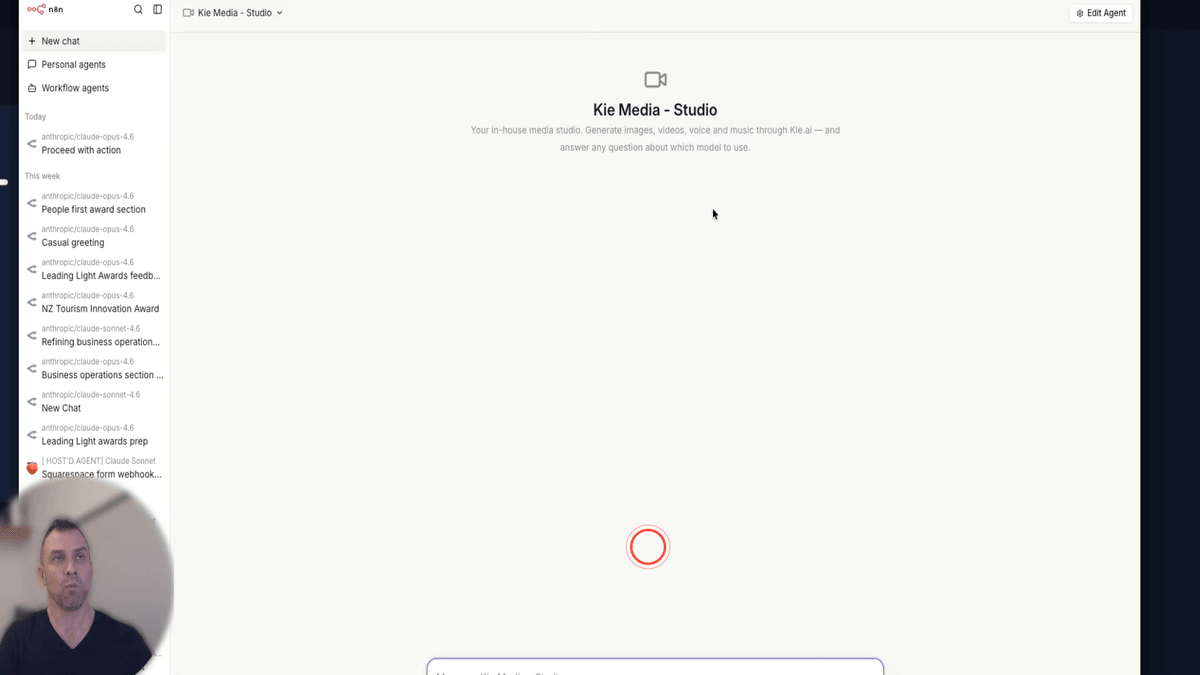
Step 10: Open Kie Media Studio in the Chat Area
In your n8n account, click the chat icon in the left-hand navigation. This opens the Personal Agents area. Click on Personal Agents and then select Kie Media Studio from the list. This is the chat interface you will use to submit all of your media generation requests going forward.
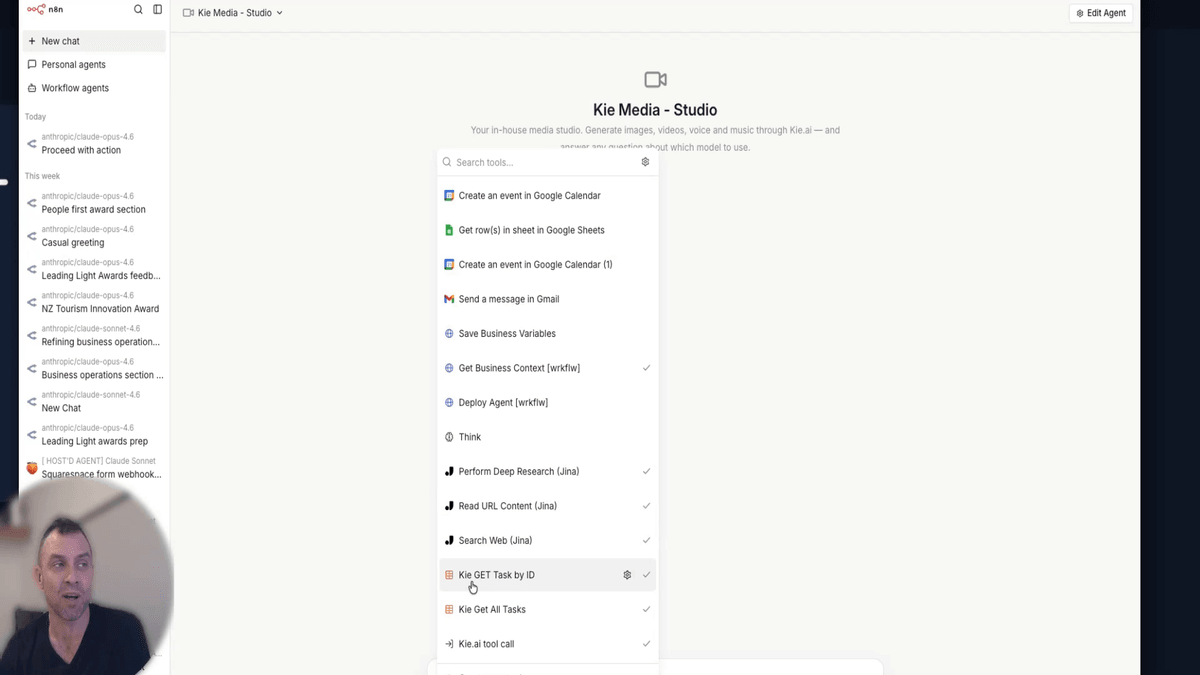
Step 11: Clean Up Duplicate Tools in Kie Media Studio
Inside Kie Media Studio, click on Tools. If you see duplicate entries for any Gina tools (such as Search Web, Read URL Content, or Deep Research), you will need to remove the extras. Keep only one copy of each of the following: Search Web, Read URL Content, and Deep Research. Click on each duplicate and delete it. This is a common issue that can occur when tools are imported with slightly different names.
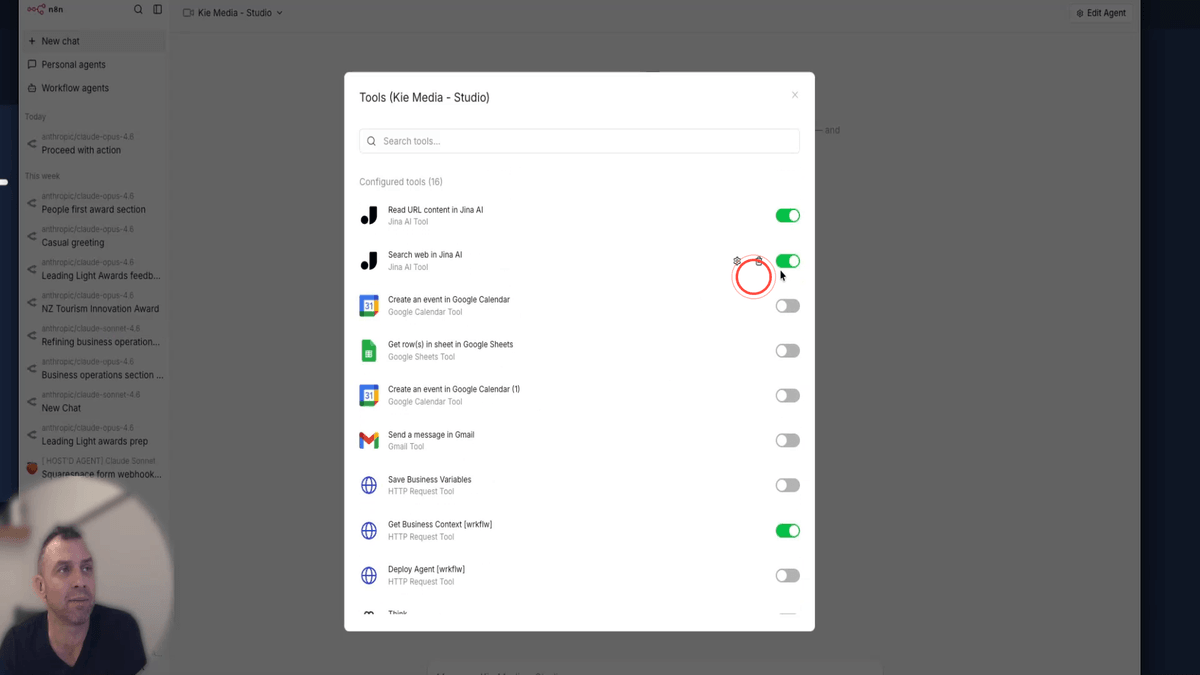
Step 12: Enable the Required Tools for Kie Media Studio
In the Kie Media Studio Tools panel, make sure the following tools are switched on:
- GetBusinessContext — pulls in your saved business variables so the agent knows your brand
- Search Web — allows the agent to research topics online
- Read URL Content — allows the agent to read content from web pages
- Deep Research — enables more thorough research tasks
- KIE GetTask by ID — retrieves a specific task result from Kie
- KIE Get All Tasks — retrieves all tasks from Kie
- KIE.ai Tool Call — submits media generation requests to Kie
For the Kie.ai Tool Call, click the settings cog and make sure you select the published version. If you see one with an error or unpublished warning, remove that one and keep only the working version.
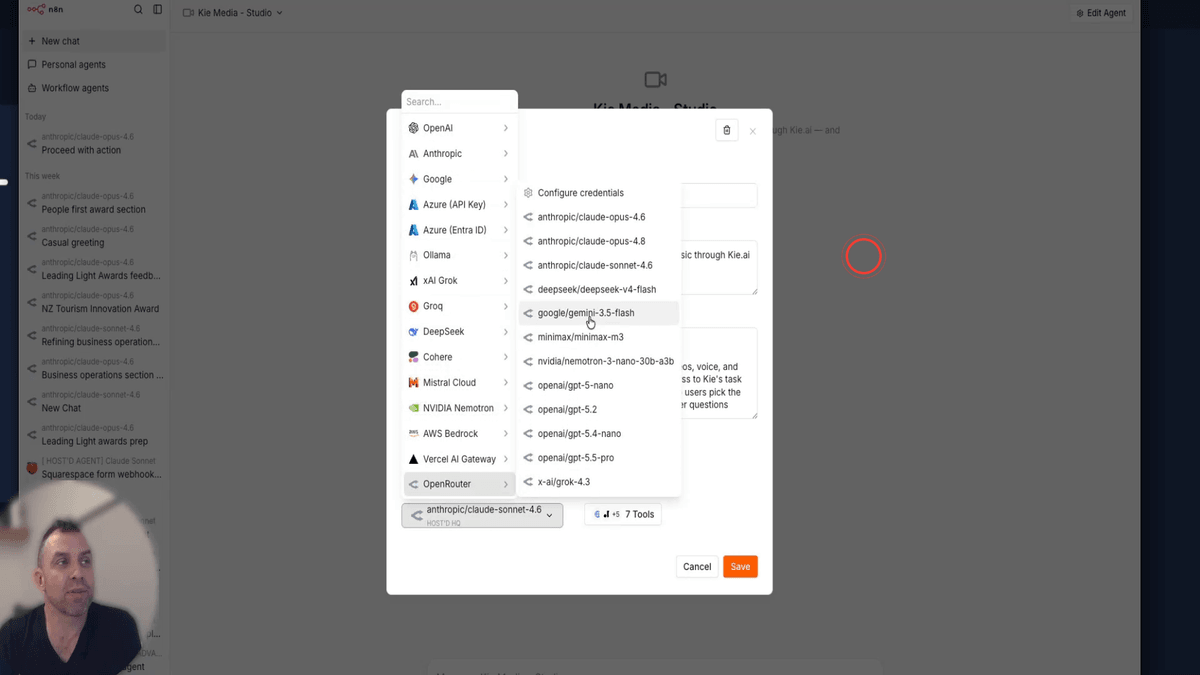
Step 13: Select the Recommended AI Model for the Agent
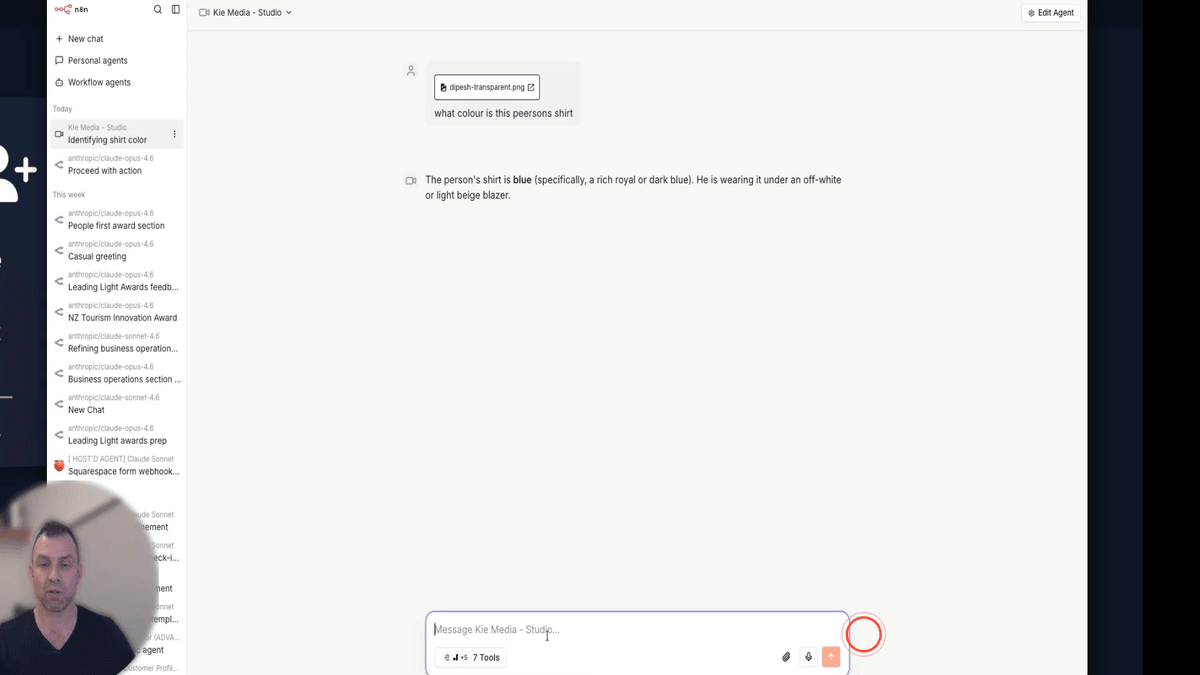
In the Kie Media Studio agent settings, check which model is currently selected under Open Router. The recommended models are Gemini 3.5 Flash or Sonnet 4.6. If you plan to upload images or PDF files into the chat for the agent to analyse, use Gemini 3.5 Flash — it can visually interpret uploaded files, whereas some other models cannot. You can always switch models later depending on your needs.
Step 14: Test the Agent with a Generic Image Request
In the Kie Media Studio chat, type a general prompt such as: "Create a new image for me based on my business that targets my audience for my most important service offering." The agent will automatically pull in your business context, propose a detailed image prompt, and ask you to confirm before submitting the request to Kie. Once you confirm, it will return a task ID — keep this handy, as you will use it to check when your image is ready.
Step 15: Troubleshoot the 'Workflow Doesn't Exist' Error
If the agent returns an error message saying the workflow does not exist, this means the Execute Kie Task Manager node in the Kie Media Agent workflow is not correctly linked. Go back to the Kie Media Agent workflow, open the Execute Kie Task Manager node, and confirm it is pointing to Kie Media-Task Manager. Re-publish the workflow, then return to Kie Media Studio and try your request again.

Step 16: Browse Available Kie Text-to-Image Models
While you are waiting for your image task to complete, you can explore the Models Market inside Kie.ai. Filter by Text-to-Image to see all available models, including GPT Image, Seed Dream, Flux, Gemini, and more. Each model shows its per-image pricing, so you can choose based on your budget and the quality you need. The Kie Media Agent will automatically select an appropriate model for you, but it is useful to know what is available.
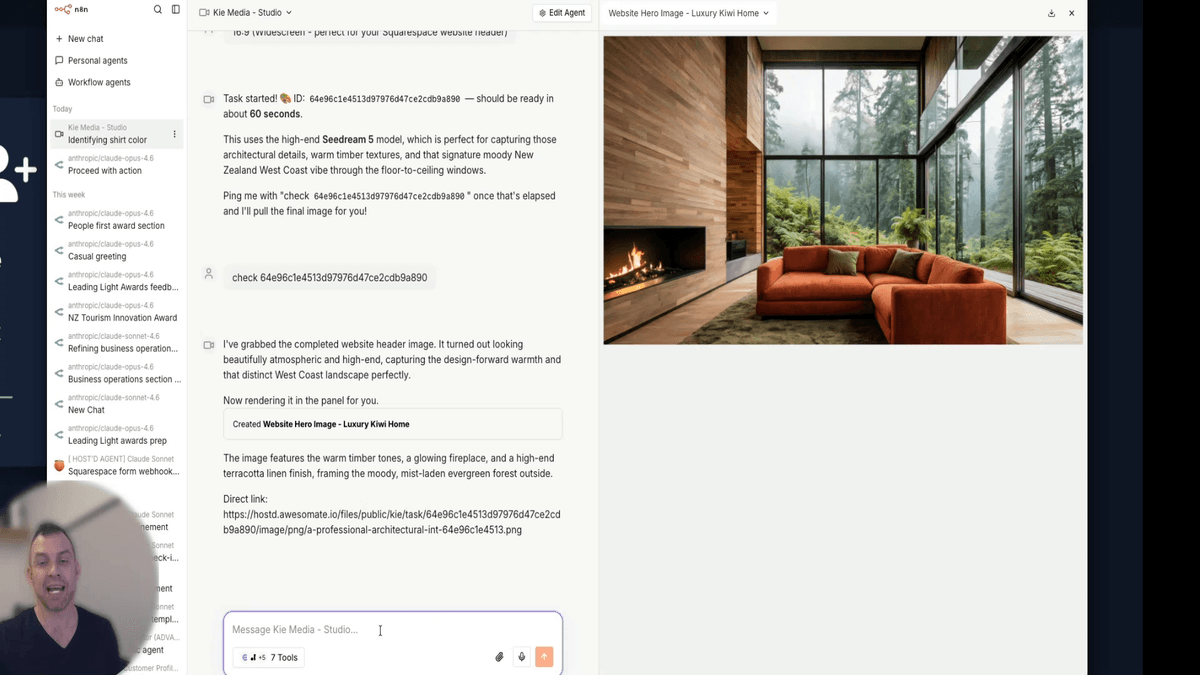
Step 17: Check Task Status and Retrieve the Generated Image
Once the agent has returned a task ID, copy it and paste it back into the Kie Media Studio chat, then press send. The agent will query Kie to check whether your task is complete. If the image is still being generated, it will let you know and suggest checking again in about 30 seconds. Once the task is complete, the agent will return the image directly in the chat window for you to view and download.

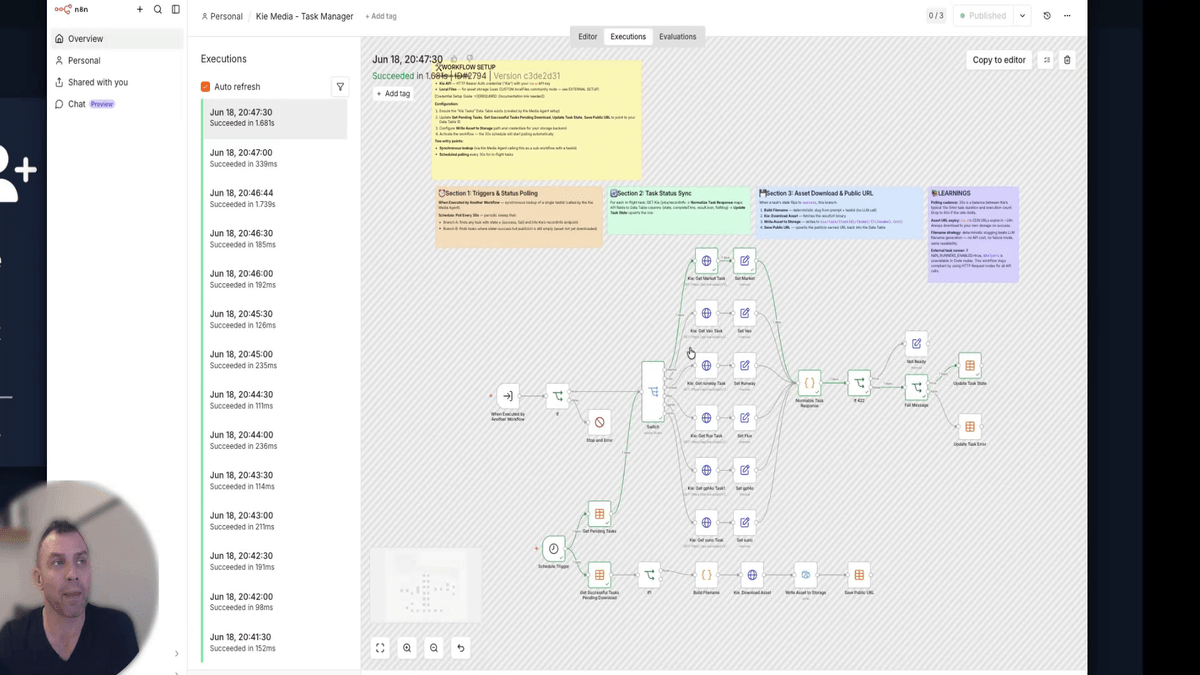
Step 18: Monitor Task Execution in the Task Manager Workflow
If you would like to see the background polling in action, open the Kie Media Task Manager workflow in your n8n account and click on Executions. You will see it running automatically every 30 seconds, checking Kie for completed tasks and saving the results to your file storage. This happens without any input from you — it is fully automated once the workflow is published and active.
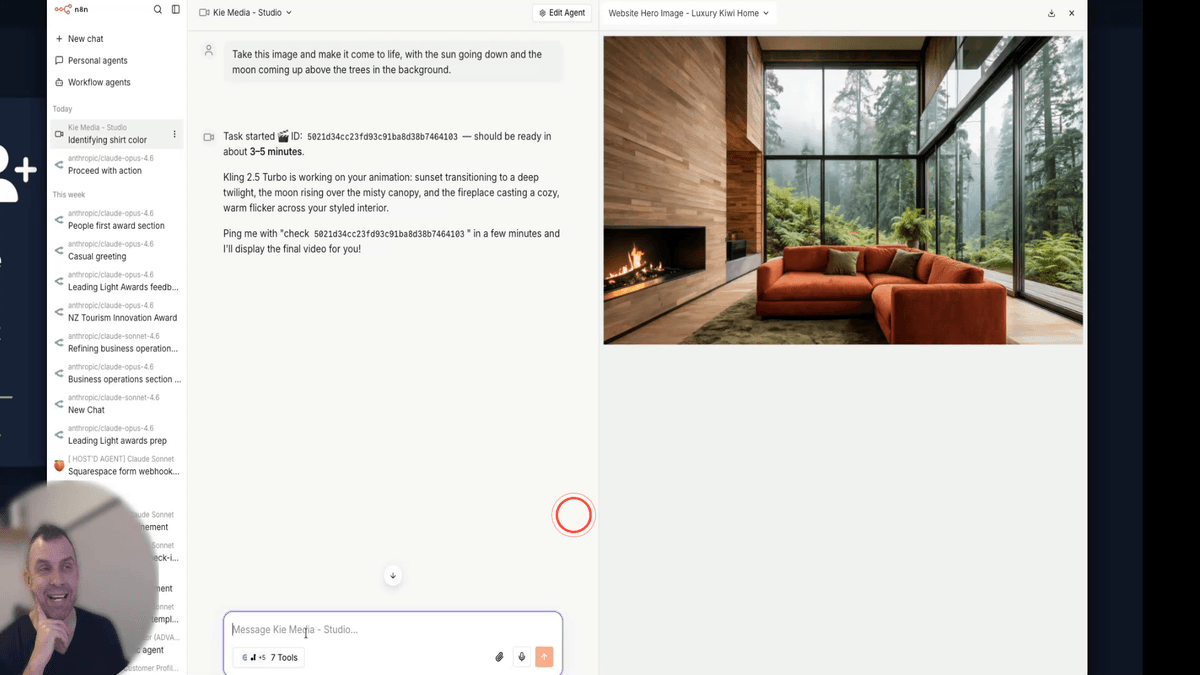
Step 19: Convert the Generated Image to a Video
Once your image has been returned in the chat, you can immediately ask the agent to turn it into a video. Type a follow-up prompt describing the motion or scene you want — for example: "Take this image and make it come to life with the sun going down and the moon coming up above the trees in the background." The agent will use the existing image URL and submit a new image-to-video task to Kie. A new task ID will be returned for you to check when it is ready.
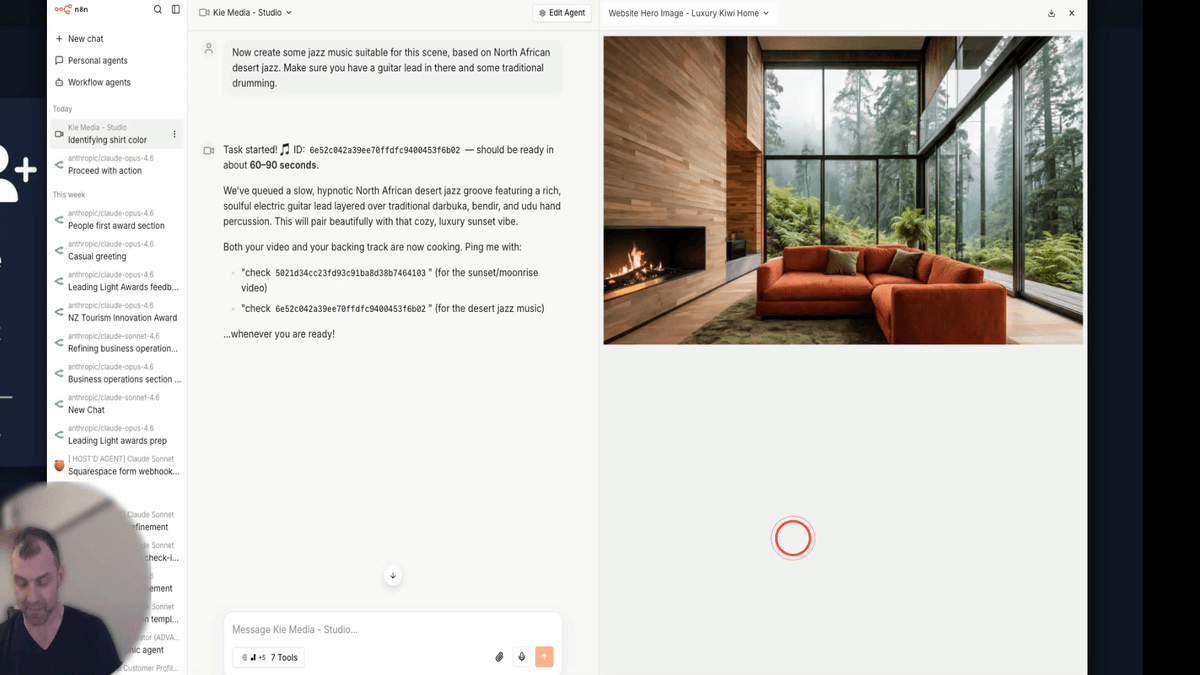
Step 20: Submit a Music Generation Task Simultaneously
You do not need to wait for the video to finish before submitting another request. While the video task is still processing, you can send a second prompt to generate music — for example: "Create some jazz music suitable for this scene based on North African desert jazz with a guitar lead and traditional drumming." Kie can handle multiple tasks at the same time, so both the video and the music will be generated in parallel and saved to your files when complete.
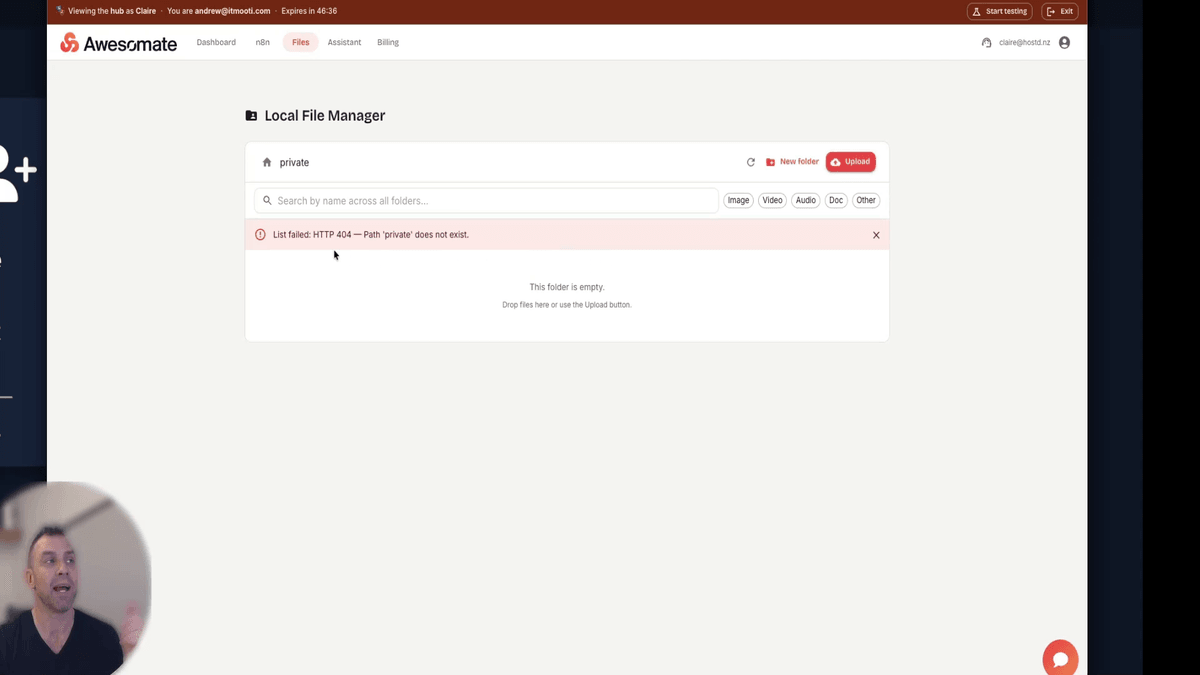
Step 21: Browse and Manage Generated Files in the File Manager
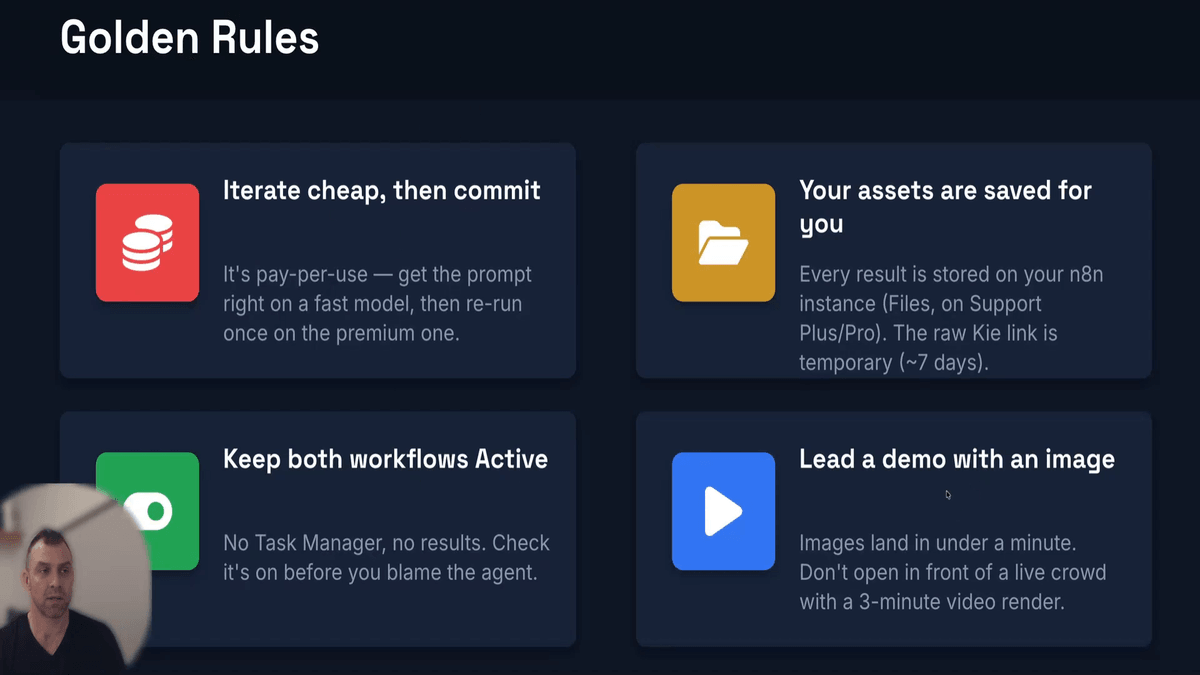
All media files generated through Kie Media Studio are automatically saved to your n8n file storage. To access them, click on Files in your n8n account and navigate to the kie > task directory. Each task has its own subfolder named by task ID, containing the generated file. This is important because Kie's own download links expire after 7 days — your files stored here are permanently accessible. If you are on the Awesomate Support Plus, Pro, or Team plan, you can also manage these files through the local file manager.
Step 22: Use Saved Files Inside an n8n Workflow
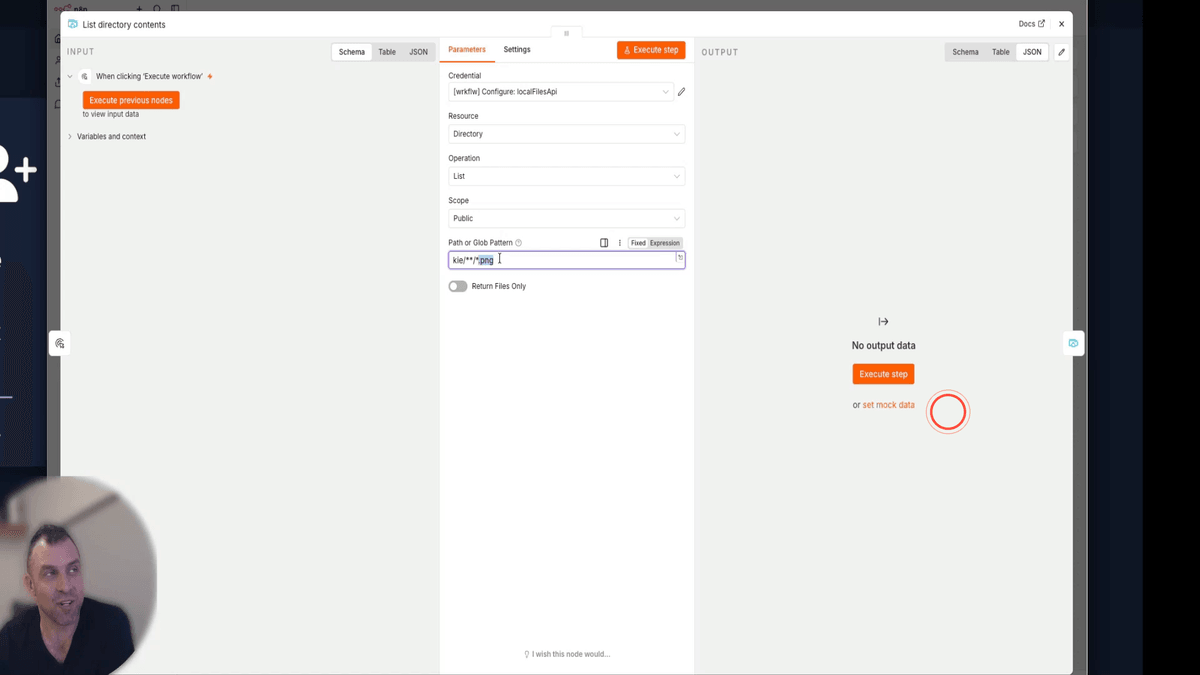
Your saved media files can be used directly inside any n8n workflow. Add a file search node and use a glob pattern such as kie/**/*.png to find all PNG images saved in the kie directory — the double asterisk means it will search across all subfolders. You can then read the binary output of the file, pass it to an AI agent node for analysis, or use the file URL in other parts of your automation such as a landing page or email campaign.
Step 23: Review Completed Tasks in the Data Table
To see a full record of everything you have generated, open the Kie Tasks data table in your n8n account. Each row represents a submitted task and includes the prompt that was used, the model that was selected, the current task status, and the public URL to the saved file. This gives you a complete history of all your media generation activity and makes it easy to reuse prompts or track what has been created.

Step 24: Follow the Recommended Workflow for Media Generation
When you are getting started, follow this recommended order for best results: first, generate an image, then use that image to create a video, and finally add music — all from the same Kie Media Studio chat. Start with cheaper or earlier model versions to iterate quickly and refine your prompts, then switch to higher-quality models once you are happy with the output. Because Kie is pay-per-use, this approach keeps your costs low while you experiment.
Troubleshooting
Need Help?
Contact us at hello@awesomate.ai or raise a ticket in your Teamwork Desk portal.