
Generating Images, Videos, and Music in n8n Using the Kie Studio Agent
This guide walks you through setting up and using the Kie AI aggregator with your n8n account to generate images, videos, and music tracks — all from a single chat interface. It is designed for Awesomate Support Plus and Pro plan users who want to orchestrate AI media generation without managing multiple subscriptions.
Prerequisites
- An active Awesomate n8n account on the Support Plus or Pro plan (required for local file storage features)
- Access to your n8n account's Workflows, Data Tables, and Personal Agents sections
- A Kie account (you will create this in Step 1)
Step 1: Sign Up for the Kie AI Aggregator
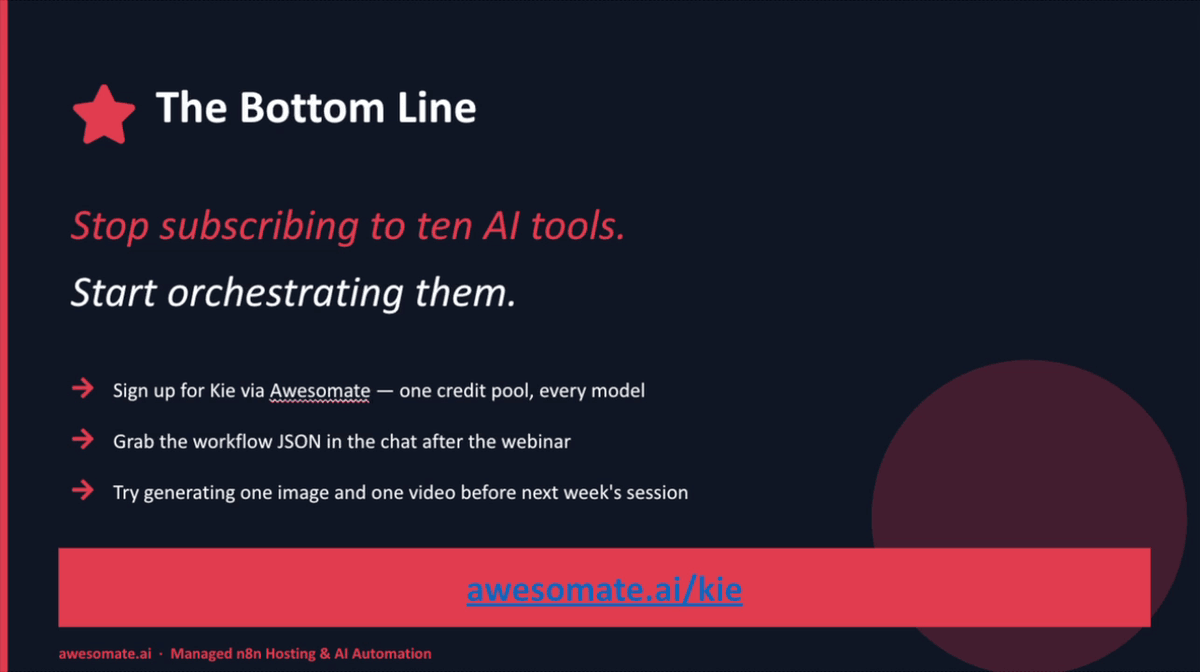
Open your browser and navigate to awesomate.ai/kie to create your Kie account. Kie is a single platform that gives you API access to 60+ image, video, audio, and music generation models, so you no longer need separate subscriptions to services like OpenAI, Gemini, or Suno. Once registered, you will receive a single API key that your N8N workflows will use to communicate with all supported models.
- Once Signed up go to: https://kie.ai/api-key
- Create a new API Key

- Then open your Awesomate n8n account and go to Credentials
- Create a Bearer Auth credential

- Rename it 'KIE' and paste your API Key in the Bearer Token section then hit Save
Step 2: Review the Kie Model Categories
Once inside the Kie dashboard, familiarise yourself with the four generation categories available to you:
- Images — models such as NanoBanana, Flux, and GPT (typically 15 to 60 seconds to generate)
- Video — models such as Kling, Sora, VO3, and Seedance (typically 1 to 5 minutes)
- Voice and Sound Effects — via Eleven Labs, including audio isolation and dialogue creation
- Music — via Suno for full music track generation
Understanding these categories will help you know which model your N8N agent will select for each type of request.
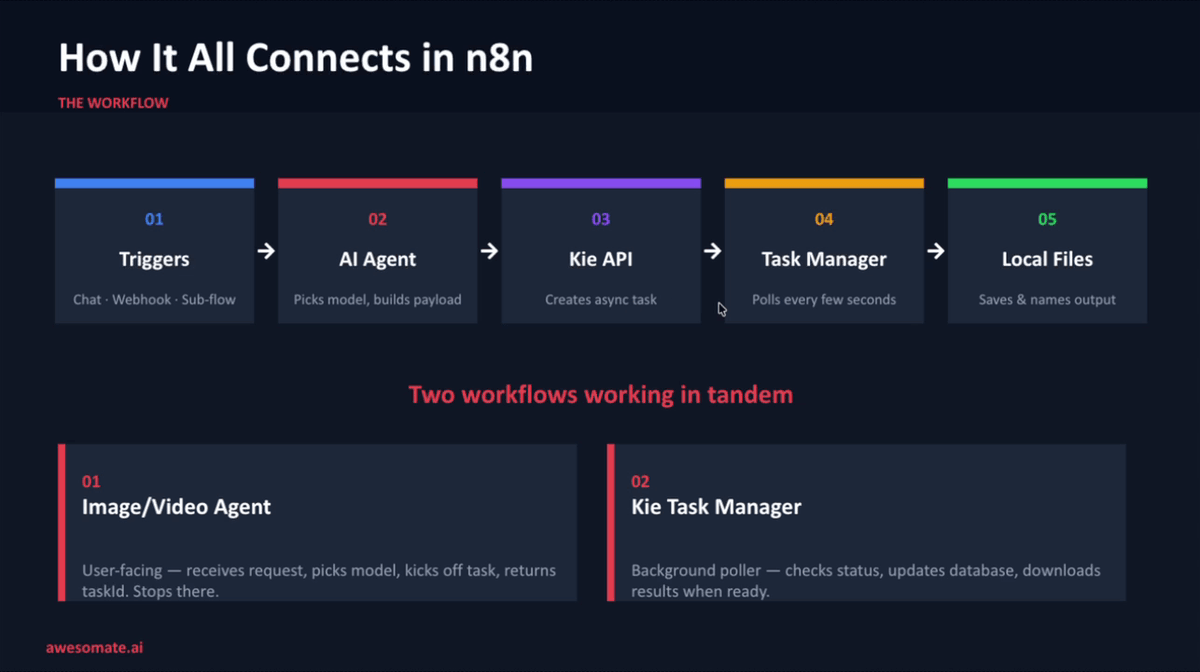
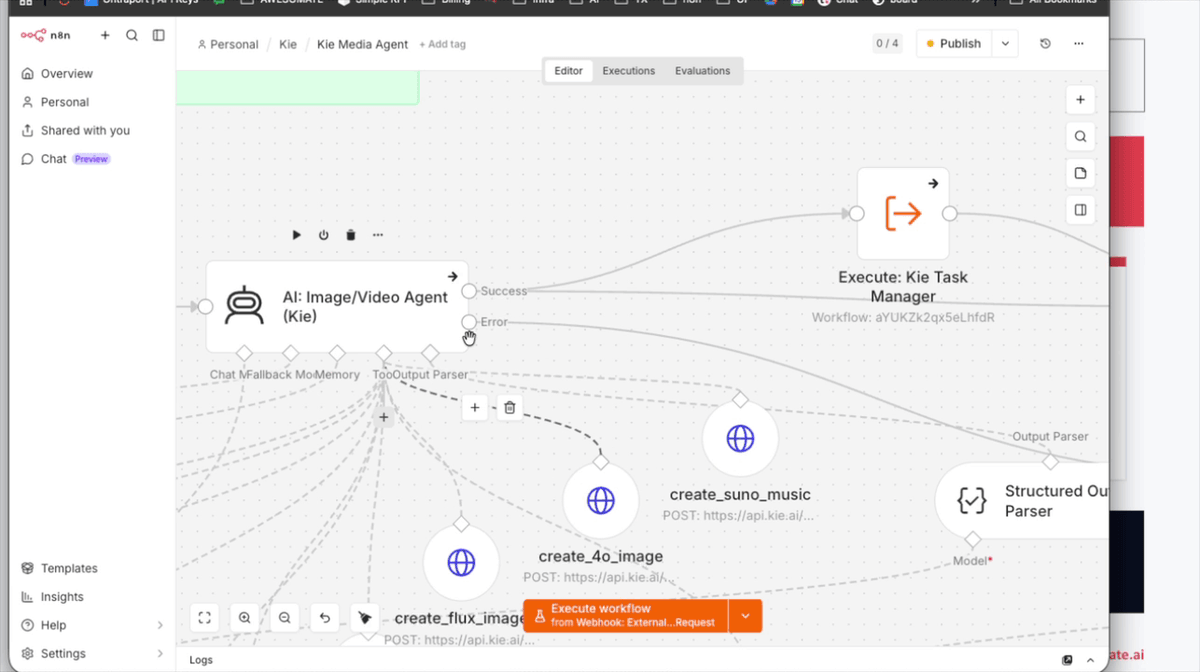
Step 3: Understand the Two-Workflow Architecture
Before using the system, it is important to understand that two separate N8N workflows must be active in your account at all times:
- Image/Video Agent — receives your request, selects the most appropriate model, submits the generation task to the Kie API, and returns a task ID.
- Kie Task Manager — runs automatically every 30 seconds, checks the status of any pending tasks, updates the data table, and downloads completed results.
Both workflows must be active simultaneously for the system to function correctly.
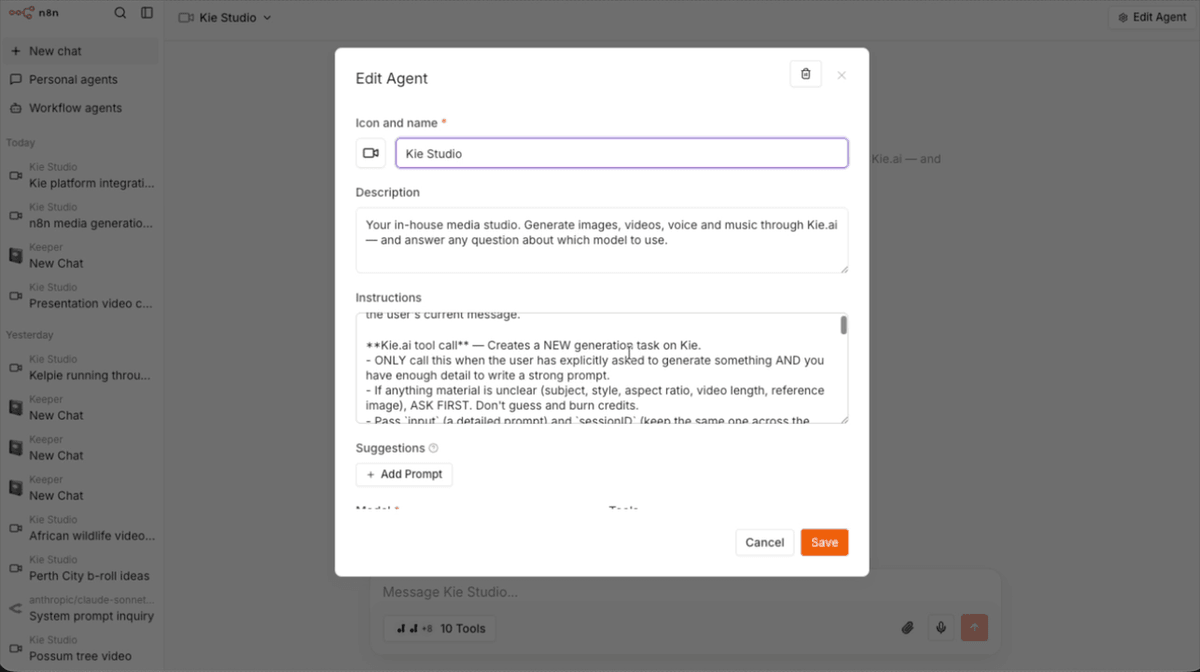
Step 4: Open the Kie Studio Personal Agent Chat
Go to your Awsomate Hub account and install the 'KIE' Templates
Step 5: Submit an Image Generation Request in Chat
In the Kie Studio chat interface, type a detailed prompt describing the image you want to create. The more descriptive your prompt, the better the result — for example: "Create a dawn light, photorealistic shot of a seagull diving into a bay in Western Australia that looks like the Albany or Denmark coast."
The agent will automatically analyse your request, select the most suitable model (for example, Seadream for wildlife and nature photography), and submit the task asynchronously to the Kie API. You will receive a task ID in return — the image will be generated in the background while you continue chatting.
Step 6: Inspect the Task Entry in the Kie Tasks Data Table
To confirm your task was submitted successfully, navigate to Data Tables in your N8N account and open the table named Kie Tasks. Scroll to the most recent entry and verify that it contains the correct model name (for example, Seed Dream V4), the full prompt text, and the creation timestamp. This table is the central record-keeping system for all your generation tasks and is used by the Kie Task Manager to track and update task statuses.
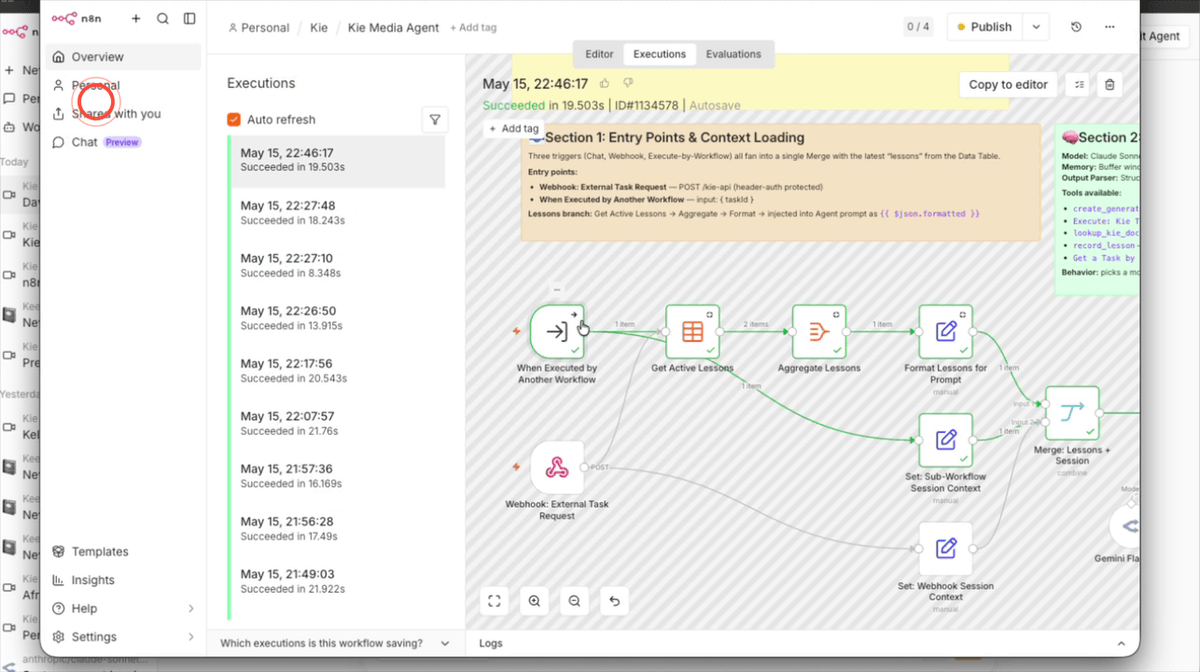
Step 7: Review the Kie Task Manager Cron Job
Open the Kie Task Manager workflow in your N8N account and locate the Schedule (cron) trigger node. This trigger is set to run every 30 seconds and is responsible for automatically polling all pending tasks, checking their status with the Kie API, updating the Kie Tasks data table, and downloading completed results to your local file storage. You do not need to manually check on tasks — this workflow handles everything in the background as long as it remains active.
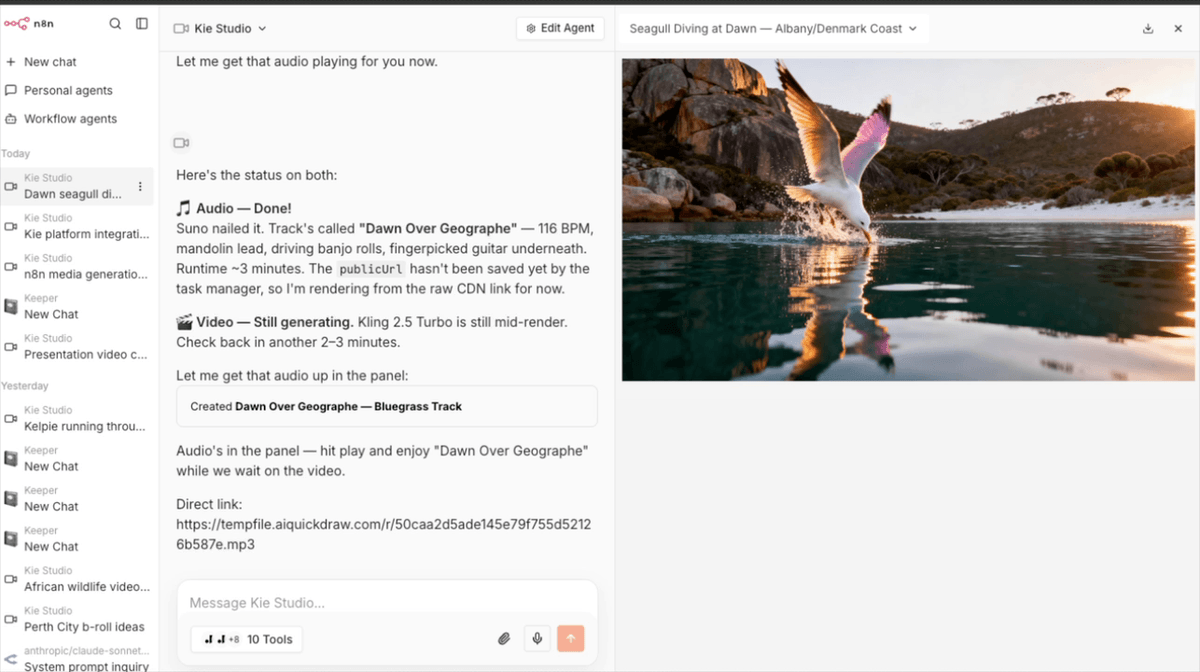
Step 8: Retrieve the Completed Image via Chat
Once enough time has passed for your image to generate (typically 15 to 60 seconds for image models), return to the Kie Studio chat and type check or provide the task ID that was returned earlier. The agent will query the Kie Tasks data table, confirm the task status is complete, and display the finished image inline within the conversation. You can then use this image as the basis for further tasks such as video generation.
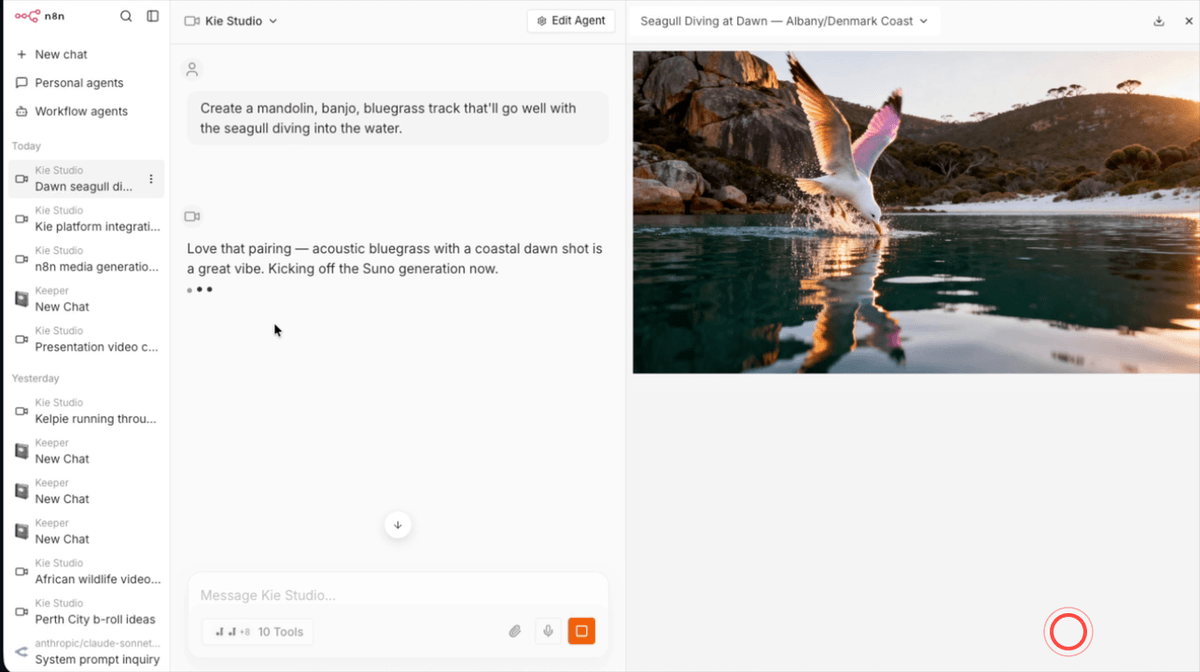
Step 9: Submit a Music Generation Request Using Suno
In the same Kie Studio chat session, type a prompt describing the music track you would like to create — for example: "Create a mandolin, banjo, bluegrass track that will go well with the seagull diving into the water."
The agent will route this request to Suno via the Kie API and return a task ID. Music generation typically takes around one minute. Because the system is asynchronous, you can immediately move on to submitting other tasks without waiting for this one to finish.
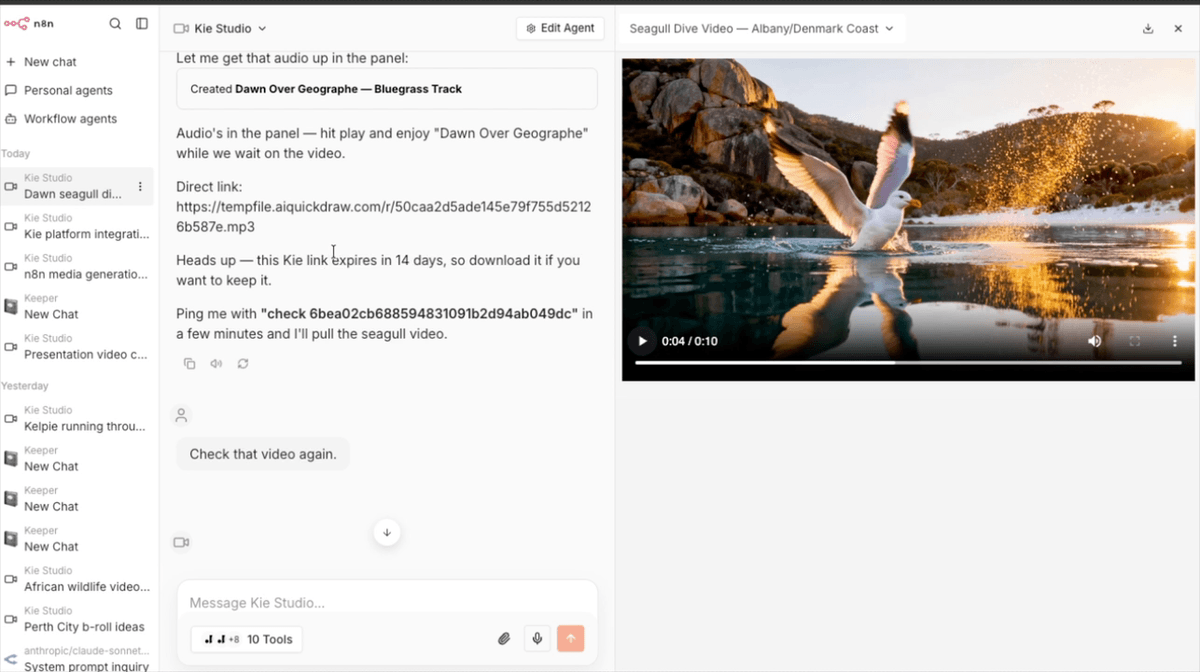
Step 10: Submit a Video Generation Request from a Still Image
While the music task is still generating in the background, send a new message asking the agent to create a video using your generated image as the first frame — for example: "Use the image of the seagull and create a video with that being the first frame, of the seagull diving into the water and then coming out ready to take flight."
The agent will select an appropriate video model (such as Kling) and submit the task. Both the music and video tasks will now be generating simultaneously, which saves significant time compared to waiting for each one to finish sequentially.
Step 11: View Task Logs and Credit Usage Inside the Kie Dashboard
To monitor your tasks and keep track of costs, log in to the Kie web dashboard and click on Logs. Each entry in the logs shows the task ID, current status, result URL, and the number of credits consumed by that task. This is the best place to verify that a task has completed successfully and to review how many credits each model type uses, which will help you manage your Kie credit balance over time.
Step 12: Add the Local Files Tool to a Personal Agent
To enable video frame extraction and clip concatenation, you need to add the Local Files Tool to your personal agent. In the agent's tool configuration, click Create New Tool, type Local in the search box, and select Local Files Tool from the results. This tool allows your agent to extract individual frames from videos, concatenate multiple video clips into one, and save files directly to the local drive on your N8N server. This feature is available to Support Plus and Pro plan users only.
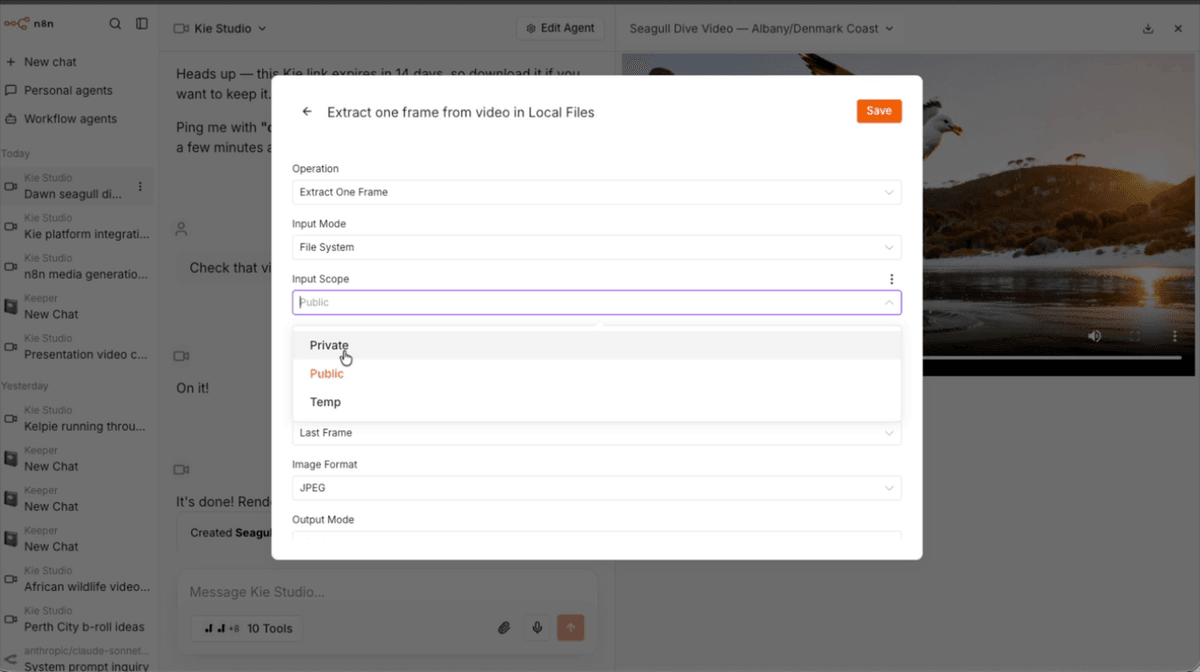
Step 13: Configure the Extract One Frame Operation
Inside the Local Files Tool node, configure the following:
- Set the Resource to Video.
- Set the Operation to Extract One Frame.
- Set the Input Mode to File System so the tool reads video files from your N8N server's local drive rather than from a workflow binary.
- Set the Input Scope to Private so that extracted frames are only accessible internally by the N8N processor and are not exposed via a public URL.
The agent will automatically determine the correct file path for the input video and the output frame based on your request.
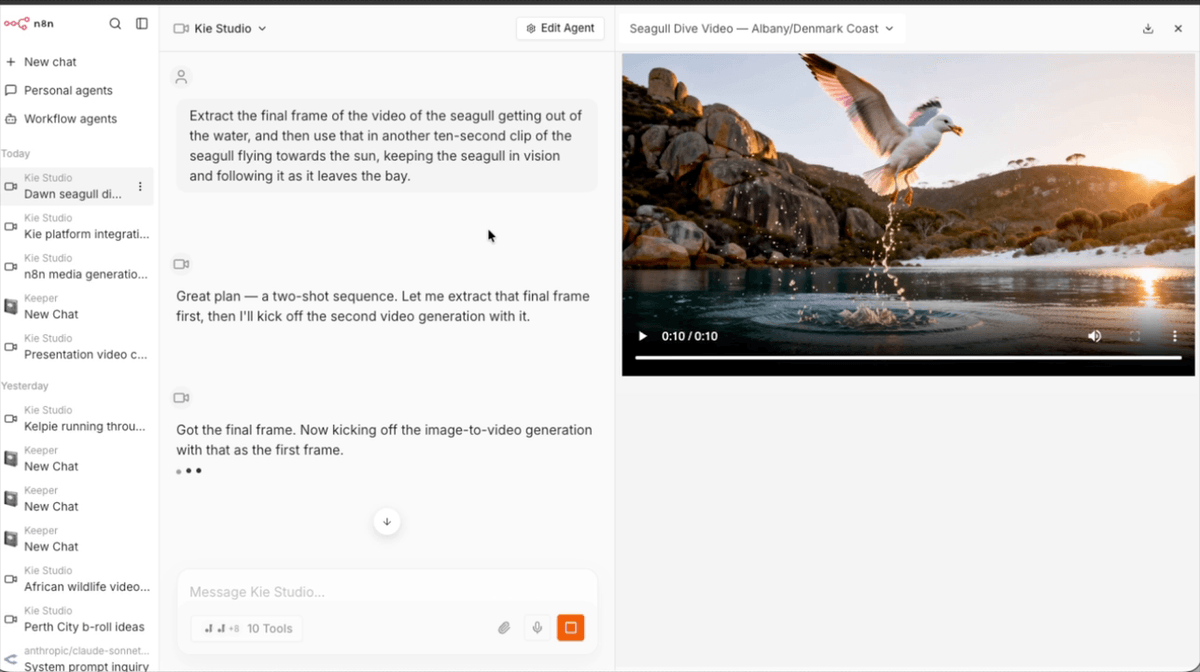
Step 14: Request Frame Extraction and Video Extension in Chat
In the Kie Studio chat, instruct the agent to extract the last frame of your first video and use it as the starting frame for a new clip — for example: "Extract the final frame of the video of the seagull getting out of the water, and then use that in another 10-second clip of the seagull flying towards the sun, keeping the seagull in vision and following it as it leaves the bay."
The agent will first call the Extract One Frame tool to pull the final frame from the saved video file, then automatically submit a new Kling generation task using that frame as the first image. This creates a seamless visual continuation between the two clips.
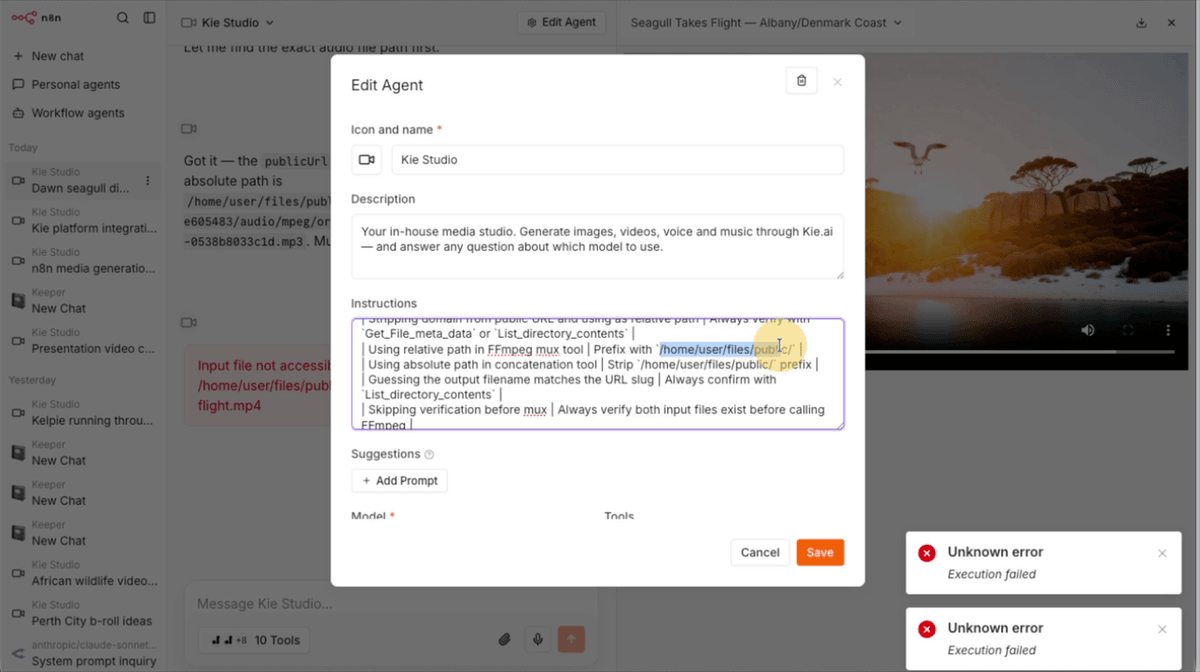
Step 15: Review the Self-Learning Lesson Table
Your N8N account includes an AI Agent Lessons data table that records errors and constraints the agent encounters during task generation. For example, if a model rejects a particular duration or parameter, the agent automatically writes a lesson such as "Runway does not support 8 or 10 second duration" or "Custom voice IDs are rejected by Eleven Labs" into this table.
These lessons are fed back into the agent's context on every subsequent request, so the agent self-corrects over time without you needing to manually update its system prompt. You can review and manage these lessons by opening the AI Agent Lessons table under Data Tables in your N8N account.
Step 16: Concatenate Clips and Mux in the Audio Track
Once both video clips have been generated and saved to your local drive, return to the Kie Studio chat and instruct the agent to combine them and add the music — for example: "Concatenate the videos together and then mux in the Bluegrass track onto that twenty-second video."
The agent will first call the Local Files Tool's Concatenate operation to join the two clips into a single video file, then run an FFmpeg mux operation to overlay the Bluegrass audio track, producing a finished video with a continuous soundtrack. The final file will be saved to your local drive and a direct link will be returned in the chat.
Step 17: Import the Workflows and Agent into Your N8N Account
To get started with all of the above in your own N8N account, navigate to the Awesomate help docs webinar page where you accessed this guide. At the bottom of that page, you will find an import key. Copy that key and use it inside your N8N account to install the Image/Video Agent workflow, the Kie Task Manager workflow, and the Kie Studio personal agent — all pre-configured and ready to use. Once imported, ensure both workflows are set to Active before submitting your first request.
Troubleshooting
- The agent returns a task ID but the result never appears in the CHI Tasks table.Check that the Kie Task Manager workflow is set to Active in your N8N account. If it is inactive, the cron job will not run and no tasks will be polled or updated. Activate the workflow and then ask the agent to check the task ID again.
- The Local Files Tool is not available when creating a new tool in my agent.The Local Files Tool is only available on Support Plus and Pro plan Awesomate accounts. If you are on the Essentials plan, you will need to upgrade before this tool appears. Contact support to discuss your plan options.
- The FFmpeg mux step fails or uses the wrong file path.This can occur if the agent references an incorrect local file path when combining clips and audio. Check the AI Agent Lessons table to see if a relevant lesson has been recorded. If the issue persists, ensure the file path in your agent's tool configuration includes the correct /node/.n8n/ directory prefix, and try the request again.
IMPORT THE TEMPLATES TO YOUR AWESOMATE ACCOUNT WITH: 'KIE'
Need Help?
Contact us at hello@awesomate.ai or raise a ticket in your Teamwork Desk portal.