
This guide walks you through the fundamentals of building workflows in n8n, including how JSON data works, how to pass data between nodes, and how to build a practical example that reads and labels emails from Gmail. It is suitable for beginners who are new to n8n and automation workflows.
Prerequisites
- Access to an n8n instance (cloud or self-hosted)
- A Gmail account connected to n8n via OAuth credentials
- Basic familiarity with navigating the n8n dashboard
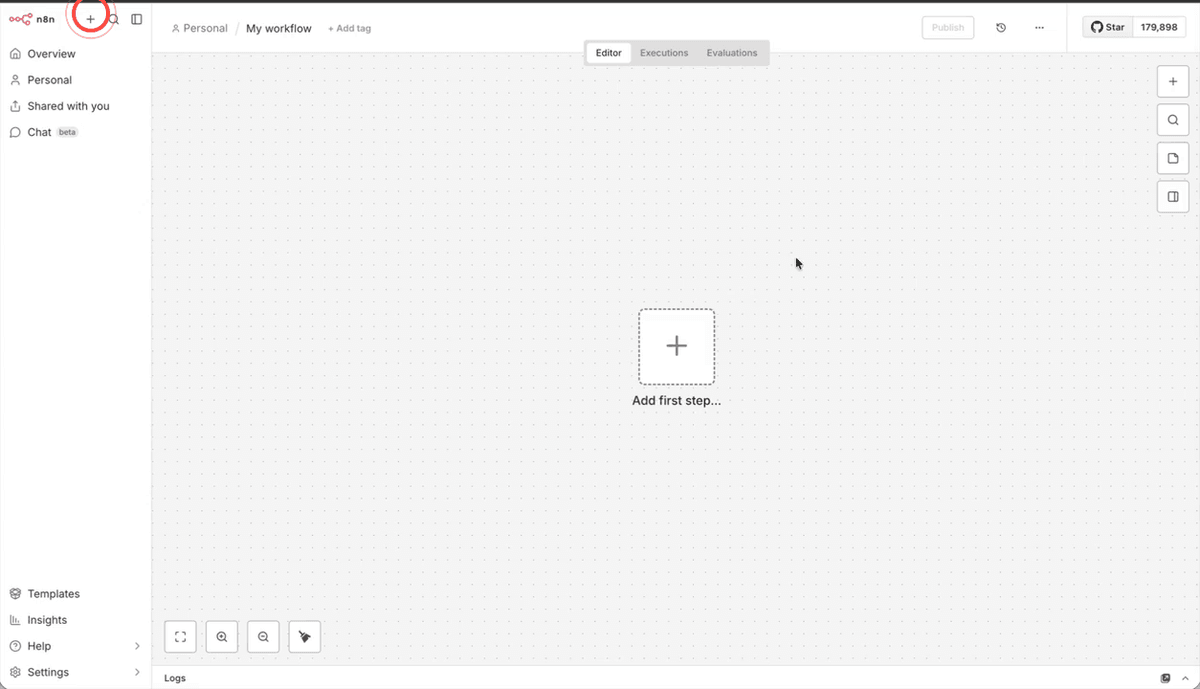
Step 1: Open a New Workflow
To begin, click the plus (+) button in the top navigation bar of your n8n dashboard. From the dropdown menu that appears, select Workflow. This will open a new, blank workflow in the editor canvas, ready for you to start building.
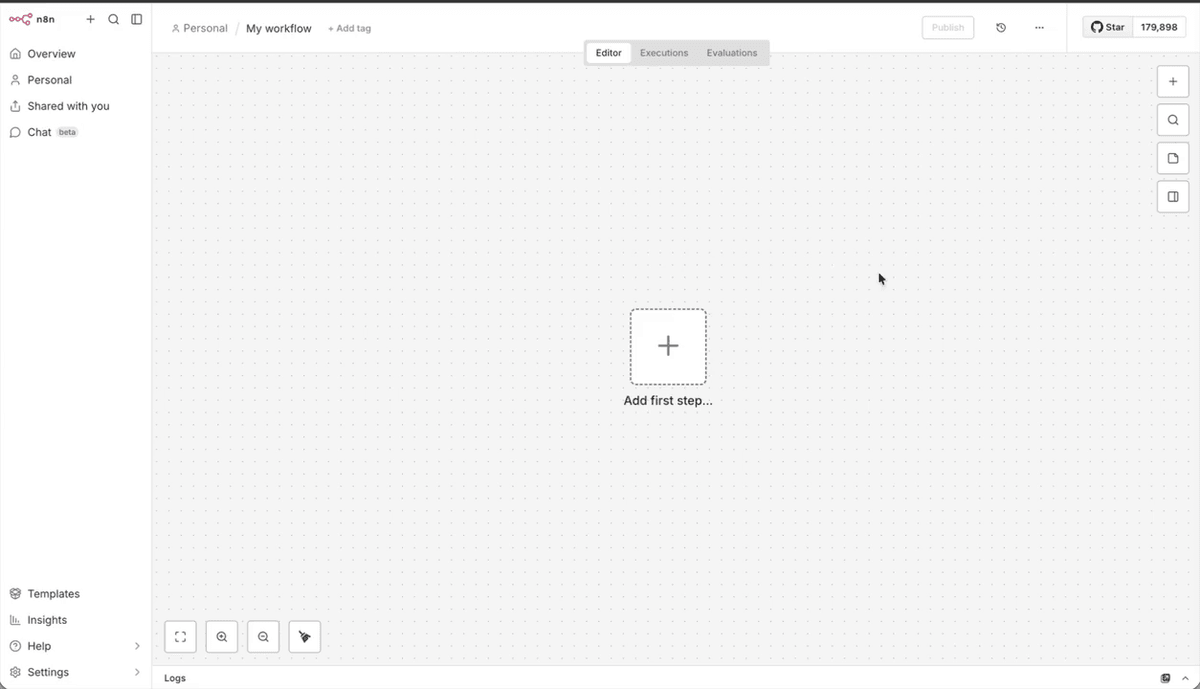
Step 2: Explore the Workflow Editor Canvas
The large central area that opens is your editor canvas — this is where you will build and connect all of your workflow nodes. You can zoom in and out using the zoom buttons in the toolbar, or by holding Cmd (Mac) or Ctrl (Windows) and scrolling with your mouse. To pan around the canvas, hold Cmd/Ctrl and drag. Take a moment to familiarise yourself with this area before proceeding.
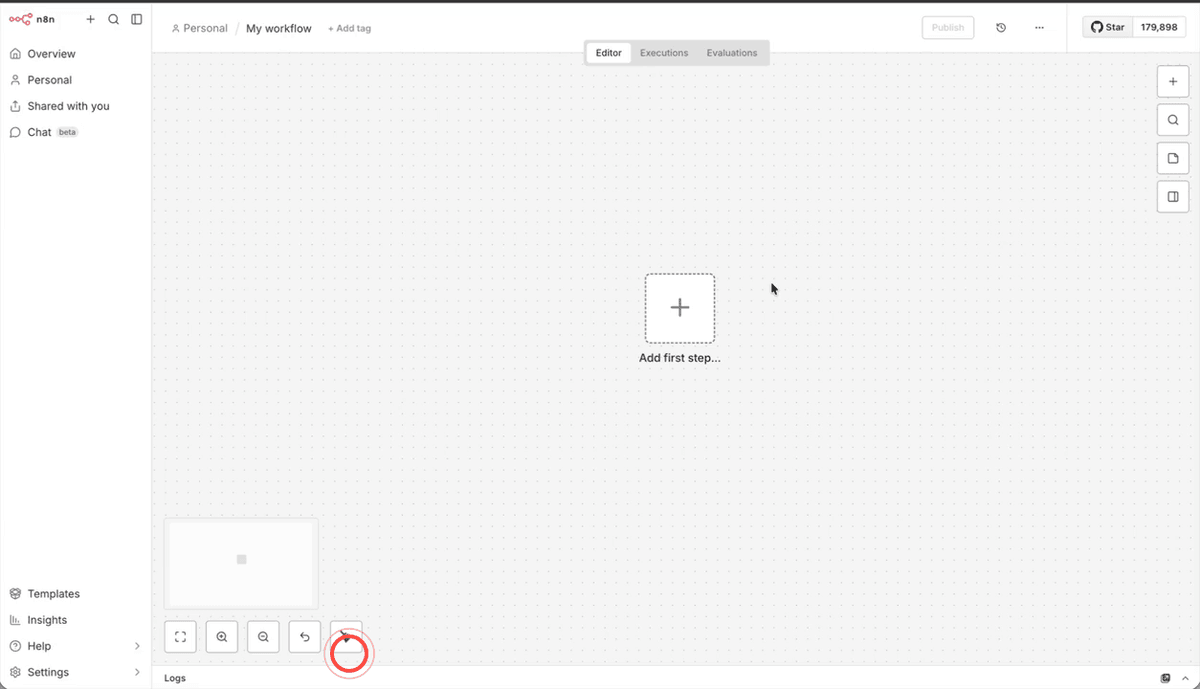
Step 3: Use the Tidy Up Button to Organise Your Canvas
As your workflow grows, nodes can become scattered across the canvas. Click the tidy up button in the toolbar to automatically arrange all nodes into a neat, readable layout. Alternatively, you can use the keyboard shortcut Shift + Option + T on a Mac to achieve the same result.
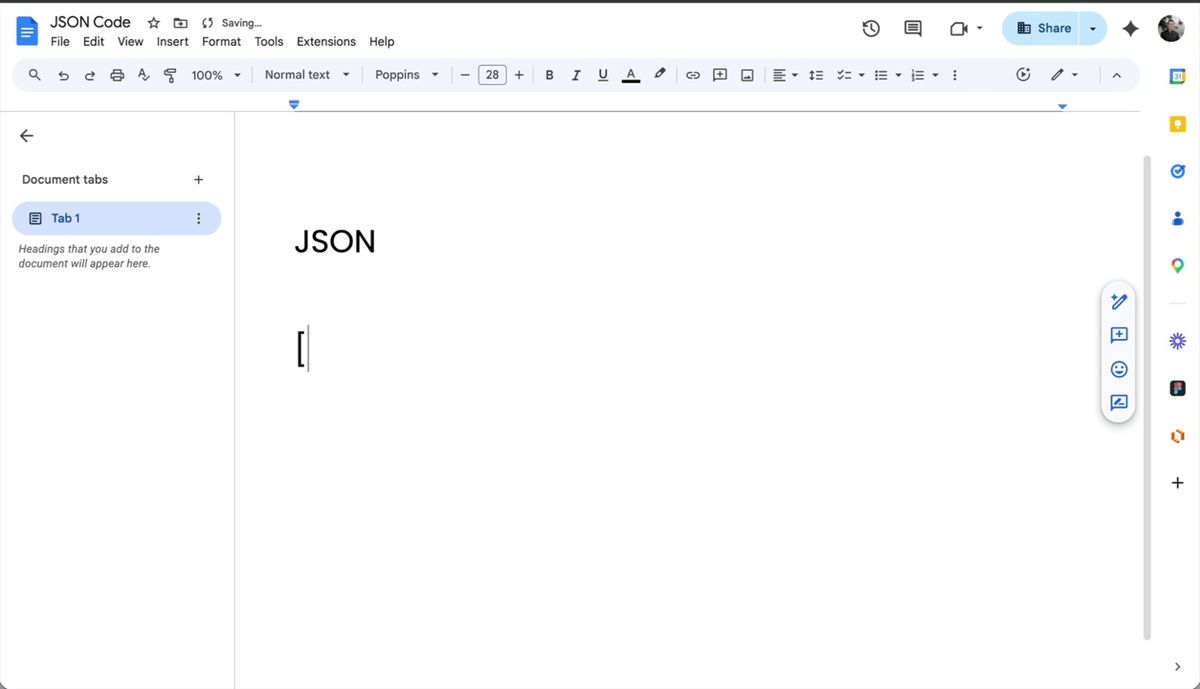
Step 4: Understand JSON Structure Using JSONLint
All data in n8n is passed between nodes as JSON — a structured format for organising information. To get comfortable with JSON, visit jsonlint.com, where you can write and validate JSON for free. JSON always begins and ends with square brackets [ ], and the data inside is wrapped in curly brackets { }. Each piece of data is written as a name and a value separated by a colon — for example, "name": "Andrew". Click the Validate button on JSONLint to confirm your JSON is correctly formatted; a green result means it is valid.
Step 5: Understand How JSON Passes Between Nodes
Every node in n8n receives JSON data from the node before it and passes JSON data to the node after it. To see this in action, click the Execute Workflow trigger node to run it. Even though the output contains no data yet, you will see that it produces one item — this is the basic unit of data that flows through your workflow. Understanding this concept is essential before building more complex workflows.

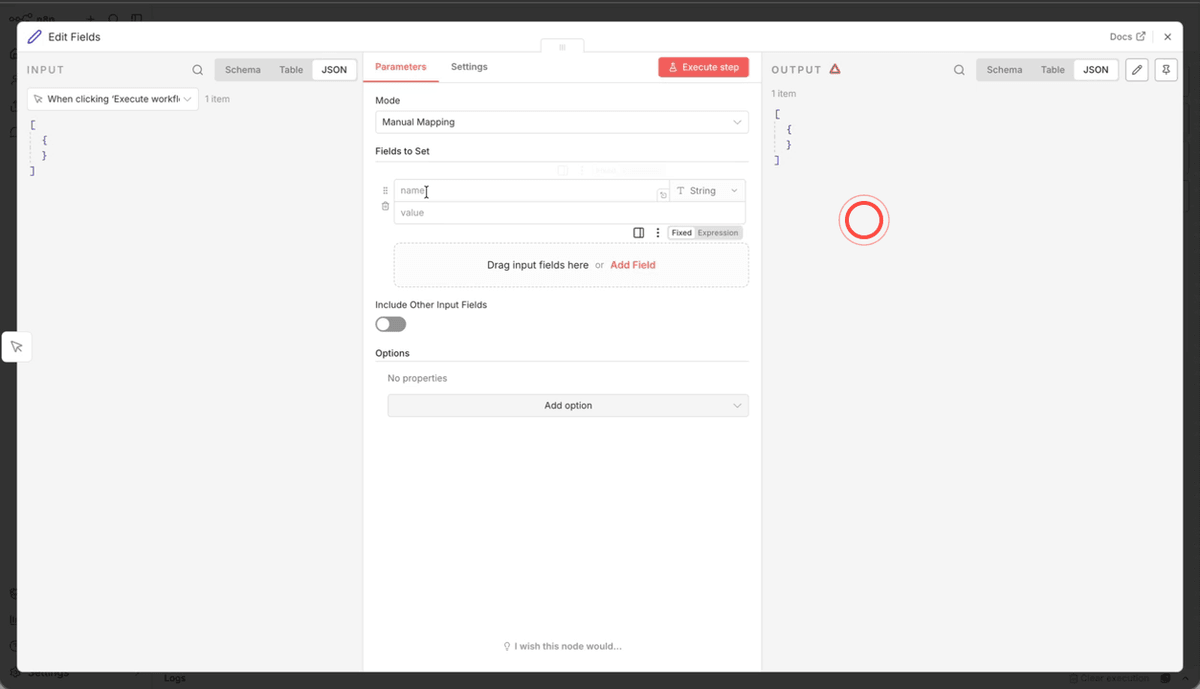
Step 6: Add a Set Node and Define Hardcoded Values
Add a Set node to your canvas and connect it to the trigger node. Inside the Set node, create three fields with the following names and values: name (e.g. Andrew), phone (e.g. a phone number), and email (e.g. an email address). These are called hardcoded values because they are fixed rather than pulled from another source. Click Execute Step to run the node and confirm that the output shows one item containing all three variables.
Step 7: Reference Upstream Data Using Double Curly Brackets
Rather than typing values manually, you can pull data from a previous node using expressions. In a new Set node's value field, type {{ (two opening curly brackets) to open the expression editor. A pop-up window will appear showing available data sources. Select $json from the list to reference the JSON data coming from the previous node. This is the starting point for mapping any field from an earlier step in your workflow.
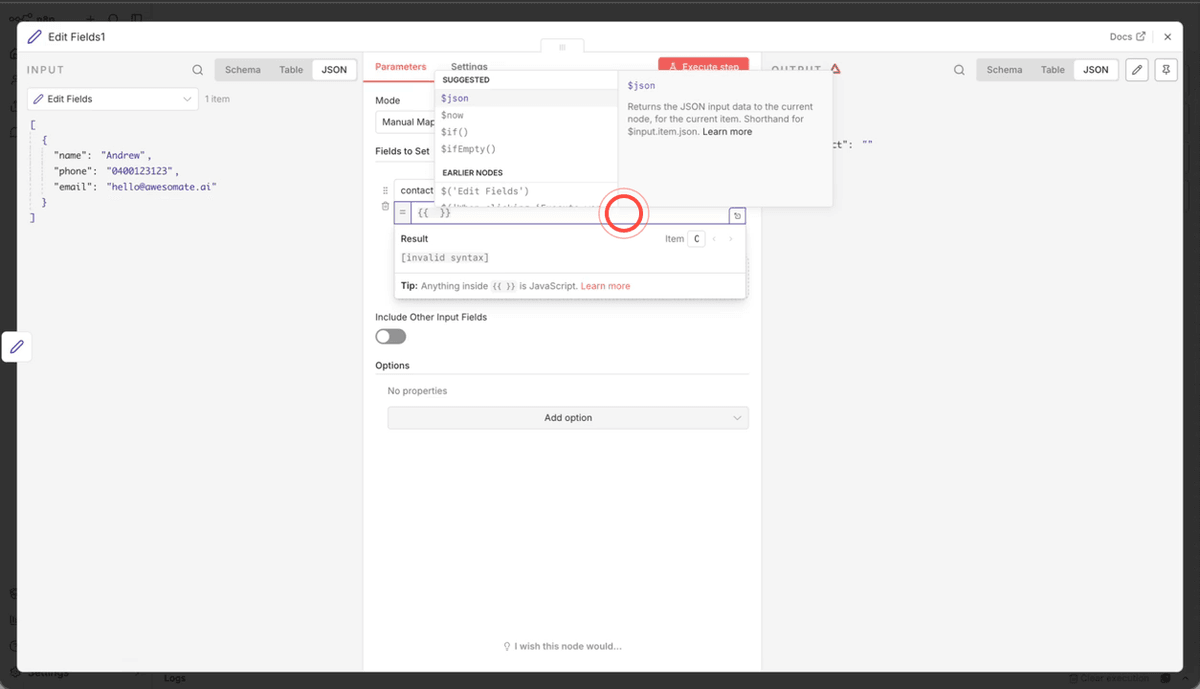
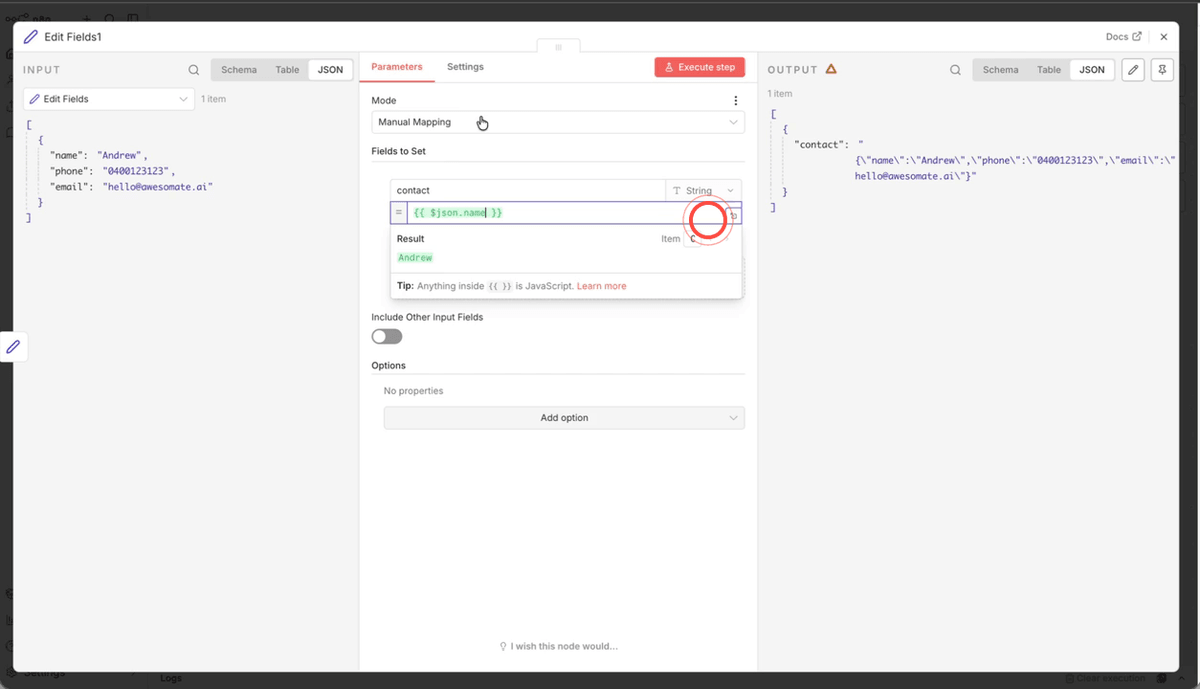
Step 8: Map a Specific Field Using Dot Notation
Once you have typed $json in the expression editor, type a full stop (.) immediately after it. An autocomplete list will appear showing all the fields available from the previous node — for example, email, name, and phone. Select the field you need, such as name. A preview will appear below the field showing the resolved value (e.g. Andrew), confirming that the reference is working correctly before you execute the step.
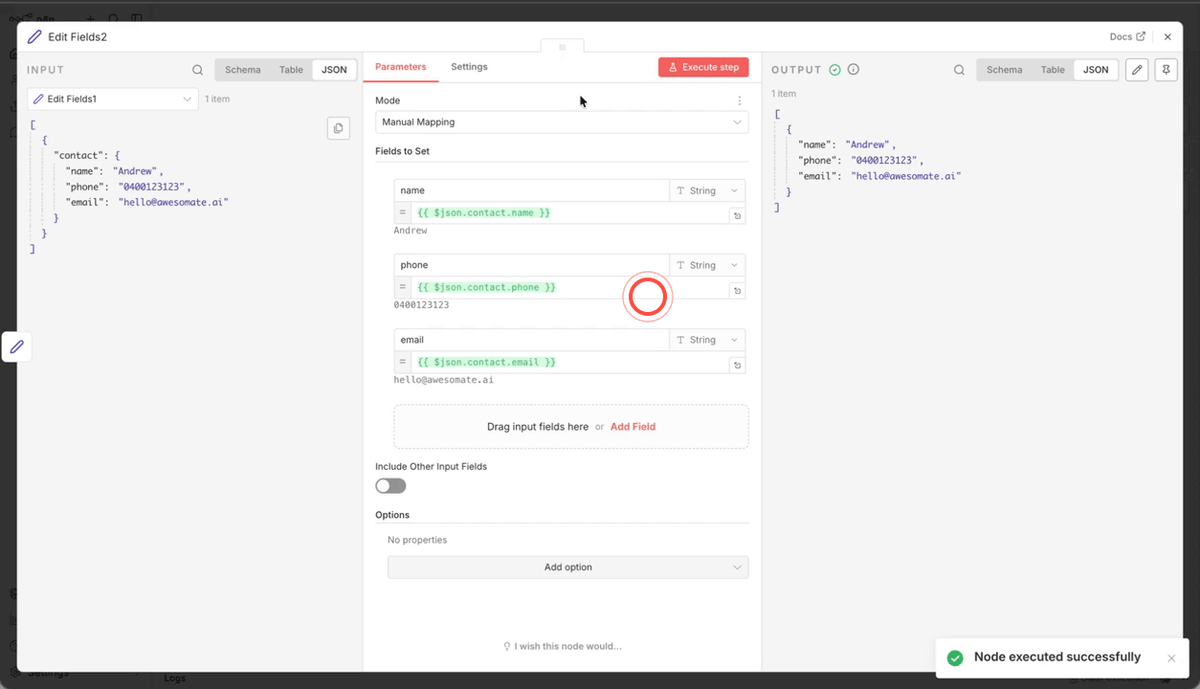
Step 9: Pass an Entire Object as a Value
Instead of mapping individual fields, you can pass the entire JSON object from a previous node as a single nested field. In a Set node, create a field (e.g. called contact), then change the value type from String to Object using the type selector. In the value field, type $json to reference the whole upstream object. Click Execute Step and you will see the output contains your field name with all the nested variables grouped inside it.
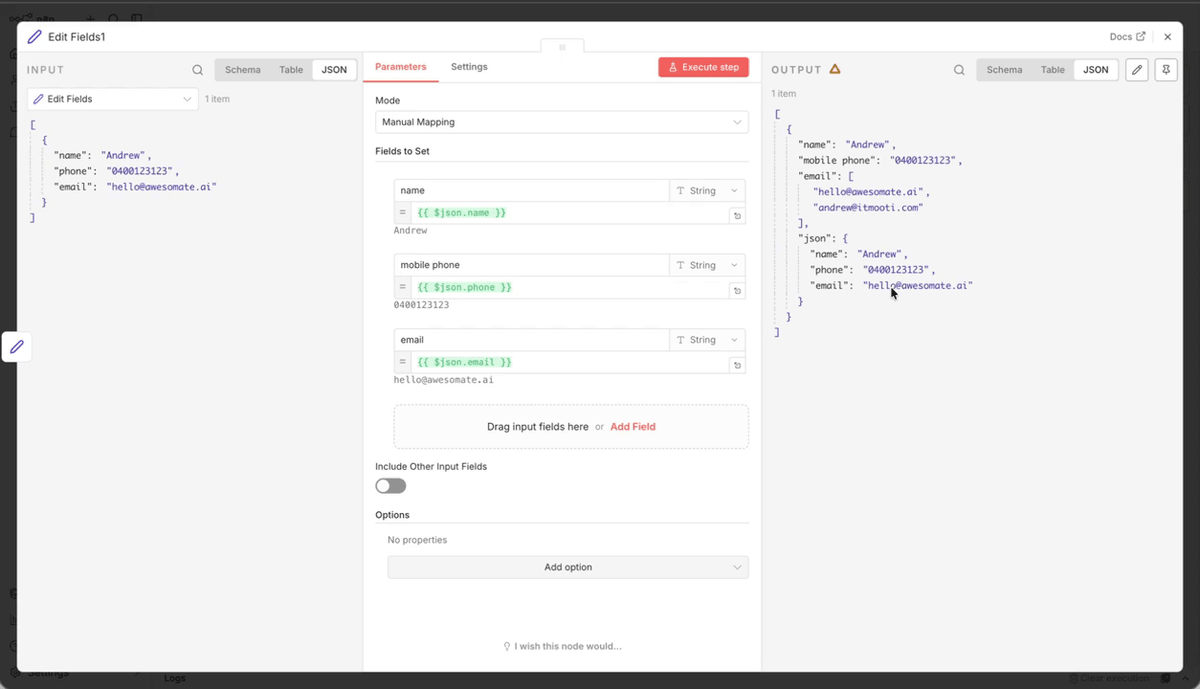
Step 10: Access Nested Object Fields Using Chained Dot Notation
When data is stored inside a nested object (such as the contact object created in the previous step), you can drill down into it using chained dot notation. For example, to retrieve the name field from within the contact object, you would write $json.contact.name. You can also drag fields directly from the left-hand input panel into the value field, and n8n will automatically populate the correct dot-notation reference for you.
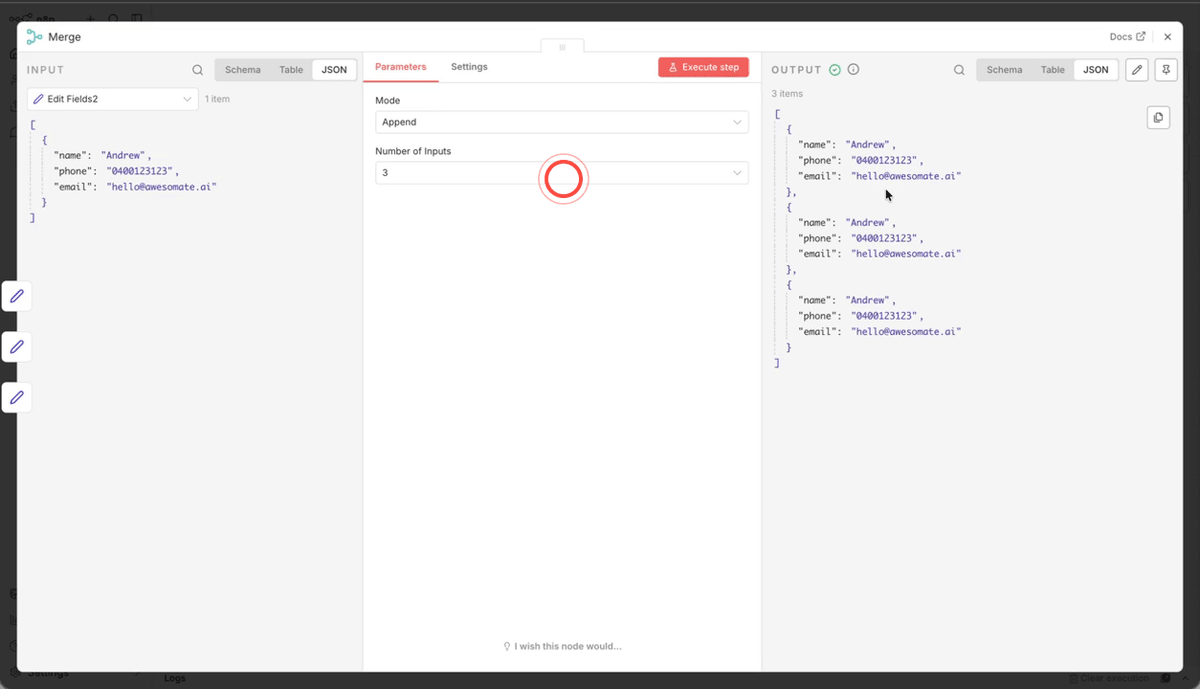
Step 11: Merge Multiple Inputs to Create Multiple Items
So far, your workflow has been passing a single item from node to node. To work with multiple items, add a Merge node to your canvas and set the mode to Append. Connect the same upstream node to the Merge node multiple times — for example, three times. When you execute the Merge node, the output will contain three separate items, each carrying the same data. This simulates what it would look like if you had three different records (such as three different contacts) flowing through your workflow.
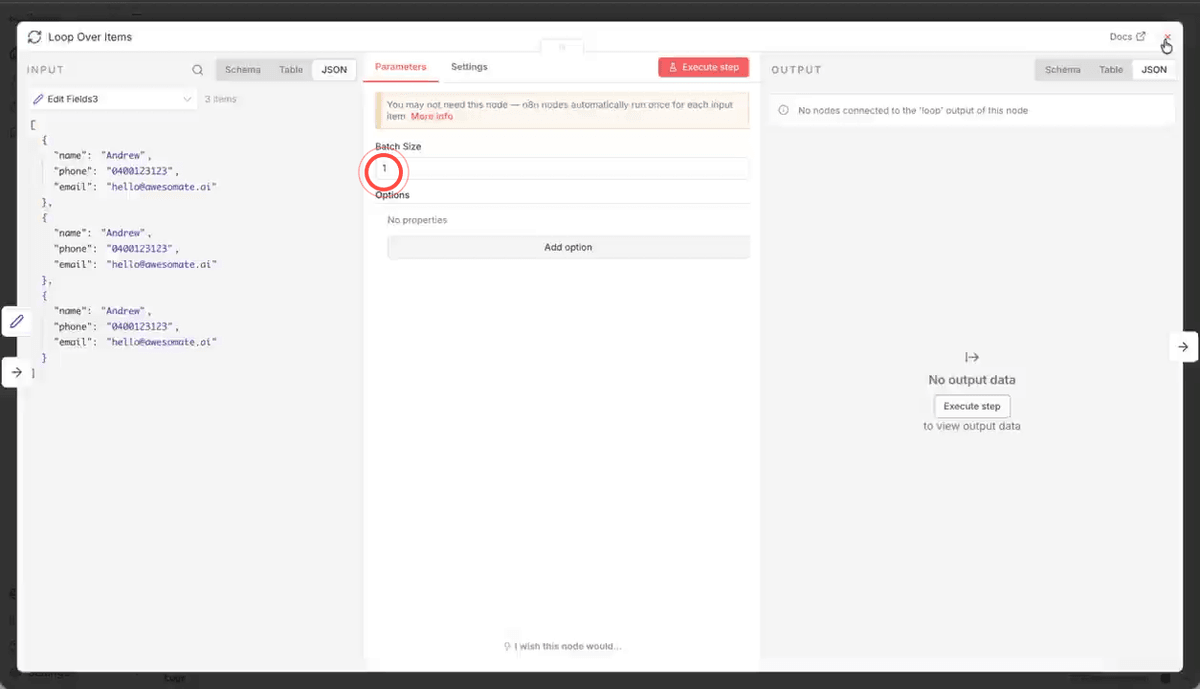
Step 12: Use a Loop Node to Batch Process Items One at a Time
When you have multiple items and need to process each one individually — for example, making a separate API call for each record — add a Loop node after your Merge node. Set the Batch Size to 1 so that only one item passes through at a time. This is particularly useful when performing actions that must be completed for each item separately, such as sending an email or updating a record. You can add a Wait node inside the loop to introduce a delay between each iteration if needed.
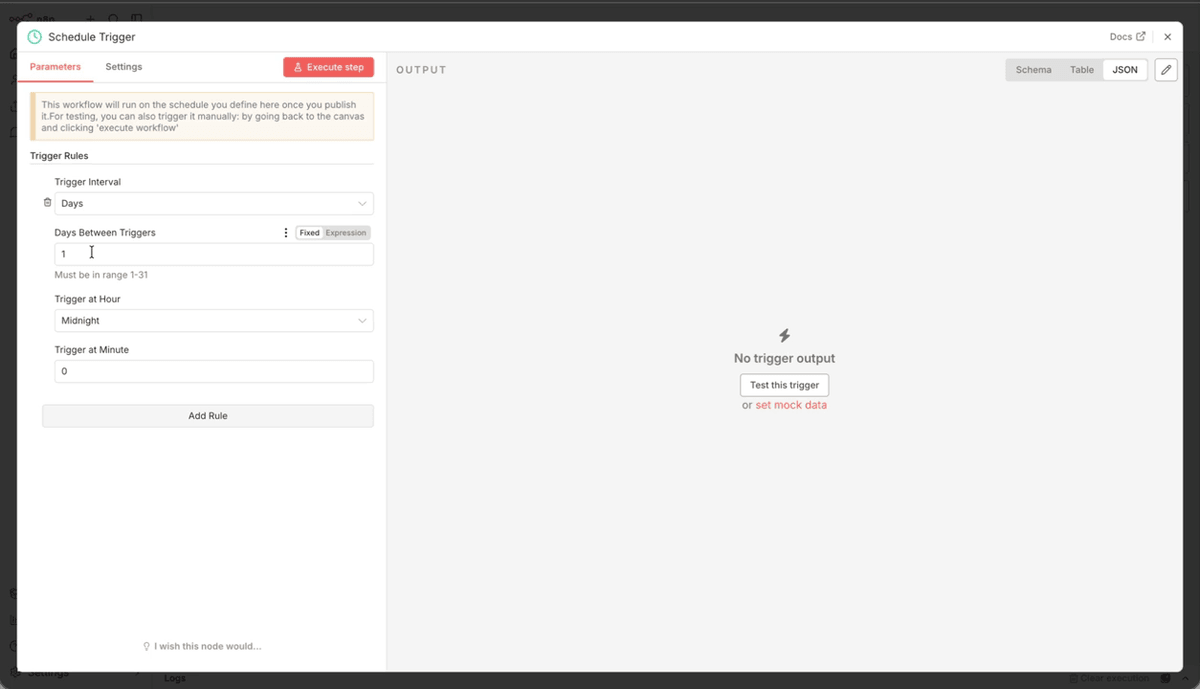
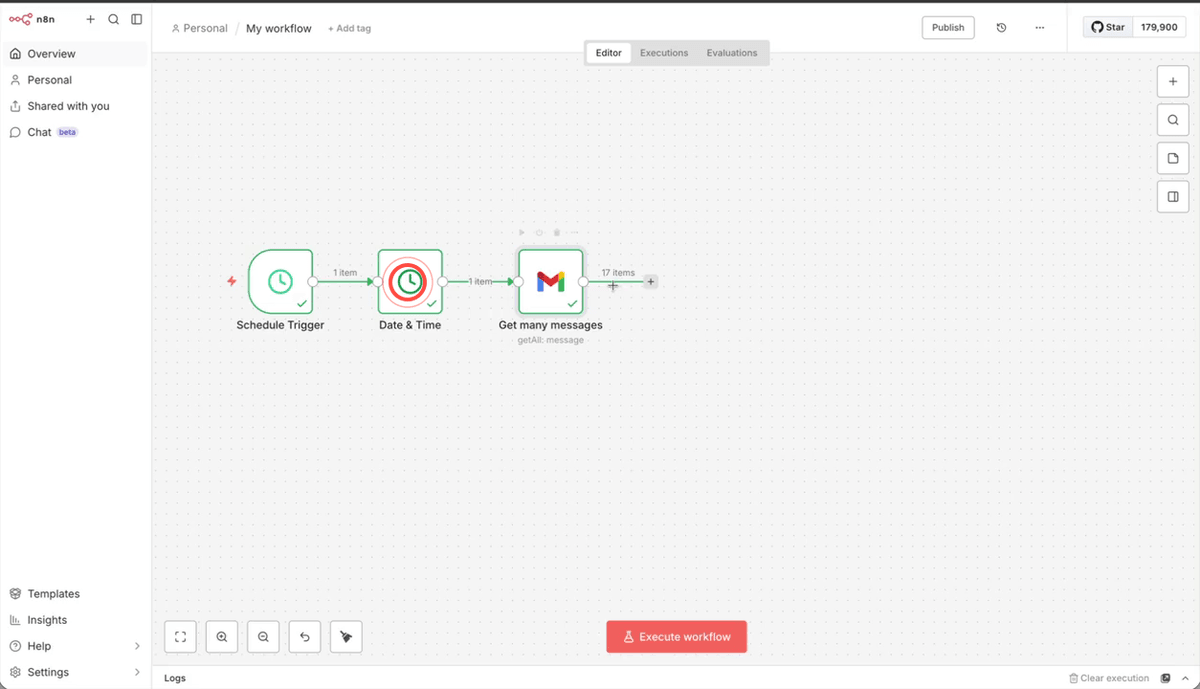
Step 13: Add a Schedule Trigger Node
Now that you understand the basics of data flow, you can build a practical workflow. Start by adding a Schedule trigger node and configuring it to run every five minutes. Click Execute Node to run it manually and verify that the output includes a timestamp showing the current date and time. Make sure to update the time zone setting to match your location (for example, Sydney) so that all timestamps are accurate for your region.
Step 14: Configure a Gmail Node to Fetch Unread Messages
Add a Gmail node and connect it to your Schedule trigger. Set the operation to Get Many Messages and set the limit to 50. Under the filter options, set the read status filter to Unread, and add a Received After filter. For the Received After value, drag in the timestamp from your Schedule node — this will be adjusted in the next step to ensure only emails from the last five minutes are retrieved.
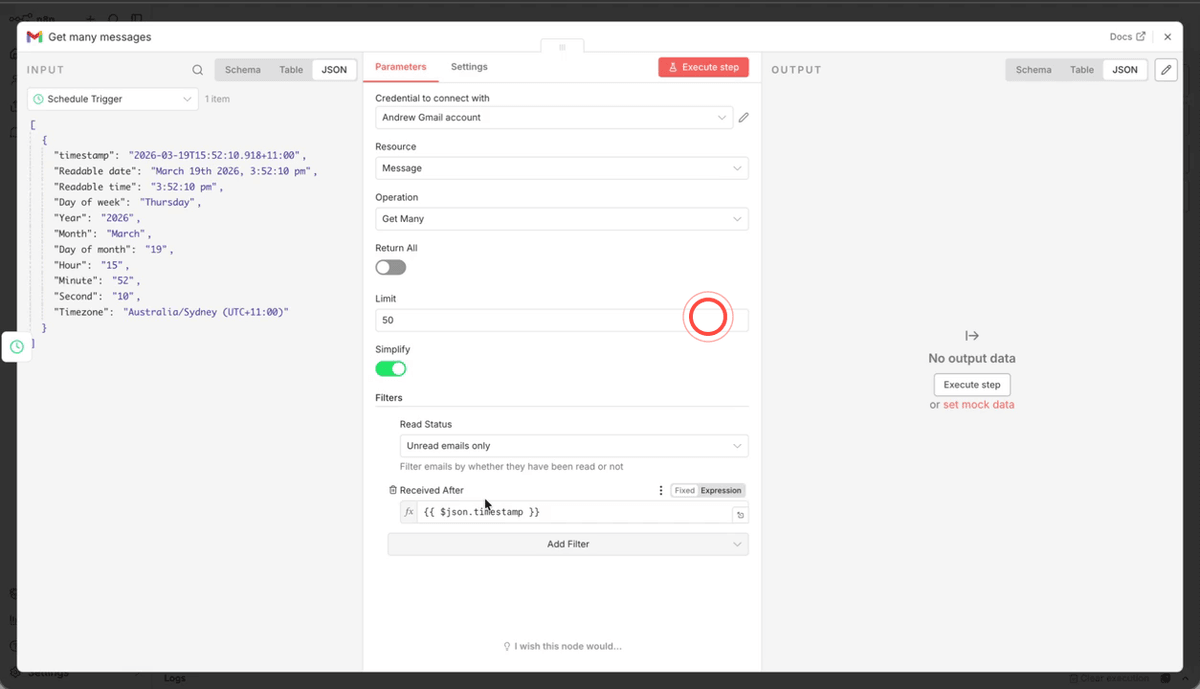
Step 15: Subtract Five Minutes from the Timestamp Using a Date & Time Node
To ensure Gmail only retrieves emails received in the last five minutes, you need to subtract five minutes from the Schedule node's timestamp before passing it to Gmail. Insert a Date & Time node between the Schedule and Gmail nodes. Set the operation to Subtract from a Date, reference the Schedule node's timestamp as the date to subtract from, and subtract 5 minutes. Set the output format to Timestamp, then click Execute Step to confirm the output time is five minutes earlier than the trigger time. Connect this adjusted timestamp to the Received After field in your Gmail node.
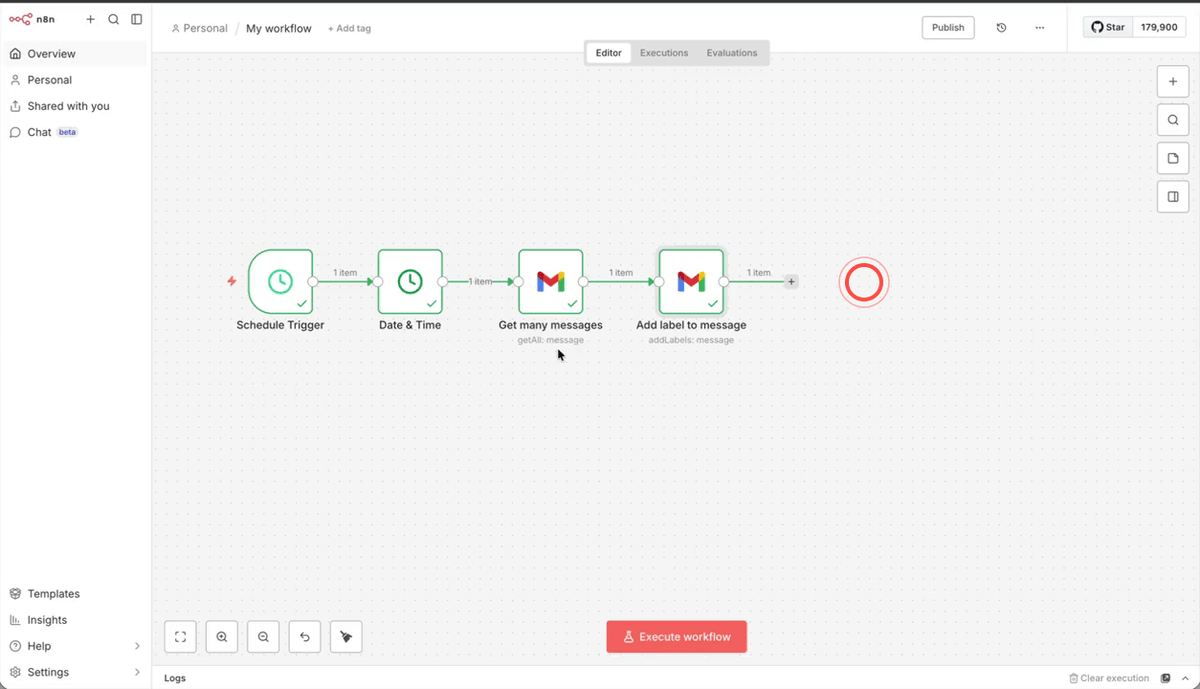
Step 16: Label Each Retrieved Email Using a Gmail Action Node
Add a second Gmail node after the first and set the operation to Add Label to Message. In the Message ID field, map the message ID from the previous Gmail node by dragging it in or using the expression editor. Then select a label to apply — for example, Yellow Star. Click Execute Workflow to run the entire workflow. Each unread email retrieved from the last five minutes will be automatically labelled, and you can verify this by checking the output of the final node, which will show the applied label on the right-hand side.
Troubleshooting
- Expression field turns red and returns a null value. This means the field reference you have typed does not match any available data from the previous node. Double-check the spelling of your field names and ensure the upstream node has been executed so its output data is available. Use the autocomplete list (by typing $json.) to select the correct field name rather than typing it manually.
- Gmail node returns no messages even though unread emails exist. This is most likely caused by an incorrect timestamp in the Received After filter. Confirm that your Date & Time node is correctly subtracting five minutes from the Schedule trigger's timestamp, and that the output format is set to Timestamp. Also check that your time zone is correctly configured in the Schedule node.
- Loop node is not processing items individually. Ensure the Batch Size in the Loop node is set to 1. If the batch size is set higher, multiple items will pass through at the same time rather than one at a time. Also confirm that the Merge node upstream is set to Append mode so that items are combined into a list rather than merged into a single object.
Need Help?
Contact us at support@awesomate.com.au or raise a ticket in your Teamwork Desk portal.